

I might be a bit late with the Christmas crafting, but this one is perfect for getting cosy in the wintertime. I will show you how to make DIY Christmas cups in this easy glass etching project.
Looking for an idea to spruce up your Christmas décor, or make something handmade to give away as gifts? Well, I have a fabulous project to share with you, and one that looks like you have put more work into completing.
These DIY Christmas cups are easy to make and they involve a few crafts to create them. One is digital cutting by making a vinyl stencil and the second is etching the glass. Don’t worry we don’t need any fancy glass etching tools, all we need is etching cream.
I am going to be using the Cameo Silhouette 4 to make my stencil, but you can use any other medium to make your stencil. Check out other digital cutting projects here too!
You can personalise these DIY Christmas cups into whatever you like. We are using ours on our Christmas hot chocolate station, because who doesn’t love a pun-tastic hot chocolate cup whilst watching those cheesy Christmas movies?!
I will also show you how to add a bit of colour to the etched glass designs as well. There are so many possibilities with this project, so if you would like to make your own…
Then let’s get crafting!

Check out more handmade Christmas projects too!
DIY Christmas Cups – What you need
To make these DIY Christmas cups (as stated previously) I am using the Silhouette Cameo 4, but you can use whichever cutting device you like. You can also use other mediums to make your stencil, so use whatever you have available. The important thing to remember is the stencil needs to fix directly to the glass so needs to be adhesive, but also removable.
So, to make the DIY Christmas cups you will need the following items: Please note some items in this list are affiliate links and are marked by an asterisk (*).
- Silhouette Cameo 4 and Software
- Assorted Vinyl*
- Glass items /Cups
- Armour Etch* – Etching Cream
- Rub ‘n’ Buff*
- Foam Paintbrush*
Step 1 – Create a Design
The first part of this project to make the DIY Christmas cups is to design the design you would like on them. To do this we need to create a vinyl stencil to stick to the glass, and we are going to use the Silhouette studio to do so.
The important part to remember for this is not to overcomplicate the design with intricate designs. If the design is too complex then there is a high chance the etching cream will spread over the lines causing one big mess onto the glass.
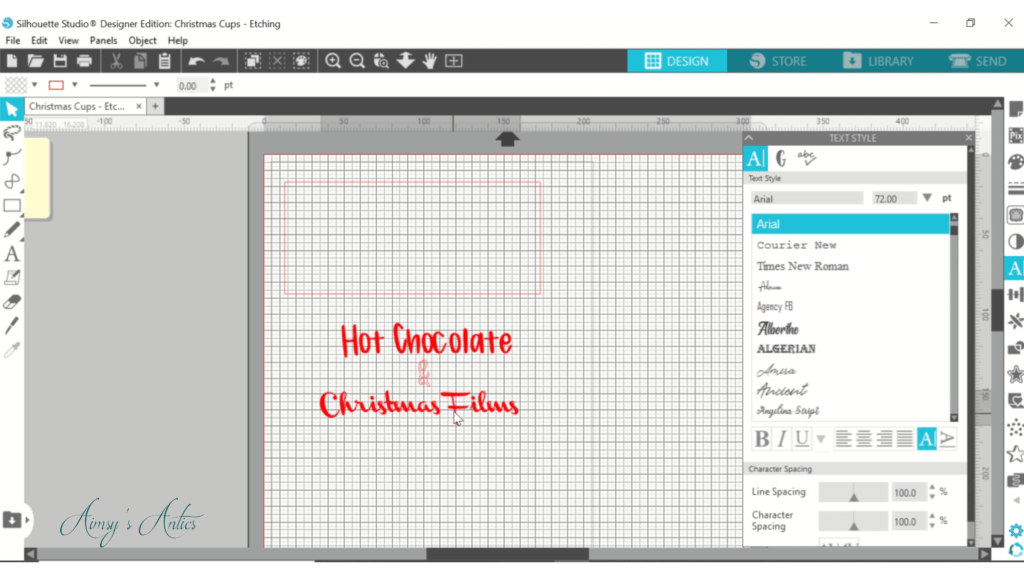
First, measure your cups so you know what size design you need to create. My glass cups are small Irish coffee cups and therefore needed to create a stencil within a rectangle of 7cm X 16cm. Draw this using the shape drawing tool.

Then it is time to create the design within this rectangle. As stated before, you want to make sure the design isn’t too intricate. This includes making sure you choose a font that is not too swirly, fancy or thin, so make your choices wisely.
Adding Text & Images
Use the text tool to write your puns or personalised statements for the cups. I had four designs, and as you can see, some are full of puns and quotes from films, with others being a bit cosier-themed.
- “Hot Chocolate & Christmas Films”
- “Treat Yo’Elf”
- “Tis the Season to be Cosy”
- “4 Main Food Groups: Candy, Candy Canes, Candy Corns, Syrup”
I used a variety of different fonts for my designs, most of which can be found on Font Bundles. All the fonts used in my designs were free too.
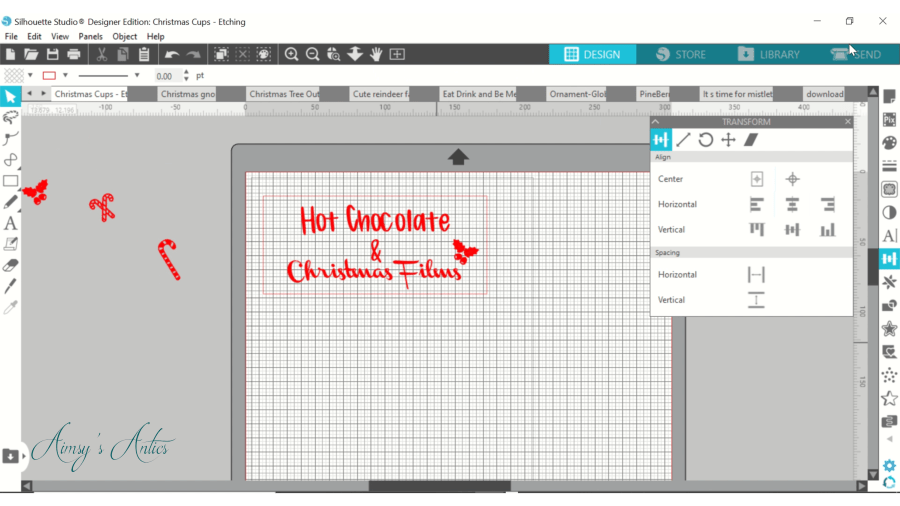
Select the text and rectangle together, and then head to the align tab to make sure the text is central within the rectangle.

If you feel your text needs a bit of something extra, then you can add simple images here too. For my “Hot Chocolate & Christmas Films” design I added a simple holly leaf to it. I also added snowflakes and an elf silhouette on other designs. These designs were either downloaded for free from Design Bundles or traced images from Google.
Once you are happy with the designs it is time to cut them out!
Step 2 – Cutting and Weeding Stencil
Before cutting out the design, make sure your settings are correct. Change the media type to the one you are using. In my case, I set it to ‘Glossy Vinyl’ and turn on the overcut feature to help cut out the design. I am also using the ‘autoblade’ for my cutting tool, but use whichever blade is appropriate for your machine or what you have available.
Load the vinyl onto the cutting mat, the vinyl side upwards and place it into the machine. Press ‘Send’ and watch your designs go in and out of the cutter and be created.

Remove the cutting mat and always remove the mat from the vinyl not the vinyl from the mat. This will stop the vinyl bubble under the pressure f being removed. To do this, flip the mat over and pull it away from the back of the vinyl.
Next, it is time to weed out the design. Unlike usual vinyl projects, we only need the outline of what we want to etch. This means we have to reverse weed. So, instead of removing all the vinyl to reveal the design, we need to remove the design, creating the vinyl.
Weed out the letter and images, leaving behind the middle of the letters. You should then have a vinyl stencil outline ready for etching onto your chosen glass cups.
Place over the top of the stencil your chosen transfer tape, smoothing this on so that it is secure. Leave this in place and do not remove it until the cups are ready.

Step 3 – Prep Glass and Etch
Before placing the vinyl stencil onto the glass cups, we need to prep the cups into perfect condition for etching. Thoroughly wash, clean of any debris and thoroughly dry the cups. I also like to spray on rubbing alcohol to make sure it is extra clean removing any grease and grime from the surface. This will help the vinyl adhere better to the glass surface and clear the way for smooth etching.
To make placing the vinyl easier onto the cups, roll up two tea towels so they are the same height and place them next to each other. Then place your glass cup, with the handle sitting in the middle of it. This should hold the glass cup into place whilst you apply the vinyl.
Then carefully remove the backing paper of the vinyl, ensuring all of the stencil adheres to the backing paper. Line up the design and place it onto the glass surface. As these cups are curved it can be a little difficult. It is best to start from the middle and smooth out to the sides. You want to make sure no air bubbles are lifting the design, especially where the letters and design edges are.
You can also cut the stencil vinyl in places to make the placement easier, just make sure you don’t cut into any of the design!
Once happy, remove the transfer tape carefully and ensure the vinyl fully adheres to the glass.

Add Etching Cream
Now for the etching to begin! Before starting, make sure that you have protective gloves. Etching cream is corrosive (it has to be to etch the glass) and therefore you want to make sure it doesn’t touch your skin.

Use a brush, I like to use a foam painter’s brush. To apply a layer of the etching cream over the stencil where you want the design to be etched. Make sure not to go over the stencil outline, as wherever the etching cream touches the glass it will etch.
Leave the cream onto the glass for the amount stated on the armour etch bottle. I found that five minutes was a better etching time for the designs, but experiment with your own. If you leave it on too long this can impact the design and the glass.

Step 4 – Remove Etching Cream and Vinyl
After the cream has been sat for the desired length of time it needs to be removed to showcase the etched design. Run water and rinse the cream from the glass until it is fully removed. At the same time, you also want to remove the vinyl stencil.
It is unlikely that you will be able to use the same vinyl again, so if you are wanting several of the same designs, make sure you have several of them cut out.

Once removed and rinsed, dry the glass and check out your handy work. Hopefully, your design will have transferred as you want it. I found that some of my designs have smudges, and it is highly likely that this was due to the etch cream getting under the stencil slightly. But, that is the beauty of handmade items, is it not? Not everything has to be perfect!
Now, you will find that the designs may not be as bright as professionally etched glass, but it is a much easier way of creating your own DIY Christmas cups and personalising them how you would like.

Adding Colour
Now, if you find the white etching a little plain and boring for DIY Christmas cups then there is a way of adding a bit of shine and colour to the etching. To do this we need something called Rub n Buff, which is a buff-in colour that you can use on furniture and other restorative projects.
Simply place a small amount of the rub n buff in your chosen colour onto a paper towel of old rage and begin rubbing this over the etched design. Keep rubbing and buffing and you will see the colour ‘stick’ to the etching. Add thin layers until you get the colour you like, removing any excess from the surrounding glass area.

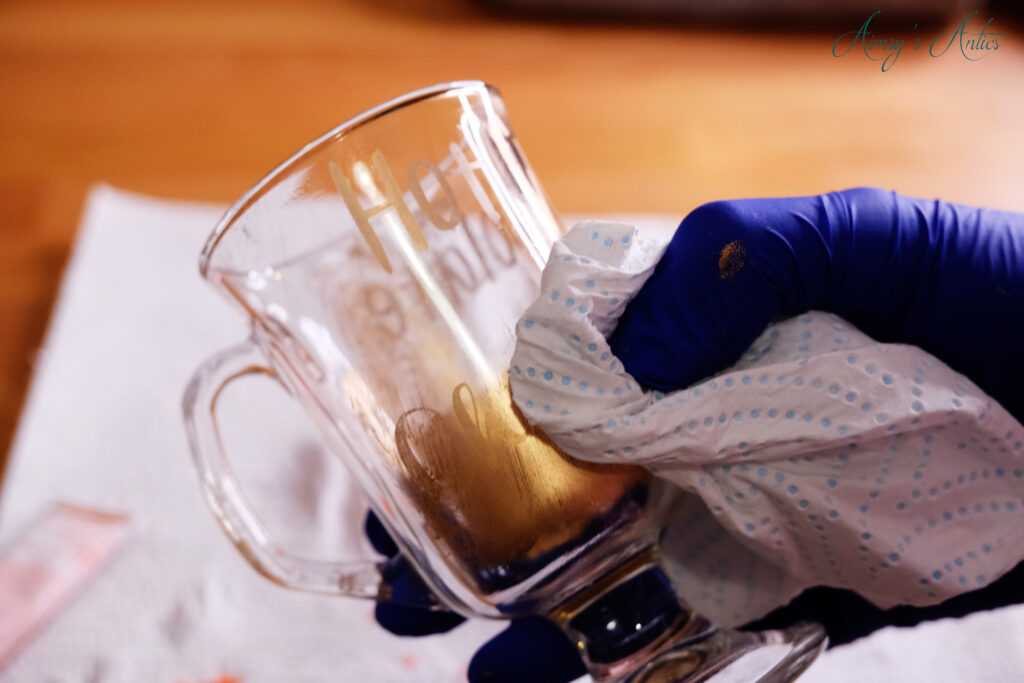

Now, I haven’t tested the rub n buff designs in a dishwasher so am unsure whether this would essentially wash off. Gentle handwash the cups to maintain the colour. If the colour does fade, you can always go back in with more rub n buff!
So there you have how to make your own DIY Christmas cups in an easy etching glass project. What do you think of this project? Will you be making your own or for gifts? Let me know in the comments below.


DIY Christmas Cups – Video
Here is the video version of this post. It may be easier to follow along with the tutorial through the video. Don’t forget to like the video if you have enjoyed it, and why not subscribe to my channel to keep up with all of my creative and crafty antics on YouTube?
DIY Christmas Cups – Share it!
If you have enjoyed this post, then why not share the love by sharing it or pinning it? You can also check out my Pinterest for more creative inspiration!


Have a creative project in mind, but don’t know how to plan it? I have you covered with a FREE creative project planner when you sign up for my email list. Grab yours now!

These all look amazing Aimsy! The finished product looks perfect for hosting or gift-giving! Thanks for sharing.
Aww, thank you! I would have liked the etching to be a bit more defined, as it disappears a bit when the cups have a drink in them, but they still look good.
Thank you for commenting 🙂
Aimsy xoxo
That looks amazing, I love that we can make it on our own. I can do whatever I want haha. Thank you for the tutorial.
Thank you, glad you liked it! Yeah, you can have whatever design you want!
Aimsy xoxo
These are such cute little cups and would make lovely stocking stuffer gifts! I especially love that one can customize and write whatever one fancies on each glass. 🙂
Aww thank you 🙂 Definitely make a great gift, you can customise it however you like!
Aimsy xoxo
These are such a great idea. These look great. Thank you for sharing this festive DIY. I hope you have a great Christmas and New Year.
Lauren x
Glad you like them. A fab festive DIY, but you could customise it for any time of the year too!
Hope you had a great Christmas and New Year (I know it is nearly Feb!)
Aimsy xoxo
These are all amazing and creative.
https://www.melodyjacob.com/2022/12/two-ways-to-style-femmeluxe-pink-mesh-ruched-corset-strappy-bodycon-mini-dress.html
Glad you liked it!
Aimsy xoxo
These cups are truly the cutest; I love the overall designs you chose and how one can utilize those extra cups we are prone to picking up at the thrift store!
Glad you like them! Definitely great for those extra cups!
Aimsy xoxo
What a great idea! They are so cute and perfect way to customise the cups for different events or occasions. Thank you for sharing how to do it.
Lauren x
Glad you like them. Definitely is a great way to customise for different events. It’s relatively easy when you get into it too!
Aimsy xoxo