

Looking for a scrap fabric busting project, that is easy and helps with organisation? Well, I have you covered in today’s post, as I am showing you how to make DIY fabric storage baskets. A perfect addition to your storage needs.
This week’s crafty bit of inspiration comes in the form of an easy sewing project that is perfect for beginners (or any level of sewing). As well as a great starter project, it is one to use up those smaller bits of fabric too! A fabric buster of sorts.
These DIY fabric baskets are perfect for adding a bit of organisation to your life and a bit of fanciness to your storage. You can add them to drawers, cupboards or shelves, the possibilities are endless. The best bit about it, is they have special closures to secure them together so they don’t move about too. These come in the form of snap closures, which are easy to pop in and make securing the baskets a doddle.
I have previously made drawstring bags and a boxed corner make-up bag if you are looking for more organisation fabric storage items. They are both great scrap fabric busting projects too!

DIY Fabric Baskets
Now, these baskets are easy enough to put together and I have used the tutorial from Hello Sewing to help put them together. You can make these in any size that you like, but I am making them in the small size from Hello Sewing. All you need to do is measure where you wish the fabric baskets to sit and make up in the sizes accordingly. Hello sewing has a fab measurement table to help you decide which size to make!
To make the baskets, you will ideally need a sewing machine. However, these could be stitched by hand if desired, it will just take a whole lot longer. Sewing on the machine will also make the seams stronger and more durable, especially if compared with my hand sewing!
So, if you would like to see the process of making DIY fabric baskets for your organisational needs, then let’s get crafting!

DIY Fabric Baskets – What You Need:
To make the DIY fabric baskets you will need the following items. Some items on this list are affiliate links and are marked with an asterisk (*).
- Fabric of choice – Outer and lining
- Medium weight iron on interfacing – If fabric is fine a heavy weight interfacing may be needed.
- Matching thread
- Sewing Machine
- Iron
- Snap closures /snap buttons and press tool*
- Erasable fabric marker* or tailor’s chalk
- Scissors or rotary cutter*
- Ruler/Tape measure
- Pins or Sewing Clips*
Step 1 – Cut and Prepare Fabric
To make the DIY fabric baskets, you are going to need several pieces of fabric measuring 27.5cm X 24cm. You will need two in the outer fabric, two in the lining fabric and four in the iron-on interfacing.
As I said previously these measurements are from Hello Sewing, so head over there if you want to see larger sizes.

After you have your fabric pieces, you then want to attach the interfacing to the wrong sides of both lining pieces and both outer pieces. The interfacing is there to add stability to the baskets and to help them stand upright.
The final step before sewing is to cut the bottom corners from each piece of prepared fabric. Use a ruler and fabric marker to mark out 6cm X 6cm boxes on each corner. It can be easier to create a template so that all corners will be matching. However, you can just mark each one by hand, as I did. The only downside, you may have slightly mismatching pieces once finished. You also have to be mindful if you have directional fabric, making sure the pattern will be facing the correct way when assembled. I am using velvet fabric for the outer material, and therefore have to be mindful of the way the pile falls, making sure both sides match up. The cut-out corners will be the bottom of the baskets.
Then use scissors or a rotary cutter to cut along the boxes to remove. The fabric is then ready for sewing.


Step 2- Attaching Outer and Lining Fabric
The first step is to attach each lining piece to each outer piece at the top edge. This will be the edge without the corners being cut off. Pin together the outer and lining pieces right sides together and head to the sewing machine. Sew a 1cm seam along the top edge, remembering to backstitch at the start and end of the seam. This will attach the lining and outer piece.

Repeat with the other lining and outer pieces to create two attached pieces. Press the seams open to set in the stitches and aid with the seams lying flat.

Step 3 – Attach Basket Together
The next step is to line up the newly sewn pieces together. Align the outer pieces right sides touching and the lining pieces right sides touching. Pin together on the top and bottom edges, as well as the sides. The parts where the corners are cut out will remain unpinned.
Then sew a 1cm seam allowance along the top and bottom, followed by the two side seams. On one side of the lining part of the side seam, leave a gap of approx. 4cms so the baskets can be turned right sides out. Backstitch at the start and end of each seam, as well as both sides of the gap. This will add stability to the seam and the edges of the gap when turning the right sides out.

Step 4 – Create Box Corners
After sewing the two pieces together it is time to create the box corners to help the DIY fabric baskets stand up and look like baskets.
Where the corners are cut out, pinch these to the bottom and side seams line up and meet. This will create a new seam going in the opposite direction to both. Pin in place and repeat for all corners (two in the outer and two in the lining). Then sew a seam, backstitching at the start and end, straight across where is pinned. You should then have the corners of the baskets complete.
I found that my lining fabric was fraying quite a bit, so I finished all of the raw edges (as much as possible) with a zig-zag or overlocking stitch to secure them.


Step 5 – Turn right side out
The next step is to turn the fabric basket right side out. Begin by pulling the lining through the gap left, followed by the outer (or whichever way the basket starts coming through the gap).
Shake and push out the corners in the outer fabric. Then close up the opening in the lining. You can do this by hand stitching with a blind/hidden stitch or by sewing up on the machine. I used the latter as I wasn’t bothered about the stitching showing on the lining.
Place the lining into the outer so you have one box shape. Push the lining corners into the outer corners. Then topstitch around the top edge of the basket to secure the lining down inside. This should be close to the top edge and not a 1cm seam allowance. Also, be mindful this will show on your outer fabric, so sew as neatly as possible.

Step 6 – Create Definition
Grab an iron and press the inside of the basket, using the iron to press out the edges of the box. You should then have a definition on the sides of the basket, creating the cube shape. You can press on the outside too for added definition. If you want the box edges/corners to be more defined, you can topstitch along each pressed edge.

Now you can leave the boxes as they are, as they are now complete. You can also create a folded edge where the lining shows by folding the edge down on itself.
However, I wanted to add something a little different to the baskets and add something that would attach them. That is where the next step comes in with adding snap closures. If you don’t want to add these then your DIY fabric baskets are complete. But if you want to see how to add snap closures then keep reading!
Step 7 – Add Snap Closures (Optional)
Snap closures are like buttons with corresponding sides that fit together to fasten. They are made up of caps, studs and sockets, secured in place with a press tool.

Now, I wanted to be able to connect the boxes in different combinations, and are therefore adding these to all four sides of the boxes. I will be adding two sockets and two studs on the four sides, alternating the positioning if that makes sense.
First, mark where the snap closures will be on all four sides of the basket. Measure 4cm down from the top edge. If you wish to have folded edges, then measure where you want the snap colours to sit, either underneath the fold or on the fold.

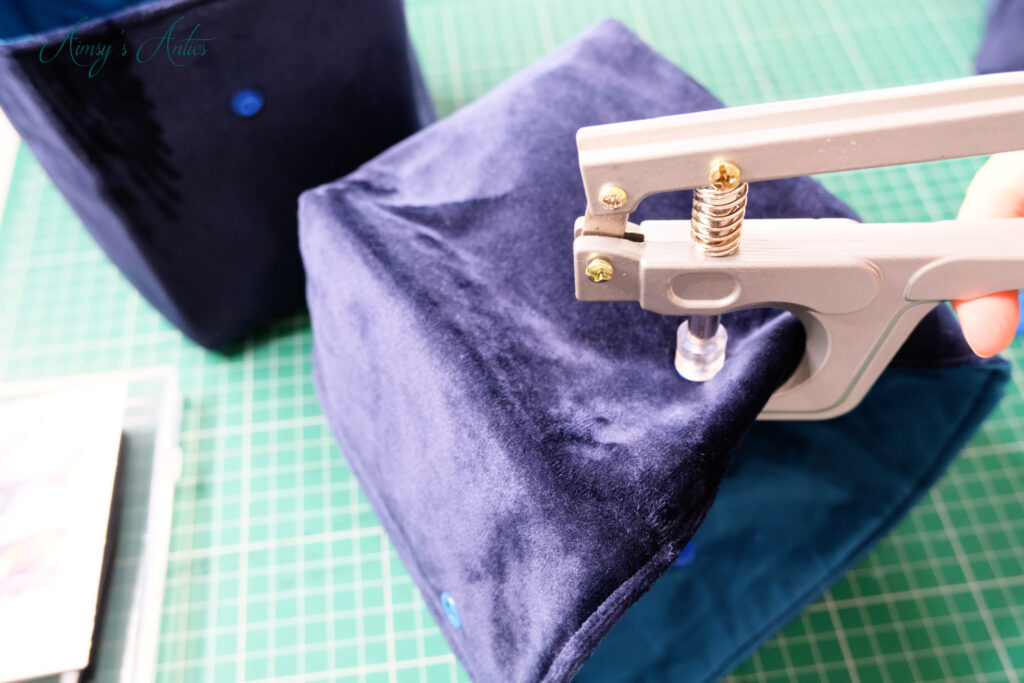
Use an awl or piercing tool to create a small hole where marked. Then place a cap through the hole from the inside of the basket. The flat edge will be against the lining with the point going through the hole. Then either add on a stud piece or a snap piece onto the cap point on the outer side.
Use the press tool securing both between the plates and the press. This should combine the two and create closure. Repeat until all four sides have a snap closure, remembering to alternate so opposite sides are matching; stud, socket, stud, socket.

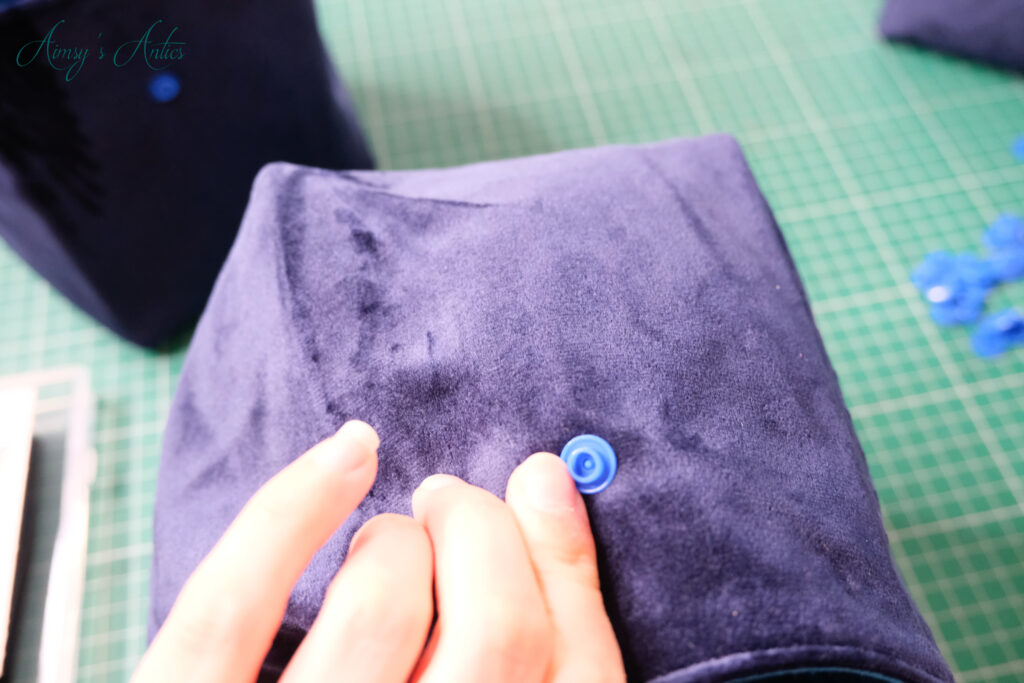
Add more snap closures in the same fashion to any other fabric baskets you have and then the DIY fabric baskets are complete and ready to use as storage.


What do you think of this project? Will you be making your own fabric storage? Would you like to see how to make cable tidies to help keep more items organised? Let me know in the comments below!
DIY Fabric Baskets – Video
Here is the video version of this post. Don’t forget to like the video if you have enjoyed it, and why not subscribe to my channel to keep up with all of my creative and crafty antics on YouTube.
DIY Fabric Baskets – Share it!
If you have enjoyed this post, then why not share the love by sharing it or pinning it? You can also check out my Pinterest for more creative inspiration!


Have a creative project in mind, but don’t know how to plan it? I have you covered with a FREE creative project planner when you sign up to my email list. Grab yours now!

What a really lovely idea — thanks for sharing this; I feel like I could actually give it a go!
Glad you like it. Quite a simple make and comes together really quickly. You will smash it!
Thanks for commenting 🙂
Aimsy xoxo
These baskets are so much better for the environment than the plastic storage boxes. This is a really helpful blog post showing how to make your own storage boxes! You are really great with diy projects. Thank you for sharing.
Lauren – bournemouthgirl
They are so much better, and you can make them out of scrap material that may otherwise end up in landfills too.
Glad you like them!
Thanks for reading and commenting 🙂
Aimsy xoxo