

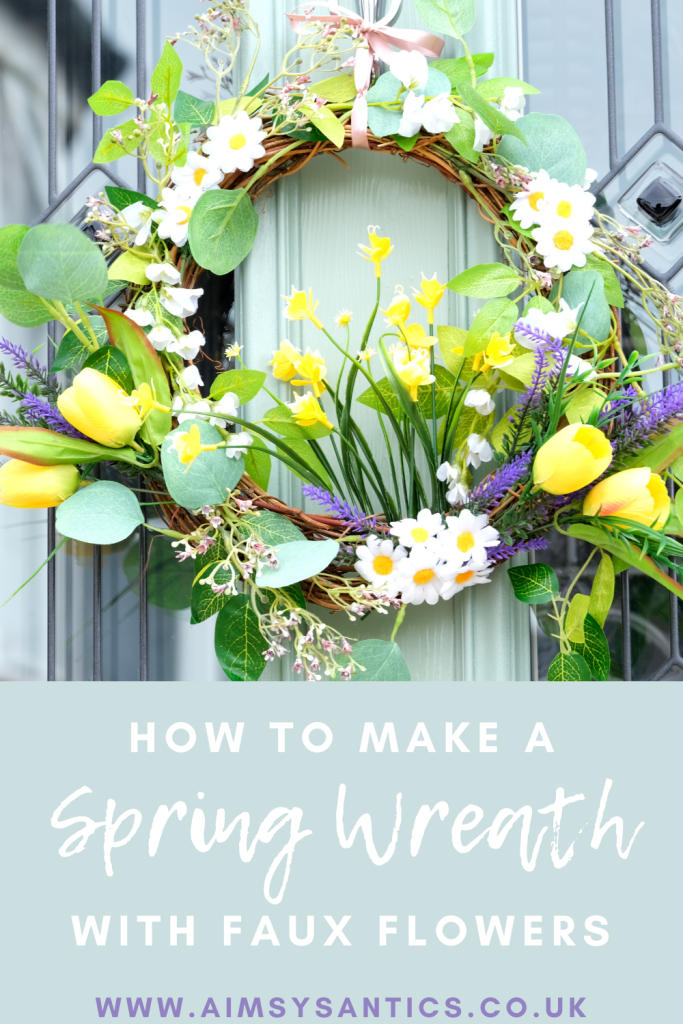
It is officially Spring here in the UK and this weekend the clocks have ‘sprung forward’. So, what better way to welcome in the new spring season by making your own DIY spring wreath with faux flowers? I will show you how in today’s post.
How nice does it feel for it to be Spring? The days are getting longer, or at least the sun is staying out longer and there is just a feeling of newness in the air. So, I thought it would be nice to celebrate Spring and bring it into a bit of home decor. The home decor of choice…a door wreath DIY style. That is where this DIY spring wreath comes in.
I have previously made Christmas wreaths, but why should all the door wreath fun be left just for Christmas? Similar to the Christmas wreaths, this DIY Spring wreath incorporates the season using faux flowers. This means that this wreath can be used both indoors and out, but also used for many more years to come. The only thing with using it outdoors is that it is best to bring it inside during bad weather to preserve the faux flowers.

DIY Spring Wreath
Originally, I was going to make an Easter wreath, with Easter just around the corner. However, I wanted the wreath to last a little longer into the season than just for Easter. Therefore the DIY spring wreath was born!
This wreath uses a mixture of faux flowers that scream spring, as well as some faux foliage to add a bit of depth to the wreath base.
So, without further ado, here is how to make your own DIY Spring wreath with faux flowers. As always, there is a video over on my Youtube channel, as well as embedded down below in this post. Click the button below to jump right into the video!

What you need:
To make this DIY Spring wreath you are going to need the following items. Please note that some items on this list are affiliate links, and will be marked with an asterisk(*). This means I may earn a small amount of commission, should you make a purchase through the link, at no extra cost to you.
- Grapevine wreath base – I bought the 30cm from Hobbycraft, but you could buy it on Amazon too.
- Faux Eucalyptus* – I cut this garland
- Faux Wisteria* – I cut this garland down too
- A variety of faux flowers – lavender*, tulips, daffodils*, wildflower* and daisies*
- Floristry wire
- Wire cutters
- Glue gun
- Decorative ribbon*

Step 1 – Faux Foliage
The first thing to do is to create a wreath base for the flowers. As this wreath is representing Spring, you want some of the bare grapevine branches showing, but with a bit of greenery sprouting. That is where the faux foliage comes in. I have two types of foliage on my wreath, eucalyptus and wisteria. This gives a nice balance to the foliage as there are a few shades of green. The wisteria also has a few hanging petals to give the wreath that blossom look.
A full garland will look too much on the wreath base and hide that grapevine. Therefore wire cutters come in very handy with trimming down the garlands. Use the wire cutters to cut off a small amount of the eucalyptus and wisteria. You want there to be stems as well as a few leaves. The fewer stems with leaves, the more you can play about with the placement.


Once the garlands have been stripped/cut down, use the floristry wire to attach them to the grapevine base. I found having a stem that creates a ‘V’ shape is best to place the wire onto. Create a figure of 8 around this ‘V’ shape of the stem, bringing the wire up and around so that the foliage pieces are secure under the wire. Then thread the remaining part of the wire through the grapevine wreath and back up around the stem. Repeat this a few times until the foliage feels secure. Cut off any excess wire, or tuck it into the wreath base.
Keep going until all your chosen foliage is added to the base.

Step 2 – Add on Faux Flowers
Now the fun part of the wreath starts…adding on the faux flowers! You can use whichever faux flowers that you like. I chose to use Spring flowers with a mixture of spring to summer flowers of wildflower, tulips, lavender and daisies.
The first flower to add is the wildflower. Trim this with the wire cutters again, as the spray has quite a long stem. I believe I used 3-4 pieces of the wildflower around the wreath. Play about with the position of this, before using the floristry wire to attach to the wreath base.

Then it is time to add more of a focal point to the wreath with the flowers. I decided to add the tulips and lavender together to form a corsage type feature on two sides of the wreath. Start by using the wire cutters again to cut down two tulip flowers and a few sprigs of the lavender. Bunch them together and secure them together with the floristry wire. Create two of these corsages. Usually, it is good to group items in odd numbers, so play about with the number of tulips and lavender you prefer. Then, use the floristry wire to secure the bunches on the bottom of the wreath base on either side.

Next, use some more lavender to fill the middle of the bottom of the wreath between the two tulip bunches. Place these inside the branches of the base, if possible. Use a glue gun to secure them fully in place. The floristry wire is difficult to secure the lavender with, as there isn’t much space or places to secure them. The hot glue works wonders though!

Step 3 – Add more Faux Flowers
We are not finished with the faux flowers. For more spring-ness, I thought what better flowers than daffodils. So, again, grab your wire cutters and trim down the daffodils. The ones I have, allow you to move the leaves up and down, which changes the height of the daffodils. Thread these through the wreath base slightly behind the added lavender on the bottom of the wreath. These should thread through the branches well, but add some hot glue just to keep them in place. I, unfortunately, didn’t take photographs of this part, but you can see them being added in the video version!
To hide some of the hot glue on the front, use some daisy petal heads. I grouped mine into five along the bottom. Odd numbers grouped again! Secure these into place with hot glue. Place the glue on the back of the flower (small stem) and push these into the wreath base. To keep some continuity with the wreath and add a bit of decoration on the top half of the wreath, add some more daisies. again group this in odd numbers, I went for groups of 3 and place them in whichever arrangement you like on either side of the top of the wreath.

Step 4 – Add Ribbon
The final thing to do is add on some ribbon to hang the wreath. We hang our wreaths from the door knocker and therefore need the ability to tie and untie the ribbon. You can also create a loop and secure it in place with the hot glue, however, I am going to tie mine on.
With your chosen ribbon, wrap this around the top of the wreath and double knot it when you have the length of ribbon you like. Make sure this is tight as this is the only thing holding the ribbon in place. Again, you could place a drop of hot glue on the back of the wreath and ribbon to hold it in place.

Then it is time to tie the wreath upon your chosen door, whether this is inside or outside. The DIY Spring wreath is then ready to be admired. Be warned, you may have others ask you to make them one as the wreath is so pretty!


What do you think of this DIY Spring wreath? Will you be making one to welcome in the Spring season? Let me know in the comments below!
Check out more DIY Decor too, including an Autumn Wreath, DIY Fabric Plant Pot and Embroidery Wall Art!
DIY Spring Wreath – Video
Here is the video version of this post, over on my Youtube Channel. Don’t forget to like the video over there if you have enjoyed it and subscribe to my channel to keep up with all my creative goodness on the channel. Hope you enjoy this, as much as I have making it!
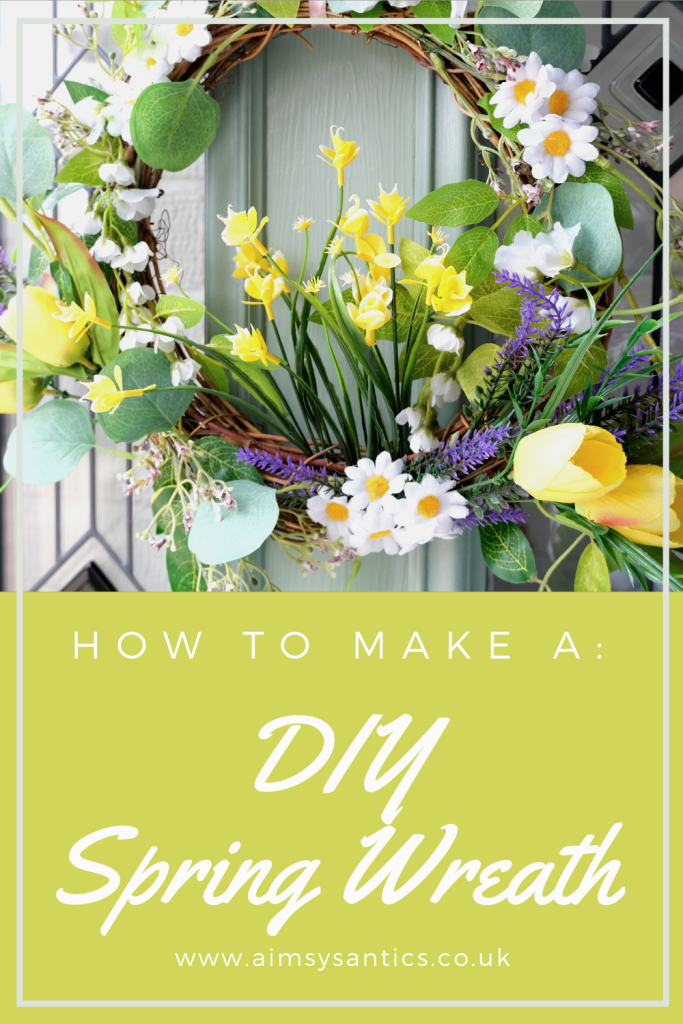
DIY Spring Wreath – Pin it!
If you have enjoyed this post, why not share the love by pinning it for later (or sharing the post elsewhere!) I am always grateful for any support of the blog! Whilst you’re there, whynt check out my Pinterest…there’s lots more creative inspiration!


Why do all of your creations have to look so good!? This is a gorgeous wreath and I need one for my front door. I love spring, it’s my favourite season and this would be a beautiful addition. The flowers you chose look gorgeous! Thank you for sharing such a lovely thing
Em x
Aww, thank you, Em! I am so glad you like it…I thought it turned out so much better than I expected it to! I have to agree, Spring/Summer is deffo my favourite time of year! The flowers are surprisingly life-like and not too faux looking, don’t you think?
Thanks for commenting 🙂
Aimsy xoxo
Love spring and what better way to show it on your doo too? This looks so lovely and honestly, even if I would love to have it with fresh flowers, this can be re used over and over.I really love the bright colours, they pop on your door, thank you for sharing x
Oh, Spring is just lovely, isn’t it? This would look lovely with fresh flowers, but as you say the faux ones means this can last and last!
So glad you like it and thank you for commenting 🙂
Aimsy xoxo
This is a beautiful Wreath! Great one for Spring and Easter time. Thanks for sharing! xx
xoxo Olivia | http://www.oliviaandbeauty.com
Aww thank you. I am glad you like it! I love how it has turned out!
Thanks for commenting 🙂
Aimsy xoxo
This is so pretty I’d love to make one! Love your posts 🙂
Glad you like it! Deffo brings out these spring vibes, doesn’t it?! Ooo would love to see yours if you do make one!
Thanks for commenting 🙂
Aimsy xoxo
Aimsy’s Antics
Aimsy, very pretty! The colors and greenery you picked look great together. I’m working on a spring wreath right now too. Thank you for the tips!
Thank you! I love how pretty it looks, especially against the green of our door! Ooo, I would love to see your wreath when its finished. I bet it is going to look fab!
Thanks for commenting 🙂
Aimsy xoxo
This wreath is such an amazing item to make for Spring, it’s so pretty! x
Lucy | http://www.lucymary.co.uk
It is perfect for Spring, isn’t it?! Even better when the sun comes out and shines on it!
Thanks for commenting 🙂
Aimsy xoxo
What a cute spring wreath! Thanks so much for sharing the tutorial.
It’s so cute, isn’t it?!
Glad you liked and thanks for commenting 🙂
Aimsy xoxo
This turned out very lovely. Kudos to you, – very creative!
https://www.missymayification.co.uk
Glad you like how it turned out. I love how it looks on the door!
Thanks for commenting 🙂
Aimsy xoxo
I usually see wreaths up for the holidays, so I LOVE the idea of a spring wreath. The flowers in this wreath send it over the top with spring vibes! I love the grapevine base and the mix of tulips, daises, and wildflowers. Buying garlands too big for one wreath and cutting them down is clever and leaves plenty of leftover foliage for future wreaths too.
Thanks for sharing! 🙂
I know, but why keep the fun just for the holidays, right?! haha! That was my thoughts exactly, now have lots of foliage for other projects too 🙂 I’ve just bought some more summer type flowers to give the wreath a different look, but I think this wreath will last for a few months yet!
Glad you like it Jaya, and thank you so much for commenting 🙂
Aimsy xoxo
This Spring wreath is beautiful! Thanks for this step-by-step tutorial!
xoxo
Lovely
http://www.mynameislovely.com
Thank you, I am glad you like it!
Aimsy xoxo
I like DIY, very good, thank you for sharing
affordable lace wigs
Glad you like it! Hope it has given you some inspiration 🙂
Aimsy xoxo
I love how your wreath turned out & it was nice you made a Spring wreath instead of an Easter wreath so you can use it longer!
I’ve made a Christmas wreath before & I would like to make one for Spring, but the hobby store is closed because of the lockdown & I don’t really want to order online.
Thank you! That’s the reason I didn’t, I just thought it would have more longevity into the season. I guess a few Easter items could be added temporarily just for the Easter weekend and then removed too! Ordering online was the only downside really. I bet in-store the items would be so much cheaper, especially in somewhere like the Poundshop, home bargains, b&m etc. I know they are open, but not essential buys Fingers crossed they open soon, so you can get some supplies!
Thanks for commenting 🙂
Aimsy xoxo
A few Easter things would be nice like maybe a few eggs? Yes exactly! Plus I wouldn’t have to pay for delivery. I hope they’ll open soon!
Yes definitley! Fingers crossed they open soon! xoxo
This looks great! I’ve been meaning to make another wreath soon. I need to make my way to a craft store soon! I’m running low on all products. Thank you for sharing, Aimsy! I’m going to watch this on Youtube too xx
Lynn | http://www.lynnmumbingmejia.com
Glad you like it, Lynn! I cannot wait to be able to go to the actual craft store rather than buying online. I hate that I use Amazon so much, but it is just so accessible! Happy wreath making, and thank you for checking out the video too!
Hope you are having a wonderful day!
Aimsy xoxo
This is one of my favourite wreaths I’ve seen, I think! I’ve got a bit obsessed with fake flowers and things at the moment as I use them in my office. I think I might have to buy a Spring / Summer wreath to go on my office door!
Aww so glad you liked it Jenny! Oh, faux flowers are fab, aren’t they? You can have beautiful flowers without needing to do all the plant care.
Thanks for commenting 🙂
Aimsy xoxo
This looks absolutely stunning, Aimsy. Yellows, purples, whites, and greens are one of my favourite colour combinations too (I’m not a fan of orange or red) and this looks so welcoming. From your photos there’s no way you can tell the flowers and foliage aren’t real – time to get myself off to Amazon, I think – thank you for sharing this! Lisa x
Thank you so much, Lisa, I am glad you like it. I love the colour mixes, and I am with you on the colour combinations of flowers…brighter colours all the way. I was surprised with the quality of the flowers, you can tell a bit closer up they are faux. Still effective though!
Tanks for commenting 🙂
Aimsy xoxo
What a beautiful idea to do to be creative and bring Spring into your home. It looks so pretty! Thank you for sharing your craft ideas!
Lauren
Glad you like it. Such a lovely way to bring Spring in, and get crafty in the process haha!
Aimsy xoxo
What a gorgeous wreath! It is the perfect spring decor for the home – outdoors and indoors! I will bookmark this post and hopefully I can get the materials soon to make this. Thank you for sharing! Have a wonderful (and sunny) week!
Julia x
Last Post: A Travel Guide (Sights + Foods) To Visit Bordeaux, France
Aww thank you so much, I love how it has turned out. I would love to see yours if you do have a go a making one!
Thank you so much for commenting. Hope you are having a wonderful week too!
Aimsy xoxo
Oooh! Love the wreath you’ve built! It is so cool to see how people put theirs together. Love that it is an art on its own – the balance of flowers and arrangement is good. Thanks for sharing this tutorial!
Nancy ✨ mdrnminimalists.com
Glad you like it, Nancy! It definitely takes a bit of trial and error with the placement of things, but in the end, it all just seems to come together!
Glad you enjoyed the tutorial, and thanks for commenting 😉
Aimsy xoxo
That wreath is so beautiful, it looks amazing!
Danielle | thereluctantblogger.co.uk
Thank you so much. Glad you like it 🙂
Aimsy xoxo
Oh this looks beautiful! If you lived in my street it woukd bring a smile o my face everyday! Milli X http://millidavison.co.uk/
Aww thank you. I am so glad you like it and that it would make you smile. I love looking at other people’s outdoor decor too 🙂
Thanks for commenting 🙂
Aimsy xoxo
This is such a gorgeous idea and a lovely wreath you’ve made! A great guide too xx
Glad you like it. It is still going strong on our door and looks just as nice as it does here. Hopefully, you found it helpful to follow 🙂
Aimsy xoxo