

Another sewing project in this week’s blog post. Today I will show you how to make a DIY tablet case, in this easy sewing project. Perfect for using fat quarter pieces of material.
I have been sitting on this post, since the start of lockdown. I made this project right before the lockdown in March, as I thought it would be the perfect DIY to be getting into before the summer holiday plans. Alas, Corona put a stop to that, but I am sharing it today, as it looks like travel is very slowly starting to pick up.
So, this is another easy sewing project and one that uses up some of that fat quarter pieces of material. I use fat quarter pieces often, as they give you practice on material, that you can then go onto purchase larger quantities of (if available). There are so many things you can do with a fat quarter, such as a Face Mask, a make-up bag with boxed corners, and even DIY scrunchies.
Another way of using up a fat quarter is in the DIY tablet case project today.

DIY Tablet Case
Now, the purpose of a tablet case is to keep your tablet safe and secure when out and about. I don’t know about you, but I love to take my tablet on flights to watch films/tv shows on. Now, I don’t want my tablet screen getting all scratched interrupting the quality of my viewing. So, a DIY tablet case is a way forward.
This can be made to suit your tablet, as I will show you how to make your own template to suit your tablet size. The possibilities are endless with how you want the tablet case to look too, as you can use all sorts of materials to really decorate it up. My first attempt was in a lovely gold colour faux leather material.
The good thing about this case as well is it can also be used as a clutch bag. So, if you would like to make your own stylish bag, then you can follow these steps too!
If this project sounds like something you would like, then let’s get crafting!
You can also find the video version of this post at the end if you find watching a video easier to follow.
Jump to the video.

How to Make a DIY Tablet Case
You are going to need a few different items to make your own DIY tablet case. Now, I have a little tip for a ‘dupe’ of sorts for one of the items. This project calls for interfacing batting, however, I didn’t have this to hand. I have found that protective pillowcases work just as well instead. So, head to your cheap shops, like home bargains, B&M or even Poundstretcher and pick yourself up a pack. They will come in very handy with any sewing project that asks for a form of batting. I used the same method when making this DIY Eye Mask and it worked perfectly for what i wanted.
What you need:
You will need the following items to make this DIY tablet case.
- Outer Material
- Inner material – make sure it is soft and won’t scratch – Lining material is brilliant for this
- Batting or protective pillowcase
- Matching thread
- Decorative ribbon /twine
- Decorative button
- Iron
- Pins
- Sewing machine
- Hand sewing needle

Step 1 – Create a template
To make the DIY tablet case fit, a template needs to be made. This will help with determining the measurements of the length and width of the case, as well as the depth needed.
Start by drawing around the tablet on a large piece of paper. I use brown packing paper or baking paper when making sewing templates/patterns.
Once the tablet has been drawn around, use a ruler to determine the depth of the tablet. Mine measures 2 cms. Take that measurement and add extra to the top and one side of the drawn tablet shape.
Then, measure the height of the tablet and add this to the top of the forming template. This should then give the front and back part of the tablet case.


Once these measurements have been added, it is time to create the envelope style flap to close the case and keep the tablet secure inside. Measure across to determine the middle point, then mark around 10cm up from this. Then use a ruler to draw a diagonal line from this point to one corner of the top of the tablet case. Repeat on the opposite side.
Cut out the template, and test that the tablet fits inside of this before cutting out any material. Make sure the template is spot on before making the case. I learnt the hard way with this on my first attempt!

Step 2 – Cut out material
To make it easier with cutting out your material, place the outer and inner material on top of each other. Make sure that they are both smooth and crease-free. Place the newly made template onto these, as close to the edges as possible. Make sure both pieces will be included in the template, there is nothing worse when one part is shorter than the other. You want them to be equal.
Pin the template into place and cut them out. You should then have the inner and outer pieces ready to make the DIY tablet case.

For the protective cushion layer, separate the pillowcase so that it is one long piece of material. It is usually only the flap of the pillowcase that needs to be undone. The pillowcase protectors I used had some form of interfacing on them, which meant I could semi-fuse it to the material.
Place the outer piece of material down onto the protective pillowcase, right side facing up. Double-check it is the right way around. Then use an iron to stick the two together. It may not always stick in parts, but as long as some of it does, that is all that matters.
Then, cut around so that the protective pillowcase is then the same as the outer piece of material.


Step 3 – Sew material together
Keeping the outer material and protective pillowcase the same way (right side facing up), place the inner material right side own onto this. Line up all the edges and pin into place. Leave the bottom edge unpinned as this part won’t be sewn.
Head to the sewing machine and sew a seam all around the edge of the material, leaving the bottom part. On parts where the direction of sewing needs to change, place the needle down into the material, lift the sewing foot up, turn the material, replace the sewing foot down and begin sewing again. Going around the envelope flap part is where you will more than likely need to do this. Backstitch either end where the opening is being left.

Once sewn, check the tablet fits inside the edge seams. Then turn it right side out, using the gap left. Push out any of the corners, using a blunt end of a pen, or even the seam ripper (with the lid on). Make sure all corners and points are pushed out and press with an iron. This will help the seams lay flat, and give the definition to the corner parts. Sew up the gap left on the sewing machine. Sew close to the edge, making sure all the material of the gap is folding inwards. Also, make sure this part is neat, as it will be seen on the outer part of the case.


Step 4 – Sew the DIY tablet case
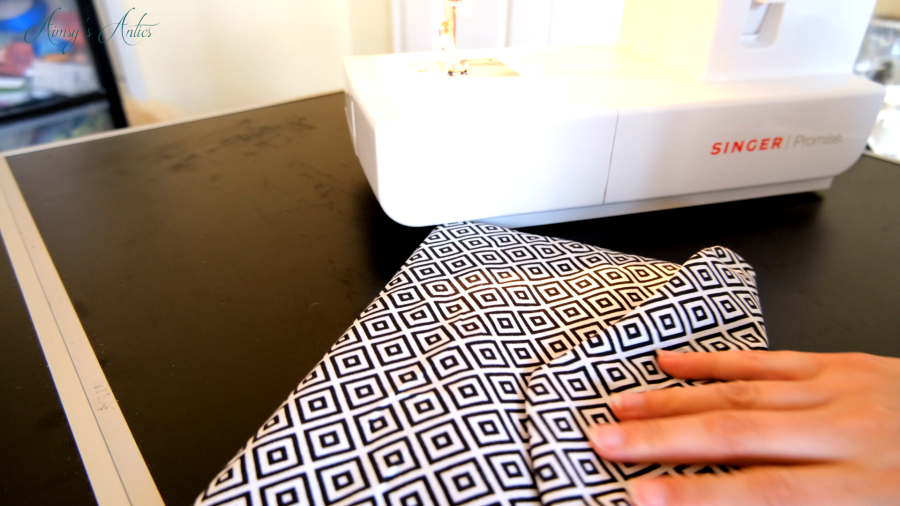
The outer shell of the tablet case is now formed, but further sewing is needed for it to be the tablet case. Fold the case in half, right side to right side, lining up the two sides as evenly as possible. The end that has just been sewn up should line up with the bottom of the envelope flap.

Then, head back to the sewing machine and sew up the two side seams. make sure that these are narrow and as close to the edge as is safe to do so. Bringing these seams too far into the case will reduce the space on the inside, and could result in the tablet not fitting. You want the fit to be snug so the tablet doesn’t move about, but you also don’t want to struggle with getting it in and out.
Again, make sure the stitching is as neat as possible, as this will be seen on the outside of the case.
Test that the tablet fits, and make any adjustments as necessary.
Step 5 – Add on button and ribbon
To finish off the DIY tablet, case a button and decorative ribbon needs to be added. This will help keep the case closed when in use.
Fold-down the flap to help gauge where the button needs to go, as well as how long the ribbon piece needs to be. Using a hand sewing needle and matching thread, attach the button to the outside part of the case. Be mindful to only stitch through the outer material.

Then create a loop with the ribbon at your chose size. Loop this around the button and attach it to the inner part of the envelope flap with a pin. Test where you want the ribbon part to be before sewing this by hand into place. Again, make sure this is only attached to the inner part of the flap.

Then the DIY tablet case is ready to be used!


That is how to make a DIY tablet case using a fat quarter piece of material. What do you think of this sewing project? Will you be giving this one a go? Let me know your thoughts in the comments below!
How to Make a DIY Tablet Case Video:
Here is the video version of this post if you prefer to follow along to this. Don’t forget to like and subscribe to my channel, if you have enjoyed the video. I would love for you to be part of the crafty family over there!
How to Make a DIY Tablet Case – Pin it!
If you enjoyed this post, why not share the love and pin it for later!


Keep up with more crafty projects by signing up to my mailing list!

I love your DIY guides!
This case you made looks so lovely! ☺️
I don’t have a tablet but if I did I’d love to make a case like this!
Love Lozza x
http://girlygabble.com
I am glad you like my DIYs and that they are hopefully inspiring you to be a bit creative!
I’d always rather have a go at making something before buying it, and this is so easy to do once you figure it out. (My first attempt was awful!)
Thanks for commenting 🙂
Aimsy xoxo
Saving this because I’d like to give it a go. Thank you for sharing!
Have fun aking it. You will have to let me know how yours turns out.
Hope the steps are easy/ useful to follow along too!
Thanks for commenting 🙂
Aimsy xoxo
What a nice case. I have to try to make one for my tablet. It can’t be very difficult.
Glad you like it! Once you have the template right, it should be easy enough to get the case right!
Happy crafting and thanks for commenting 🙂
Aimsy xoxo
This is so cute! I don’t think I’d ever be able to make something as good as this but I love how talented and creative you are! 🙂
Glad you like it! I am sure with a bit of practice you would ace it. Mine is far from perfect, but it does the job!
Thank you and thanks for commenting!
Aimsy xoxo
Oooh I need a new case for my Kindle, I’m going to try and make this asap!
Love, Amie ❤
The Curvaceous Vegan
This would be perfect for your kindle! There are other cases to make where you have a built-in stand, but I haven’t mastered that one yet.
You will have to let me know how yours turns out if you do give it a go, I would love to see it!
Happy crafting and thanks for commenting 🙂
Aimsy xoxo
I love the pattern you’ve used to make your tablet case, it’s amazing! x
Lucy | http://www.lucymary.co.uk
Thanks, Lucy! I love the pattern too…I think it was a small pack of fabric from Aldi of all places. Definitely got a summery vibe to it (I think anyway)
Glad you like and thanks for commenting 🙂
Aimsy xoxo
This is so beautiful, I have a tablet without a case and this post just makes me want to try it out. I don’t have any of the materials yet. Saving this till I would like to make one. Love the pattern
Aww, thank you! Hopefully, you can find the materials you like and have a fab case for it!
Happy crafting, I would love to see yours if/when you do give it a go!
Thanks for commenting 🙂
Aimsy xoxo
That’s looks really good. I can’t sew at all, but my mum does, I will tip her off about this idea
Thanks! Hope your mum likes it, maybe she will make you one!
Thanks for commenting 🙂
Aimsy xoxo
This looks amazing, and fairly simple too. I love the fabric you chose for yours. I’d definitely buy something like that in a shop x
Sophie
Thank you! Yeah, once you get into it, it is a really easy project (as long as the measurements are right). I love the pattern too!
Thanks for commenting 🙂
Aimsy xoxo
I just bought a lot of fabrics with cute patterns! Can’t wait to give this a try!
Mari | http://www.dazedmari.com
Oh! happy crafting! What type of pattern fabric did you buy?
I would love to know how your tablet case turns out if you do make it!
Thanks for commenting 🙂
Aimsy xoxo
This looks so professionally done. Great job!
http://www.fashionradi.com
Aww thank you…it could be neater but I am so happy with how it turned out!
Thanks for commenting 🙂
Aimsy xoxo
I could actually make this as a purse…lolllll. I’ll just use a sturdier material, maybe jacquard?
I love the shape and I could wear it with many outfits!
I love it.
Another great post!
xxxx
https:///ooomaye.com
This would be perfect as a purse! You could also add some straps in somehow as well to make it a shoulder clutch type bag.
Jacquard material would be great, or adding heavier interfacing rather than the batting would give it more structure.
Glad you liked it and thanks for commenting 🙂
Aimsy xoxo
Thanks for this tutorial, very helpful especially if you just can’t find the design you want!
Glad you liked it and found it helpful. That is one of the reasons I started learning to sew, as I could never find what I was looking for in the shops. It definitely opens up what you can create!
Thanks for commenting 🙂
Aimsy xoxo
I loved your beautiful tablet case, it turned out so perfect… and that was such a clever tip for using a protective pillowcases as batting!
Aww thank you, I love how it has turned out. I racked my brain when I first made this of what I could use instead and then thought a protective pillowcase is basically a batting material. So much cheaper!
Thanks for commenting 🙂
Aimsy xoxo
This is so cute! Thanks for the detailed how-to! Here’s hoping to being able to travel again someday soon!
Aww thank you! Glad the instructions are detailed enough to be able to follow. Oh, I know, but it looks like Europe is going to be out again.
Thanks for commenting 🙂
Aimsy xoxo
OH MY GOD YES ANOTHER CRAFT BLOGGER! sorry, I always get super excited when I find other craft bloggers 🙂 This is a really cute project! xx
YES! It is so hard to find other craft bloggers, isn’t it? I will be checking your blog out!
Thank you…I love how it turned out!
Thanks for commenting 🙂
Aimsy xoxo
I was thinking about buying a tablet case but now I can easily make one. It is so cute. It looks like a purse.
That’s good, hopefully it will save a bit of money on one! Yes, it does look like a purse and can be adapted a bit to make it even more purse-like.
Glad you liked and thanks for commenting 🙂
Aimsy xoxo
I always feel so inspired whenever I read your sewing projects as I have a HUGE pile of fabric squares (now I know what they’re actually called too, fat quarters) that I keep meaning to turn into cushions but yet don’t want to. This case is gorgeous – although to be honest I’d probably use it as a clutch bag 🙂 Really beautiful, Aimsy! Lisa xx
Glad it inspires you! Fat quarters are great for lots of sewing projects, Aldi always have a few different designs you can pick up cheaply too.
It’s great that the pattern doubles up as a clutch bag, isn’t it? Just change the batting part out for a strong stabiliser and it will be more streamlined (i think).
Thanks for commenting Lisa!
Aimsy xoxo
I love the cloth you used for this! I would make myself a clutch or small purse out of material like that and, with a tutorial like this, I am sure it would be easy to upsize for, say, a notebook. It is amazing when you can create something and have a story behind it rather then going out and buying a mass-produced item. 🙂
It such a lovely pattern isn’t it? Yes, it should be easy enough to change up the sizing of it. What a great idea for a notebook! It would make a lovely clutch bag. I totally agree with you, something handmade can have so much more meaning than that that has been mass-produced.
Thanks for commenting!
Aimsy xoxo
Your case looks so lovely! I inherited my grandmother’s old sewing machine and really want to learn how to use it so I can make projects like these. 🙂
Aww, thank you. I bet that is a much-cherished machine…the older machines seem to last forever!
Practice will make perfect and you will be sewing lots of different projects!
Thanks for commenting 🙂
Aimsy xoxo
This looks so cute. I love that you can customize it to make it look like something that screams ‘you’. I don’t really sew but I have always wanted to start. Maybe this can be a goal to kick off my sewing abilities lol – learn how to use a sewing machine enough to make this a reality.
Glad you like it! Definitely so customisable, and can be made as unique to you. Start with small projects and build up to this and you will be creating them in no time! Once you pick it up, you will be flying and wanting to make all sorts!
Thanks for commenting 🙂
Aimsy xoxo
Oh my gosh, the cutest table case ever! Thanks for sharing, I’m quite tempted to make one for my iPad!
☼ cabin twenty-four
Glad you like it…I love how it has turned out! You will have to show me your case if you do decide to give it a go!
Thanks for commenting 🙂
Aimsy xoxo
This case is so cute! I love the envelope shape. I don’t have a tablet but I do have an e-reader and would love a little case for it.
Glad you like it. This would be perfect for your e-reader, and I bet a bit cuter as it will be smaller! Happy crafting, if you do give this a go!
Thanks for commenting 🙂
Aimsy xoxo
Loved this DIY! The fabric that you chose for it is so pretty too 🙂 x
https://www.femaleoriginal.com
Glad you liked it! I loved the material too, it just gives me chic holiday vibes haha!
Thanks for commenting 🙂
Aimsy xoxo
Oh wow, love this case and the material you used! It looks very classy 🙂
Glad you like it! I think the print really brings that classy vibe to it, doesn’t it?
Thanks for commenting 🙂
Aimsy xoxo
This is a terrific way to hold tablets and e-reader devices! I never thought to make one of these, but it would be so useful. Thanks for sharing this!
Glad you liked and thought it would be useful! It’s a great way to keep them safe, as well as have a design that you want.
Thanks for commenting 🙂
Aimsy xoxo
This is such a fun project, thanks for sharing!
Glad you like it! Happy crafting 🙂
Aimsy xoxo
The case is so nice.
New post :
https://www.melodyjacob.com/2020/07/femme-luxe-wine-cut-out-one-shoulder.html?m=1
Glad you like it!
Aimsy xoxo
This is such a cute DIY – I am sure it will save a lot of people money if they made their own. It would make a really cute Christmas present! Thank you for sharing, you always inspire me to make things I’ve not even thought about yet!
Love, Em x
Glad you like it. Yes, hopefully, it will save a bit of money, cases can get quite pricey, can’t they? Definitely a great Christmas present too!
So glad my DIYs give you inspiration, that’s my main aim!
Thanks for commenting 🙂
Aimsy xoxo
I love the look of your tablet case! Love the pattern, if I saw something like that in a shop I would probably buy it! It would be a cute little clutch bag as well. I feel like I could give this a go and it would hopefully all work out well haha, mine might be a little bit more messy though!
Chloe xx
Glad you like it! The pattern is lovely, isn’t it? Definitely has the french riviera vibes (i think anyway!). My first attempt wasn’t the best, this was like my 3rd where I actually got the measurements right. Happy crating!
Thanks for commenting 🙂
Aimsy xoxo