

Looking to make yourself some clothing items, and items that are comfy? Well, I have the perfect sewing project for you today, in the form of how to make joggers using the ‘Stella Joggers’ sewing pattern by Tilly and the Buttons.
So, we are still in lockdown and the weather is still chilly. Doesn’t it just make you want to hibernate and wear comfy clothing? It does me! That is where today’s post comes in. I wanted to have a go at making my own clothing that is easy, and comfy all in one.
Enter Tilly and the Buttons with a fabulous sewing pattern that incorporates all of this with the ‘Stella Joggers’, and this post on how to make joggers!

I have made clothing many years ago, and more recently turning a dress into pyjamas. So, I wanted to get back into sewing from complete scratch; which is where Tilly and the Buttons have come in. There is something special about making a clothing item from a piece of fabric. I love the creativeness and possibilities of it!
Some links within this post are affiliate links and will be marked with an asterisk (*). This means I may earn a small amount of commission should you make a purchase through the link. This is at no extra cost to you!

Tilly and the Buttons (TATB)
Tilly and the Buttons is a British sewing pattern maker by the founder Tilly Walnes. Not only do they design fabulously easy sewing patterns, but she has three books to help you with your sewing journey to make sewing clothing easy.
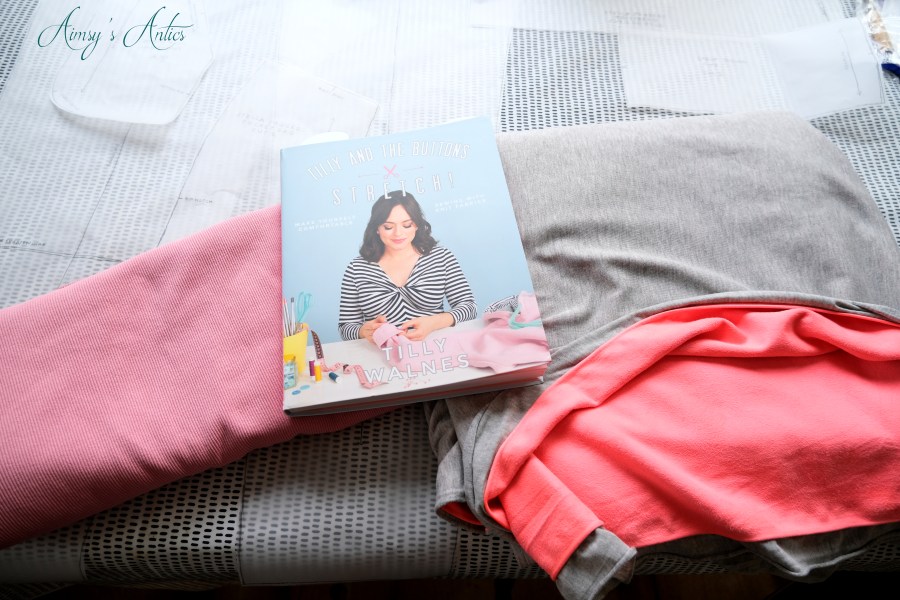
The ‘Stella Joggers’ can be found in Tilly’s second book ‘Stretch!’*. This book is all about sewing with stretch fabrics and taking the daunting out of it. There is also a matching ‘Stella Hoodie’ pattern that I am going to have a go at making in a few weeks. All of Tilly’s books have about 6 sewing patterns included; as well as many variations to change them up. Purchasing the books is a winner as you get so much from them.
Unfortunately, many of the patterns in the books can only be purchased as part of the book, rather than individuals. So, to make these joggers, you really need to purchase the book. (This isn’t a bad thing though!)
I am completely new to sewing with knit/stretch fabrics. The only time I have made something with knit fabric is cushion covers and they were a complete disaster. This put me off sewing with stretch material…until now that is!
How to Make Joggers:
I won’t go fully into each individual steps to make these joggers; as really you need the TATB pattern to make them. But, I will show you through my process; and hopefully, it will help you if you are having a go at the same project. It may also help if you are looking for a few sewing tips; especially with sewing knit/stretch fabrics. Maybe, just maybe it may inspire you to have a go at learning a new skill and making your own clothing too!
Jump to the video version of this post, for a full breakdown of how to make joggers!
Items needed:
To make the ‘Stella Joggers’, you are going to need the following items. I picked up my fabric from an online fabric store ‘Flamingo Fabrics’. These have a fab range of fabric to choose from, with lots of premium jersey. Perfect for making stretchy items like these joggers.
- Sweatshirt jersey fabric – This is the grey/pink double sweatshirt jersey fabric I used. Let me tell you, this material is a dream to sew and is super comfortable against the skin. It is currently on sale (but may change after the post goes live).
- Ribbing – Unfortunately the pink ribbing I used, is not currently available on the site, but here is a different shade of pink. This is for the cuffs and waistband.
- Matching thread
- Sewing Machine
- Ballpoint Sewing needle* – A must for sewing this type of fabric.
- 5cm waistband elastic*
- Sewing Scissors or Rotary cutter*
- Pattern tracing paper*
- Knit iron-on interfacing*
- Cotton Ribbon*
I would also advise investing in something called a walking foot*. This is a different sewing foot for the machine, which helps guide bulkier items through easier. It is perfect to help sew stretch fabrics as it doesn’t pull them out of shape when feeding through.

How to Make Joggers – Pattern Preparation
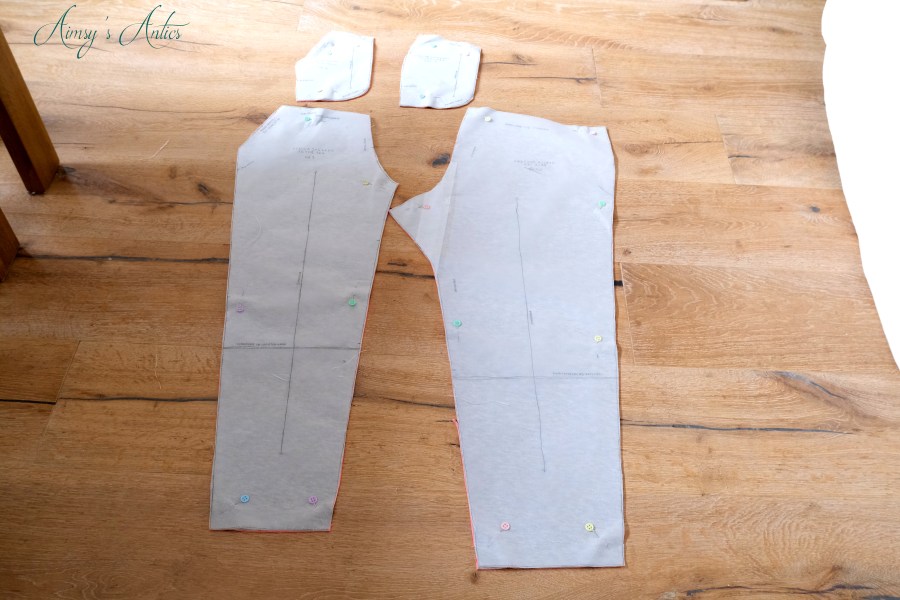
The first thing to do before sewing is to prepare the pattern pieces. As this is a multi-size pattern, I decided to trace the pattern in my size. This gives an option to be able to use the pattern again, in another size, as you don’t cut out the original pattern.
The traced pattern needs to be cut out, with all of the markings and grainlines as indicated on the pattern. This way it can be sewn together correctly and precisely as it should.
Cut out the fabric as guided in the book, making sure to match the grainline. The grainline usually runs parallel to the salvage edge of the fabric. Use pins or pattern weights to hold the pattern pieces to the fabric.

Step 1 – Sew the pockets
The first thing to do on the pattern is to create the two side seam pockets for the joggers. I mean, who doesn’t love a pocket? For this, you need a few pieces of the pattern, including the lining/interfacing piece and some iron-on knit interfacing.
Place the iron-on knit interfacing onto the main jogger leg where the opening of the pocket will be. This gives the pocket opening some stability, which is important for the pocket to keep it’s shaping when wearing.
Then it is time to attach the relevant pieces together. When sewing knit/stretch fabrics, a small zig-zag stitch is needed. If you have a fancier sewing machine than mine, there may be a stretch stitch program, however, mine doesn’t have this so a small zig-zag stitch works well. This can also be made with an overlocker; however, if you are a beginner then a regular sewing machine is your best bet until you are more comfortable with sewing. I haven’t ventured into an overlocker yet!

Make sure the notches are lined up on the pocket pieces, as this makes it more exact. It may also be useful to mark out the seam allowance if you tend to get a bit wonky like me. Once the pockets begin to take form, attach them to the relevant place (indicated on the pattern) with a basting stitch. This is a temporary stitch as it is just a large zig-zag stitch (in this case). It keeps the pocket in place, whilst sewing the other seam, but doesn’t form the overall seam. It is also advisable to sew a second row of stitching on places of more wear and tear. A topstitch on the inside of the pocket too, to keep this laying flat.

Step 2 – Sew the legs
After sewing the pockets, it is time for the jogger legs to start taking shape. There should be two pieces per leg, one front and one back. Line these up right sides together and sew a seam along the two open edges. Don’t sew the crotch area at the moment, as you will sew this after.

Next, it is time to turn one leg right side out. Keep the remaining leg inside out and place this inside the right-side-out leg. I found this step confusing at first! Again, make sure the notches and seams all align and pin into place before heading to the sewing machine.
Sew as indicated, which will sew the crotch seam together. The joggers should now be taking shape and actually look like a pair of joggers.
Step 3 – Form the Waistband
The next step is to form the waistband. I cut this out of ribbing for a contrast to the joggers; however, you can use the same material as the main part of the jogger.
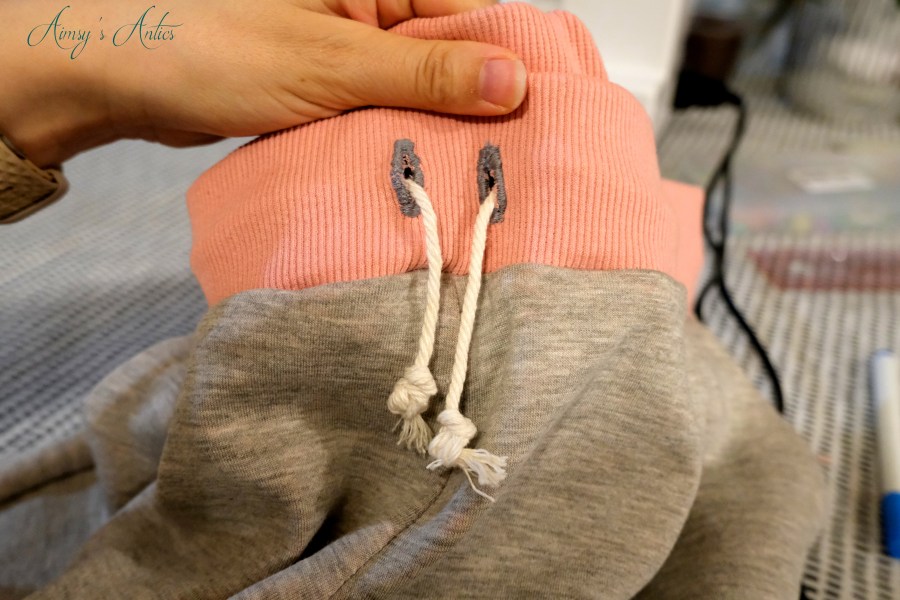
Take the waistband piece and mark where the buttonholes are. Then sew the two buttonholes, changing the presser foot to the buttonhole foot. This makes it easier to sew the buttonholes, as the machine should have a buttonhole setting. I found it slightly difficult to get an accurate buttonhole, but they didn’t turn out too bad! Also, use knit interfacing on the back of the buttons for more stability.


Use a seam ripper or small pair of scissors to cut down the middle of the buttonhole to open it up.
Then, it is time to fold the ribbing in half lengthways and sew the two ends together. This should give you a continuous waistband piece. Then fold it in half widthways so that it is half in size and press with the iron.
Next, pin the waistband upside down to the raw edge of the waist edge of the joggers. The raw edges should be together, again lining up the notches. Leave a gap in the waistband unsewn and attach the waistband pieces together.

Step 4 – Add elastic
Then it is time to add in the elastic for the waistband. Place a safety pin at the end of the elastic. The elastic should be cut to your waist measurement. Thread this through the gap left until it comes back around on itself.
The elastic then needs to be connected using straight stitches rather than zig-zag. A few rows should hold the elastic together well.

Finish off by placing the elastic into the waistband, and continuing the zig-zag stitch over the open gap to close. Press the seams and the waistband is complete.
Finish off the waistband by adding on some ties. Use drawstring or cotton ribbon and thread through one buttonhole. Use the safety pin method to help guide it through until it comes out of the other buttonhole. Make sure the ribbon doesn’t twist inside. Knot the ends and the drawstring part is complete.
Step 5 – Add on leg cuffs
The final stage of the joggers is adding on ankle cuffs. Again, I am using a contrasting colour for mine, but this can be completed in a matching colour. Ribbing allows for a bit more stretch to the cuffs.
Remove the sewing arm of the machine so that you have a smaller base to work on. Then, pin the cuffs similar to the way to the waistband, and sew along so that it is a full circle. Fold in half and place the raw edges together of the cuffs and leg pieces, pinning in place.
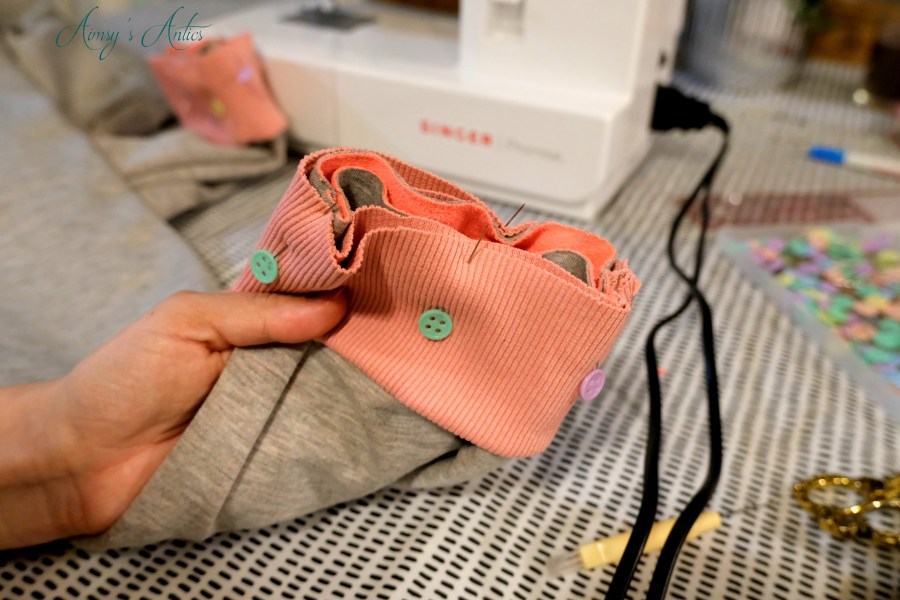
Head to the sewing machine and place around the narrower working space. Begin sewing around the raw edges to attach. This may appear quite bulking so you may need to hand-wind the sewing machine in parts. Also when adding in the cuffs, you want to stretch them a little during the sewing, as this helps them to attach to the legs pieces better. It also means they lay flatter and do not bunch up (hopefully!)
The final thing to do is press the seams as directed in the book. You can also finish off all the seams inside with an overlock stitch. I use a zig-zag stitch along the raw edges to finish them off. This traps the fabric ends in and reduces fraying. Usually knit/stretch fabrics are pretty sturdy and don’t require as robust finishing. I think overlocking/zig-zagging the edges gives a more polished look to the garment.


So there you have how to make joggers using the ‘Stella Joggers’ TATB pattern!
What do you think of this project? Will you be giving making your own clothing a go? Let me know in the comments below!
How to Make Joggers | Video
Here is the video version of this post. Don’t forget to like if you have enjoyed, and subscribe to my channel to keep up with my antics over on YouTube!
How to Make Joggers | Pin it!
If you enjoyed this post, why not share the love and pin it for later?
Check out my Pinterest too!


These are fab, you’re creations are always so impressive 🙂
Aww, thank you. I am permanently wearing them, they are so comfy!
Aimsy xoxo
These joggers are lovely! I love the grey and pink combo, these look perfect to wear around the house right now! x
Lucy | http://www.lucymary.co.uk
Thanks, Lucy! They are so comfy and I love the contrast too. I never want to take them off! haha
Aimsy xoxo
I have to say this is a really interesting post! I’d never think to make my own joggers but this idea is so cool! Thank you for sharing xx
xoxo Olivia | http://www.oliviaandbeauty.com/
Oh, the world of sewing really does open up so much to make! These are really easy to put together and are sooo comfortable! can’t wait to share more of my sewing makes!
Aimsy xoxo
You caught me! I am not very comfortable sewing with stretchy or even sequined fabrics, but this book sounds amazing and I love how pretty it is. I never thought about buying a sewing-related book so I love the idea! What a handy guide to gave on hand.
The joggers look like a perfect and comfortable fit. I want to make a pair for the coming warmer weather.
Thanks so much for sharing!
Oh, I was the same with stretch fabric after bad experiences. This book totally breaks it all down and makes it easier to sew. I love how this has lots of different patterns in it, with adaption so you can make so many items!
They are so comfortable and just right, I never want to take them off Happy sewing! Can’t wait to share more of my makes too!
Aimsy xoxo
These turned out so well and I love the pink details. I don’t think I’d ever be able to make them as sewing is definitely not a strong point of mine, haha!
Tash – A Girl with a View
Aww, thank you. I am so happy with how they turned out. I am sure with practice you would smash making a pair of these!
Thanks for commenting 🙂
Aimsy xoxo
You are so talented. For me this will be mission impossible.
New Post – https://www.exclusivebeautydiary.com/2021/02/rodial-dragons-blood-eye-gel.html
Aww, thank you. With practice I am sure you would be able to create your own!
Aimsy xoxo
What cute joggers! These actually look really sweet and like something I’d buy. Your stitching is so neat!! I have a sewing machine that I haven’t used in years, but this has inspired me to give making clothes a try.
Em x
Thank you! They turned out better than I was expecting and are so comfortable! This material sewed so well, so I think that helped with the neatness. Glad it has inspired you…you will get the sewing bug once you start! Would love to see anything that you make 🙂
Aimsy xoxo
Wow! I love these! What an excellent job you have done! Thanks for sharing your experience.
Glad you like them! The matching hoodie will be coming onto the blog soon!
Thanks for commenting 🙂
Aimsy xoxo
I can only sew by hand as I tried a machine and never succeeded, but this will go on my to do list! I would love to be able to sew my own clothes! They look amazing and love the two colours on them, thanks for sharing x
The two colours give a fab contrast, don’t they? Ah practice makes perfect…start with smaller and easier projects and build up. You will not look back once you start putting clothing items together!
Thanks for commenting 🙂
Aimsy xoxo
Oh Aimsy! I basically can learn all my life skills within your blog. I love how you create really practical things! I need to get back into sewing. Last year at the start of the pandemic, I was making skirts and scrunchies and everything in between Lol Thank you for sharing xx Pinning for later!
http://www.lynnmumbingmejia.com
Haha, Glad to be of service Oh, there is just something about creating something out of a piece of fabric, isn’t there? I’ve got the matching hoodie coming up onto the blog soon, so stay tuned for that one!
Thanks for commenting 🙂
Aimsy xoxo
Aimsy’s Antics