

I have a delightful bake for you in today’s post with this pistachio and rose cake recipe. The perfect mix of pistachio and rose for a delicate but packed full of flavour cake, otherwise known as a Persian love cake.
Now, I am not a stranger to trying out different cake/baking recipes, I mean hello Beetroot and White chocolate cake! This cake recipe is no different, combining the delicate flavour of pistachio with the light floral taste of rose. A delight if you enjoy more perfume tastes like Turkish delight and cardamom kind of treats. This recipe packs a punch with the flavours, whilst still being delicate on the palate.
The recipe is also a version of a Persian love cake, which can be made in several ways. The apparent history behind the love cake is this; a woman desperately in love with a Persian Prince baked the cake for him. This was as a way to make him fall madly in love with her. I don’t know if he did or not, but either way; at least she had yummy cake to console herself!
Now, this cake may be more Valentine’s theme; however, I decided to make this for my mum’s birthday. What better time to eat cake than for a birthday celebration? (or anytime is a good time for cake).
Jump to the video version of this post!

Pistachio and Rose Cake
This post is split into two recipes; the first being the cake and the second the buttercream. That way you can interchange the recipes and use the buttercream for other baking delights, or pair the cake with another frosting.
I am not a baking goddess and need to follow recipes; therefore the recipes in this post have been adapted by other talented bakers. The pistachio cake has been adapted from The Food Duchess recipe and the rose swiss meringue buttercream has been taken from The Flavor Bender.
You can jump to the swiss meringue buttercream here, or keep reading for the cake recipe.

Pistachio and Rose Cake Recipe:
This cake blends the delicateness of pistachio flavouring with a hint of lemon and the punch of cardamom. Pistachios make up a percentage of the flour mix, which results in a denser cake consistency. So, don’t worry if you think the cake has gone wrong, it is supposed to be dense. That said, make sure that you bake it for long enough; as you don’t want raw cake batter in the middle of the cake.
Ingredients:
To make the pistachio cake, you will need the following ingredients.
- 95g Ground Pistachios
- 250g Plain Flour
- 190g Caster Sugar
- 180ml Vegetable oil – I used Rapeseed Oil
- 3 large Eggs
- 240ml Milk
- 1 1/2 tsp Baking Powder
- 1/2 tsp Salt
- 1/4 tsp Cardamom
- 1/2 tsp Almond Extract/Essence
- 2 Tbps Lemon Juice
- 1 tsp Vanilla extract/essence

Step 1 – Preheat oven and Prepare
The first step is to pre-heat the oven to Gas mark 4 or 350°F. Then, prepare the baking tins with greaseproof paper. I found that the recipe made two small 8″ cakes; however, the tins were not overly full. You may want to adjust the measurements if you want larger cakes or make several batches to create cake layers. For this cake, I created three cake layers and had cake batter left for 5 cupcakes.
You also want to prepare the ingredients too. That includes grinding the pistachios so that they resemble flour. Ideally use a food processer or coffee grinder to do this as it will make it much faster. I only have a pestle and mortar to grind mine, which works perfectly but takes some time. Be careful not to over grind the pistachios as they can turn into a paste. You want the ground almond texture to them. It is better to grind the pistachios first before weighing them out too.
You also want to prepare the cardamom, by grinding the seeds so that they are fine too. Leave this step out if you don’t want to add the cardamom. The flavour comes through with a punch with only 1/4 teaspoon worth!

Step 2 – Prepare dry ingredients
In a mixing bowl add in the flour, sifting this. Then, add in the ground pistachios, baking powder, cardamom and salt. I must admit I lower the amount of baking powder to 1 teaspoon worth because in the past adding more I can taste it. Feel free to add between 1 tsp to 1 1/2 tsp depending on your taste. The more baking powder, the less dense the cake maybe, but I am not 100% sure.
Mix this together so that all the ingredients are combined.

Step 3 – Mix wet ingredients
Use a different mixing bowl for this part of the recipe. Make sure it is large enough, as the wet and dry ingredients will be combined in this bowl.
Start by adding in the three eggs. Follow this by adding in the sugar and mixing it together with an electric mixer or stand mixer. You can also mix it all by hand if you do not have the other mixers. It may just take you a little bit longer to do!
Then start adding in the vanilla and almond extracts/essences to the mix and continue mixing. The almond extract helps to enhance the pistachio flavour and give the cake a nutty taste. If you can get pistachio extract or essence then feel free to use this instead. The mixture should thicken and go slightly fluffy. It may also triple in volume, however, mine didn’t.

Finally, begin incorporating the vegetable oil into the mixture. I add a little bit at a time and mix. You can use whichever vegetable oil you like, however, I read that using rapeseed oil can give the cake a lighter density and isn’t as heavy as some oils (looking at you olive oil).

Step 4 – Combine Wet and Dry Ingredients
Now, it is time to combine the wet and dry ingredients together to make the cake batter. Start by adding a few spoonfuls of the pistachio and flour mix, mixing this in. Then add in part of the milk, again mixing in thoroughly. Continue alternating between the flour mix and milk until you have a little of the milk and flour left.
Add in the lemon juice at the same time as the last of the milk, followed by the remaining flour. Make sure it is all incorporated together and you have a smooth batter.

Step 5 – Bake and allow to cool
The final step in making the cake is baking it. So, pour the batter into the waiting cake tins. I tried to split mine evenly between the two 8″ sandwich cake tins.
Tap the tins gently a few times to release any air bubble that may have formed inside the batter. Place in the oven, keeping it at the preheat temperature and bake the cake. This can take around 50-60 minutes to bake fully; however, it may depend on the oven you are using. Check the cake, and test with a skewer in the middle. If the skewer comes out clean, then the cake is ready.

I always err on the side of caution and leave in for an extra few minutes to make sure it is fully baked. A slight golden top to the cake should form, and the cake should be slightly springy when touched too.
Remove from the oven and allow to cool slightly in the tins. Remove from the tins after 5-10 minutes and allow them to further cool on a cooling rack.

Then the cake is ready to be decorated with some beautiful rose swiss buttercream or icing of your choice!
Rose Swiss Meringue Buttercream
Now this buttercream is delightful. There are a few different versions of buttercream, with the swiss meringue being a great alternative to regular buttercream. It is a bit more time consuming and contains eggs, but it is the safest version (of meringue buttercream) for those who are pregnant. This is because the eggs are pasteurised during the making of the buttercream.
Swiss meringue buttercream is also less sickly than traditional American buttercream; so lends itself really well to this recipe. The rose hints really do come through, without being too fragrant and overpowering on the palate. You can also detect the hint of lemon to help balance the flavours.
This buttercream can be used to frost the cake, as well as use in between the layers of the cake. I opted to just frost and decorate the cake in buttercream. Instead of frosting between the layers, using lemon curd to adhere the layers. This also gives the cake that extra hint of lemon between the pistachio and rose flavourings. Delightful!

Ingredients:
To make the swiss meringue buttercream, you will need the following items. Again I have used Flavour Bender’s recipe for this.
- 4-5 Large Egg Whites – I used pre-separated egg whites in a carton
- 220g Granulated Sugar
- 340g Butter (unsalted) & cubed
- 1tsp Lemon Essence/Extract
- 60ml Rose Water
- 1/4 tsp Salt
- Pink Food colour (ideally gel colouring)

Step 1 – Prepare Mixing Bowl
One of the most important steps is to prepare the mixing bowl to make the buttercream in. Make sure it is fully clean and does not have any grease in it. Use lemon juice and wipe this around the bowl. This should clean and remove any grease on the bowl.
Now, this is important as any grease will stop the meringue from forming. Using carton egg whites too can alter how the meringues form; as most have additional additives to help them thicken.
Ideally, a stand mixer is best for this buttercream, however can still be achieved using an electric whisk. Again attempting by hand will take you a very long time.
Step 2 – Create the Meringues
Place the clean large mixing over a pan of simmering water (ban-Marie style). Make sure the water doesn’t touch the bottom of the bowl as this will affect the egg whites cooking.
Then add in the egg whites and granulated sugar, gently whisking. You do not have to whisk vigorously at this point. The mixing is to stop the egg whites scrambling and sticking to the side of the bowl.

Remove from the heat when the meringue mixture reaches between 68°C – 71°C (155°F – 160°F). A candy or jam making thermometer is very handy for this recipe. Generally, a probe style thermometer rather than infrared is probably better.
Begin whisking the egg whites on a medium to high setting to create the meringues. Keep whisking so that stiff peaks are formed with the meringue looking glossy and thick. Be careful not to over whisk though; as this can have the opposite effect as the protein in the egg is broken down more. Mine didn’t reach stiff peaks, which i think is due to the carton egg whites; however, I was still able to make the buttercream.
You also want the meringue to reach room temperature; which should be achieved through whisking.

Step 3 – Add in butter, essence and colour
Now, it is time to add in the butter to form the buttercream. If you have a stand mixer then you should change it to the paddle set. I don’t have a stand mixer and therefore continued with my electric mixer; which is still fine to do. Just be careful not to over whisk and lose all the air put into the meringue.
Add the butter a few cubes at a time and allow to incorporate fully before adding in the next bit of butter. You also want to add in the salt whilst mixing too.

When all the butter is fully mixed in, it is time to add in the lemon essence and rose water. Add the essence first and mix, before adding in the rose water. I added the rose water parts at a time and mixed them before adding more.

Finally, add the pink colouring to buttercream to colour it. I added 1/4 teaspoon and it gave the buttercream a lovely pink colour. As I said before, gel food colouring is better as it doesn’t add extra water content to the buttercream.
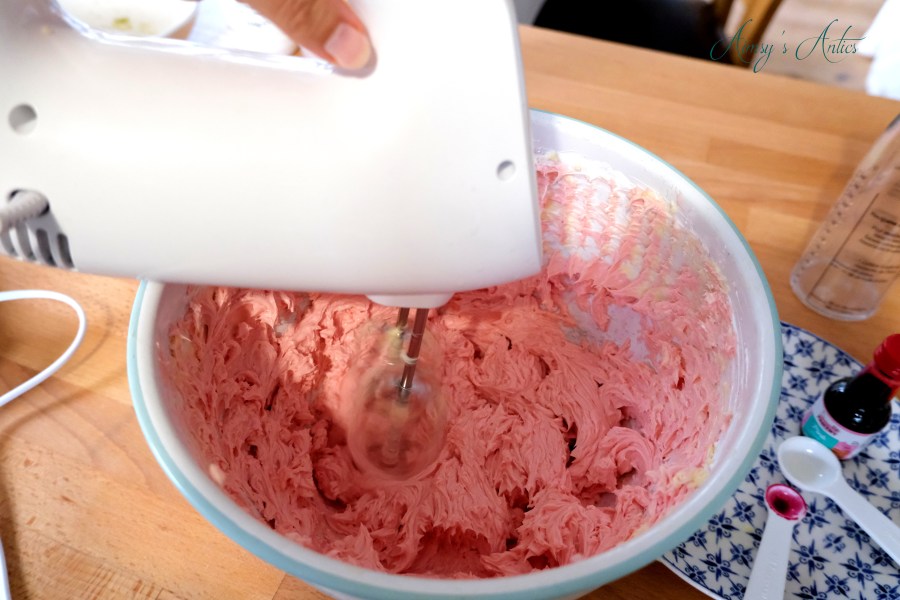
The pistachio and rose cake can now start taking shape and being assembled.
Step 4 – Decorate the Pistachio and Rose Cake
Once the buttercream is made, the cake can be decorated. If you are not ready to use the buttercream, then it can be stored in the fridge in an airtight container. Just return it to room temp and mix before using. You can also freeze it too; again defrosting and returning to room temperature before using.
Place a small amount of the swiss buttercream onto the middle of a cake board. Add the bottom layer of the cake to this. The buttercream will act like glue, keeping the cake attached to the board.
Either use the buttercream in between cake layers or do as I did and place in a good amount of yummy lemon curd. Make sure there is enough between the cake layer before adding on the next cake. Repeat until the cake has the desired height. Mine is three layers of cake, with lemon curd between the cakes.

Crumb Coat
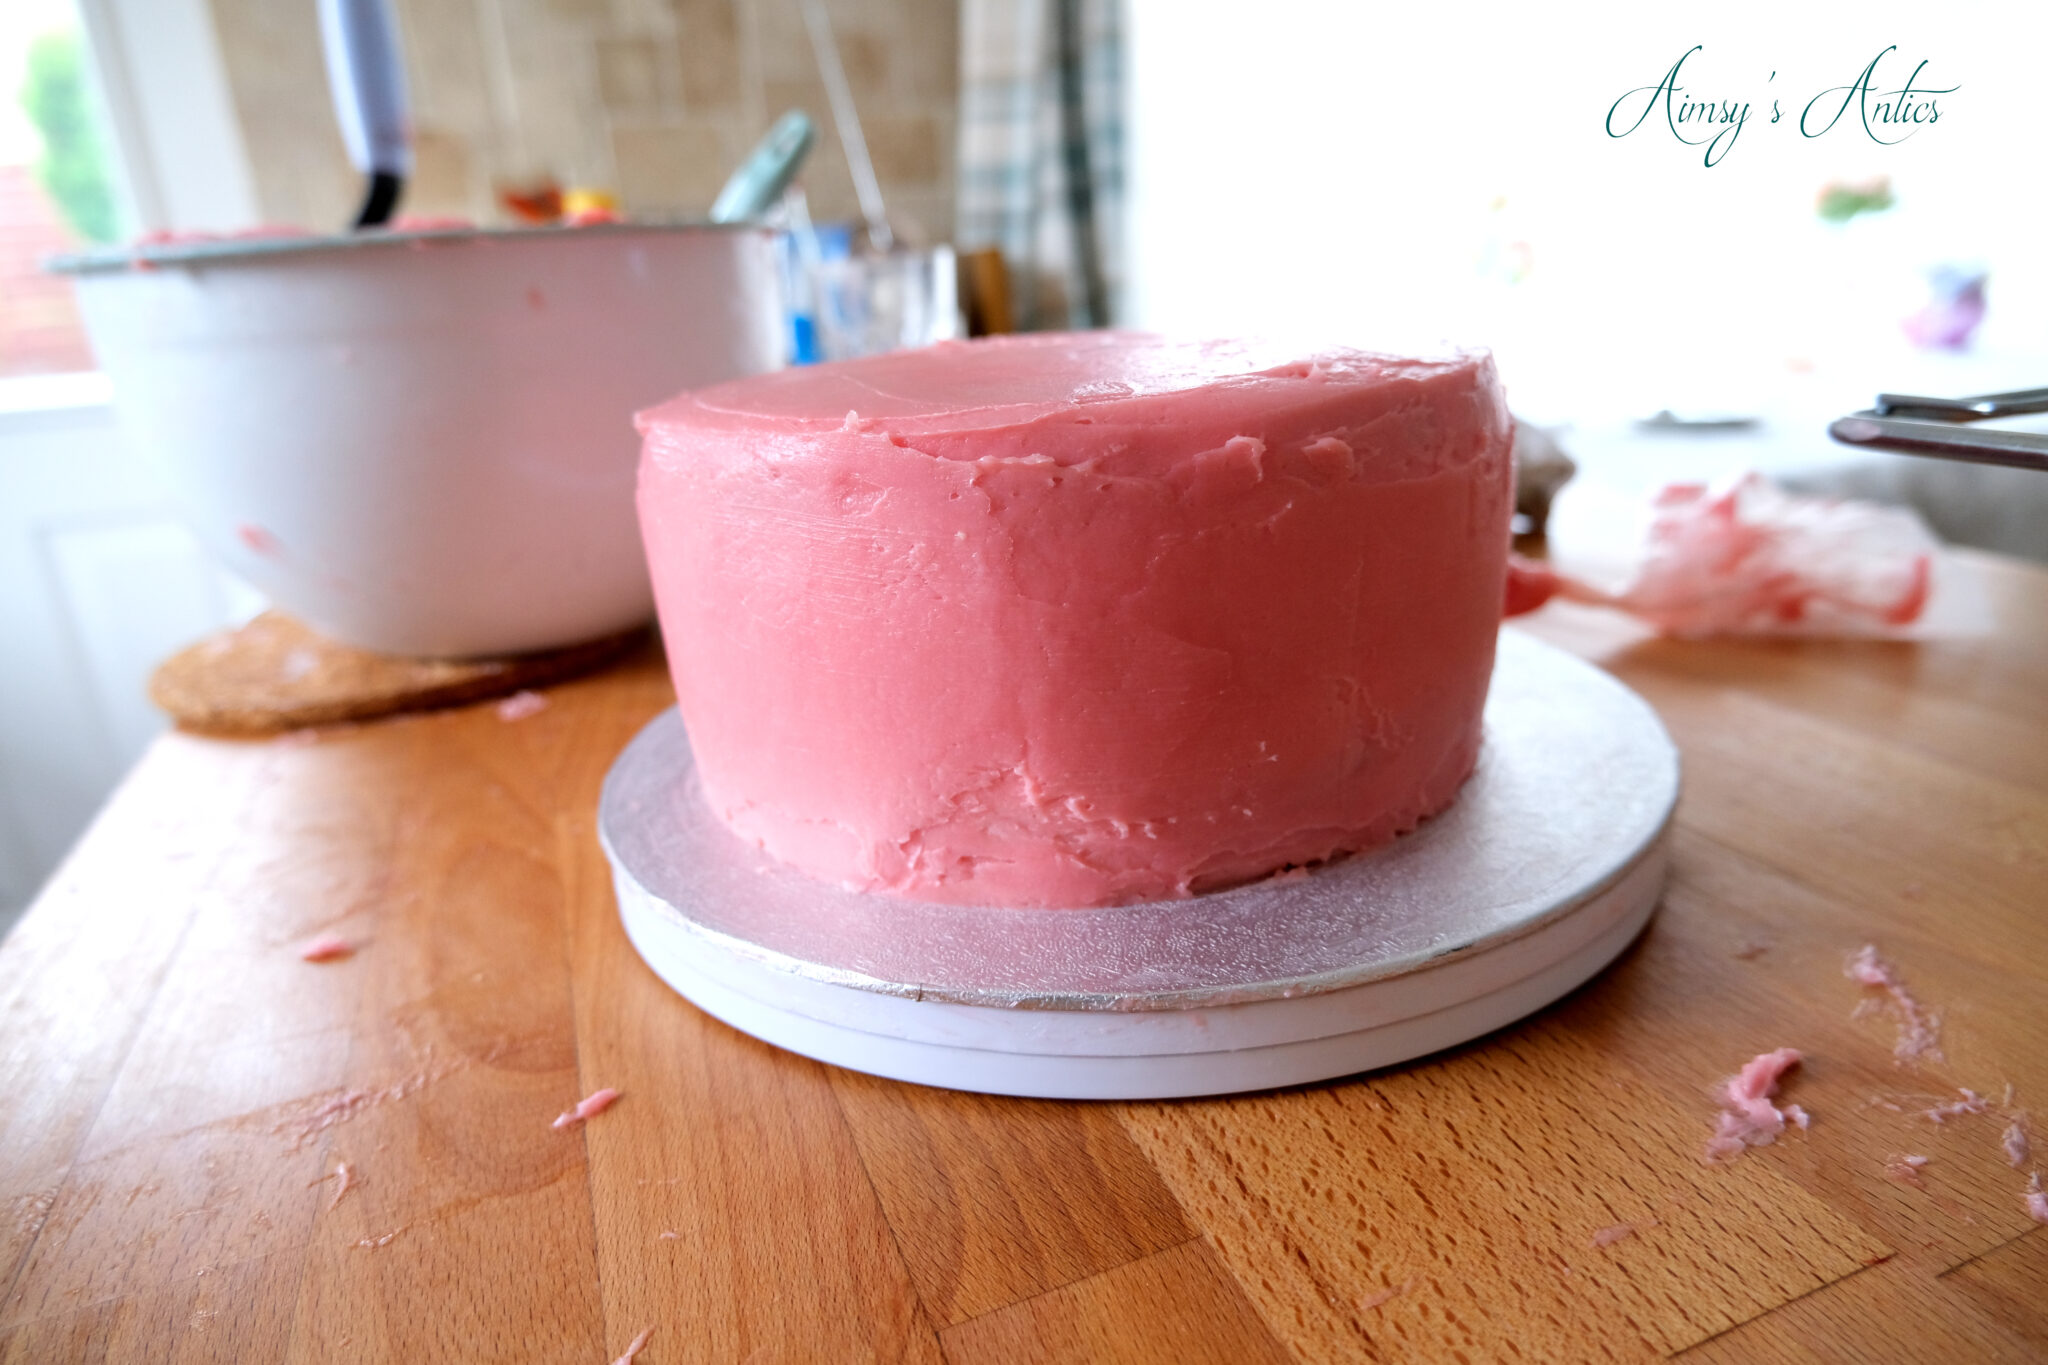
If you want a nice frosted look to the cake, then a crumb coat needs to be applied first. This is basically a layer of buttercream to seal in the crumbs of the cake. This stops the crumbs from going into the top layer of the cake.
Use a piping bag without a tip, cutting the corner; or you can spoon the buttercream. Pipe a zig-zag of the buttercream around the cake and on top. Then smooth the buttercream into the cake using a palette knife or spatula. Use a cake scraper to smooth the buttercream further, removing any excess.
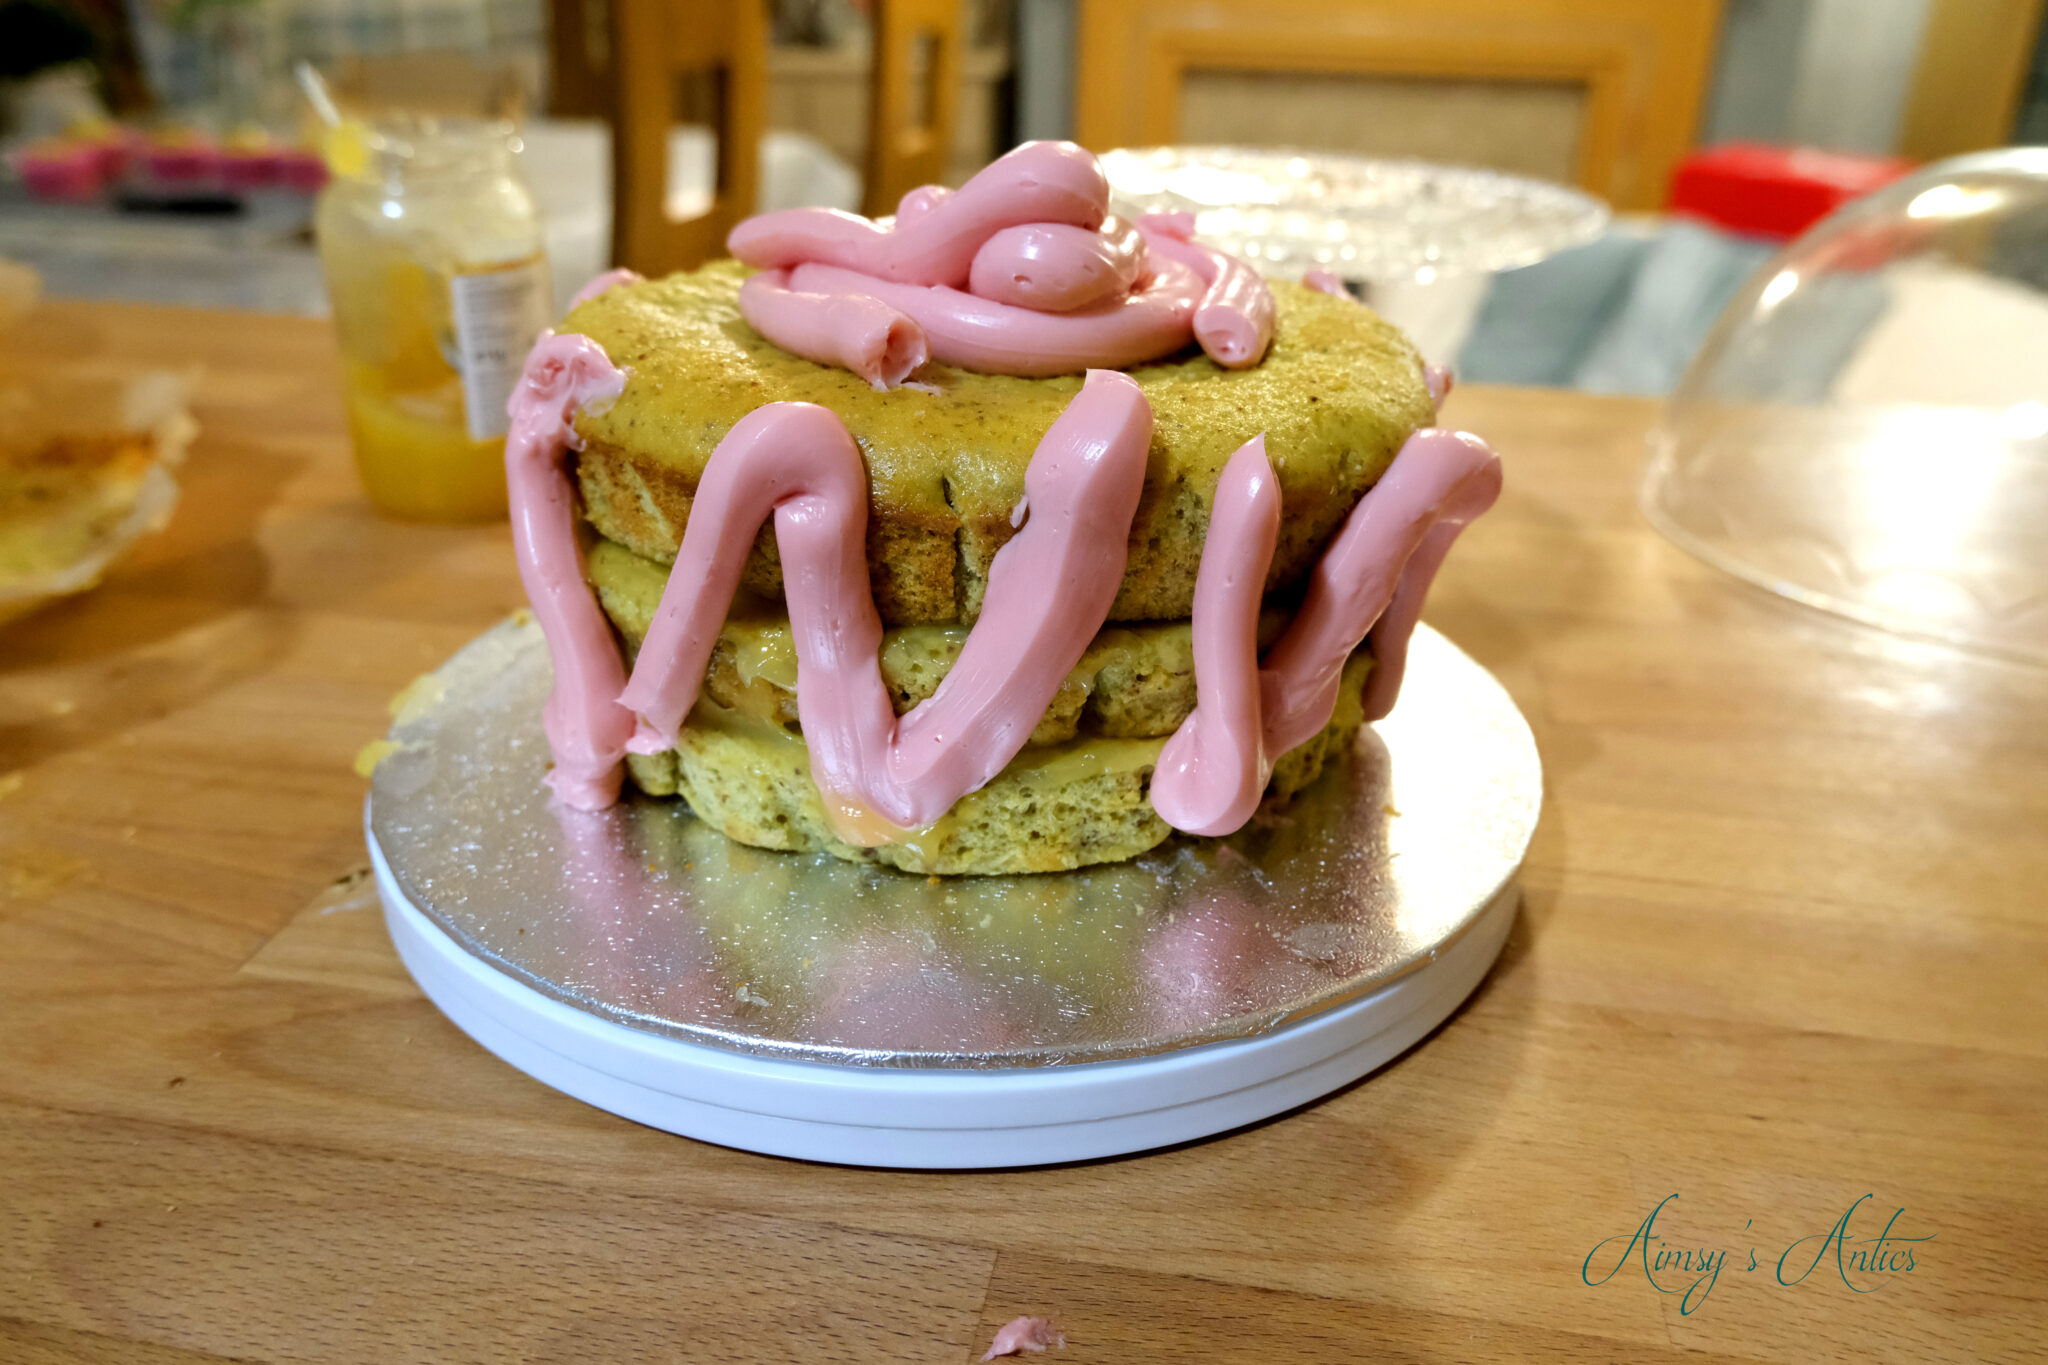
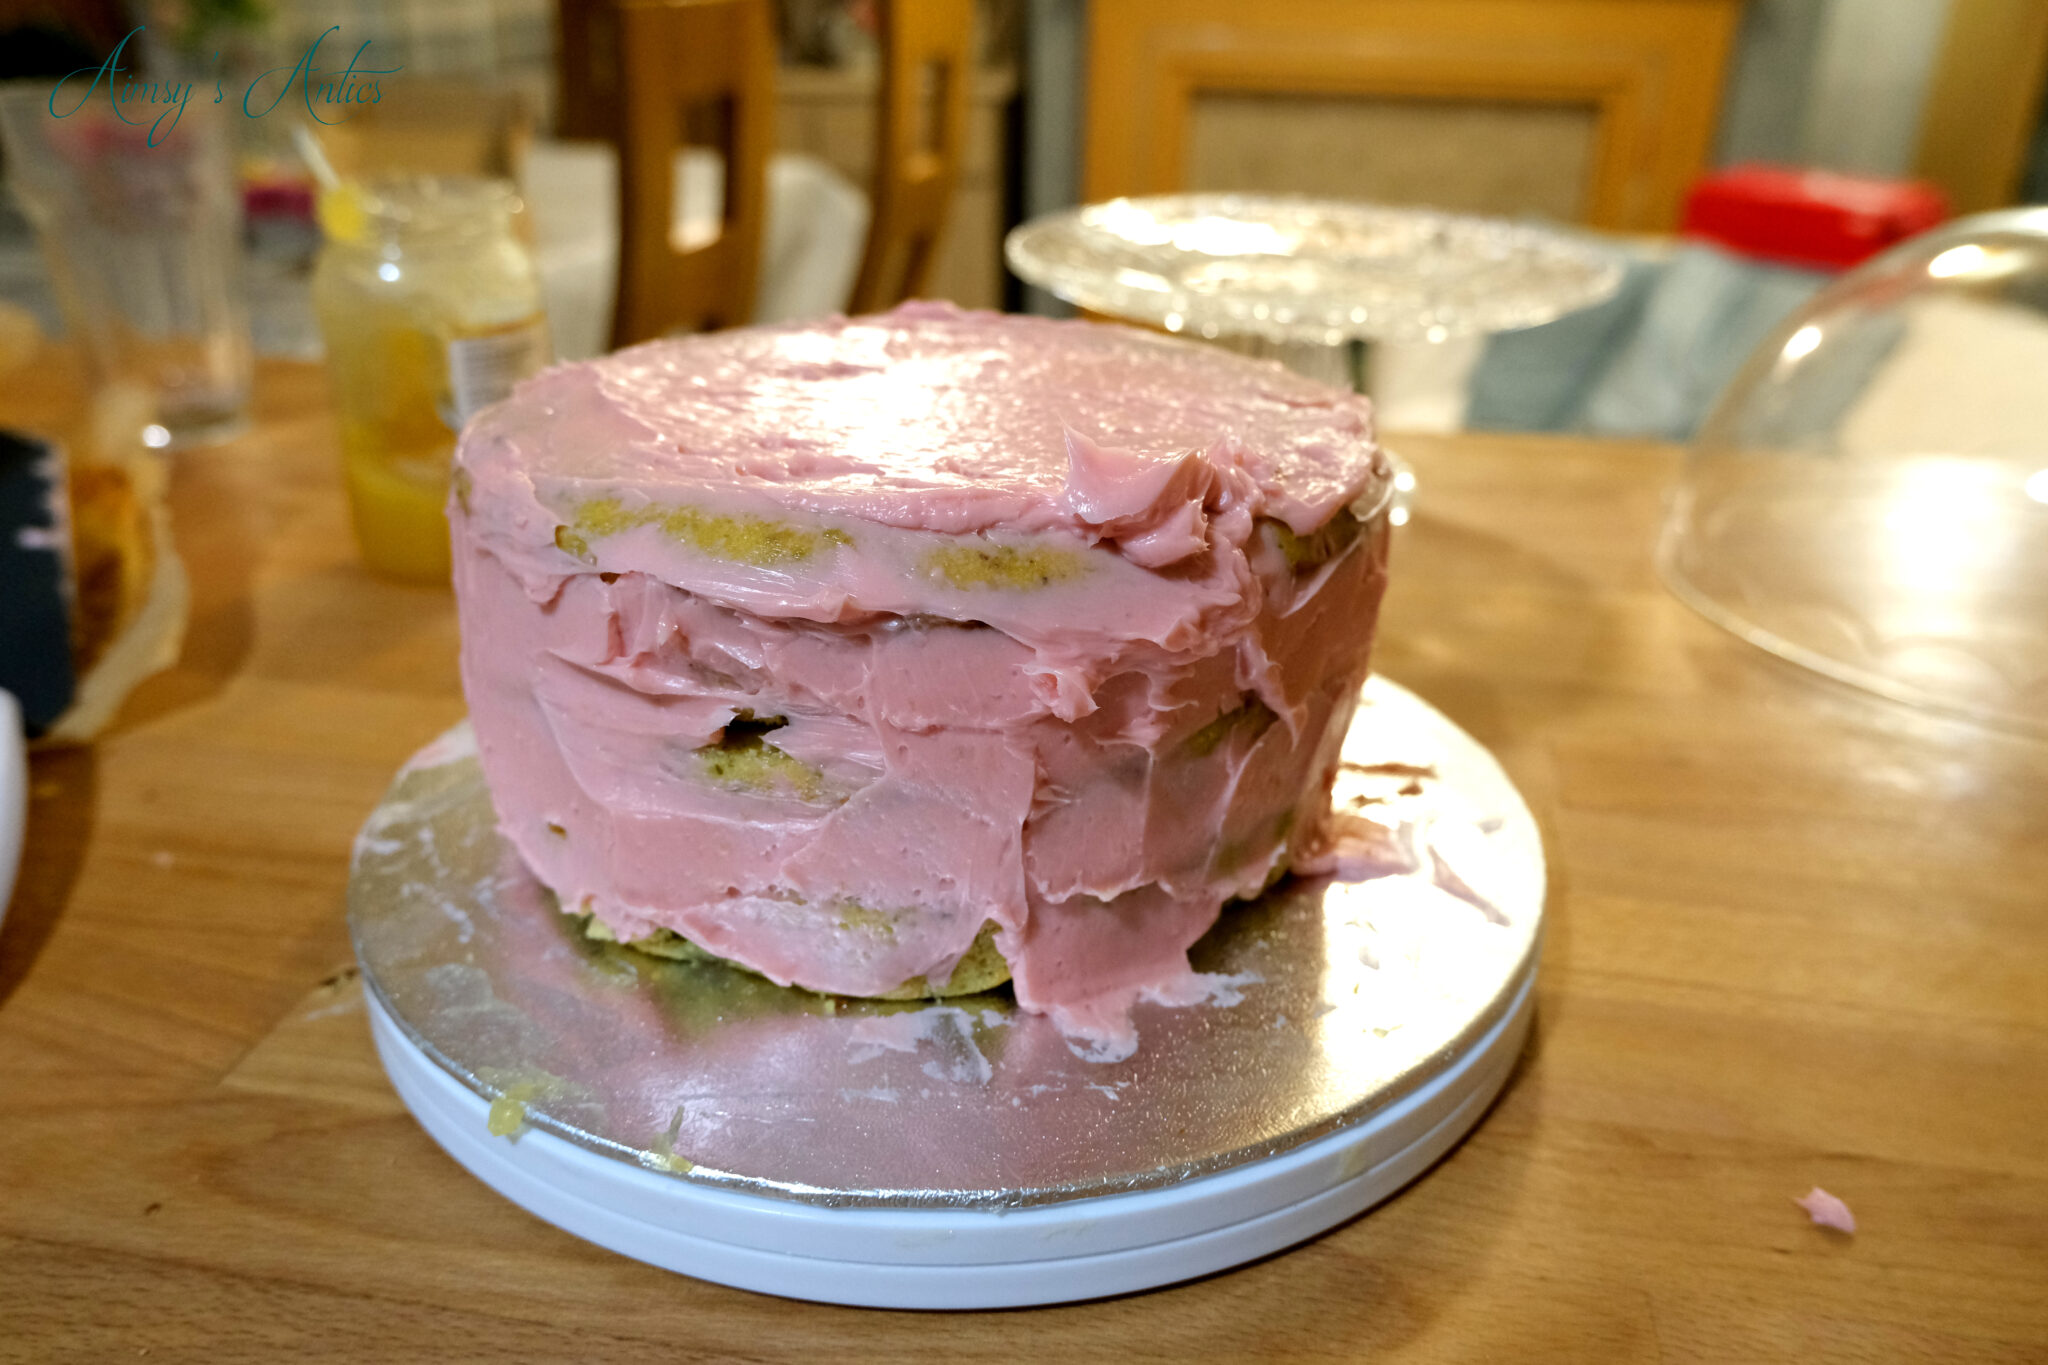

When the cake is covered, place this in the fridge to chill and allow the crumb coat to set. You may still see parts of the cake through this, as it should be a thin layer of buttercream.
Frosting the Pistachio and Rose Cake:
When you are ready to frost the cake, remove it from the fridge and allow it to come up to room temperature. This will make it easier at adding on the next layer of frosting. If the cake is too chilled, then you may find that the fresh buttercream does not smooth on as well as the cake is cooling it too much.
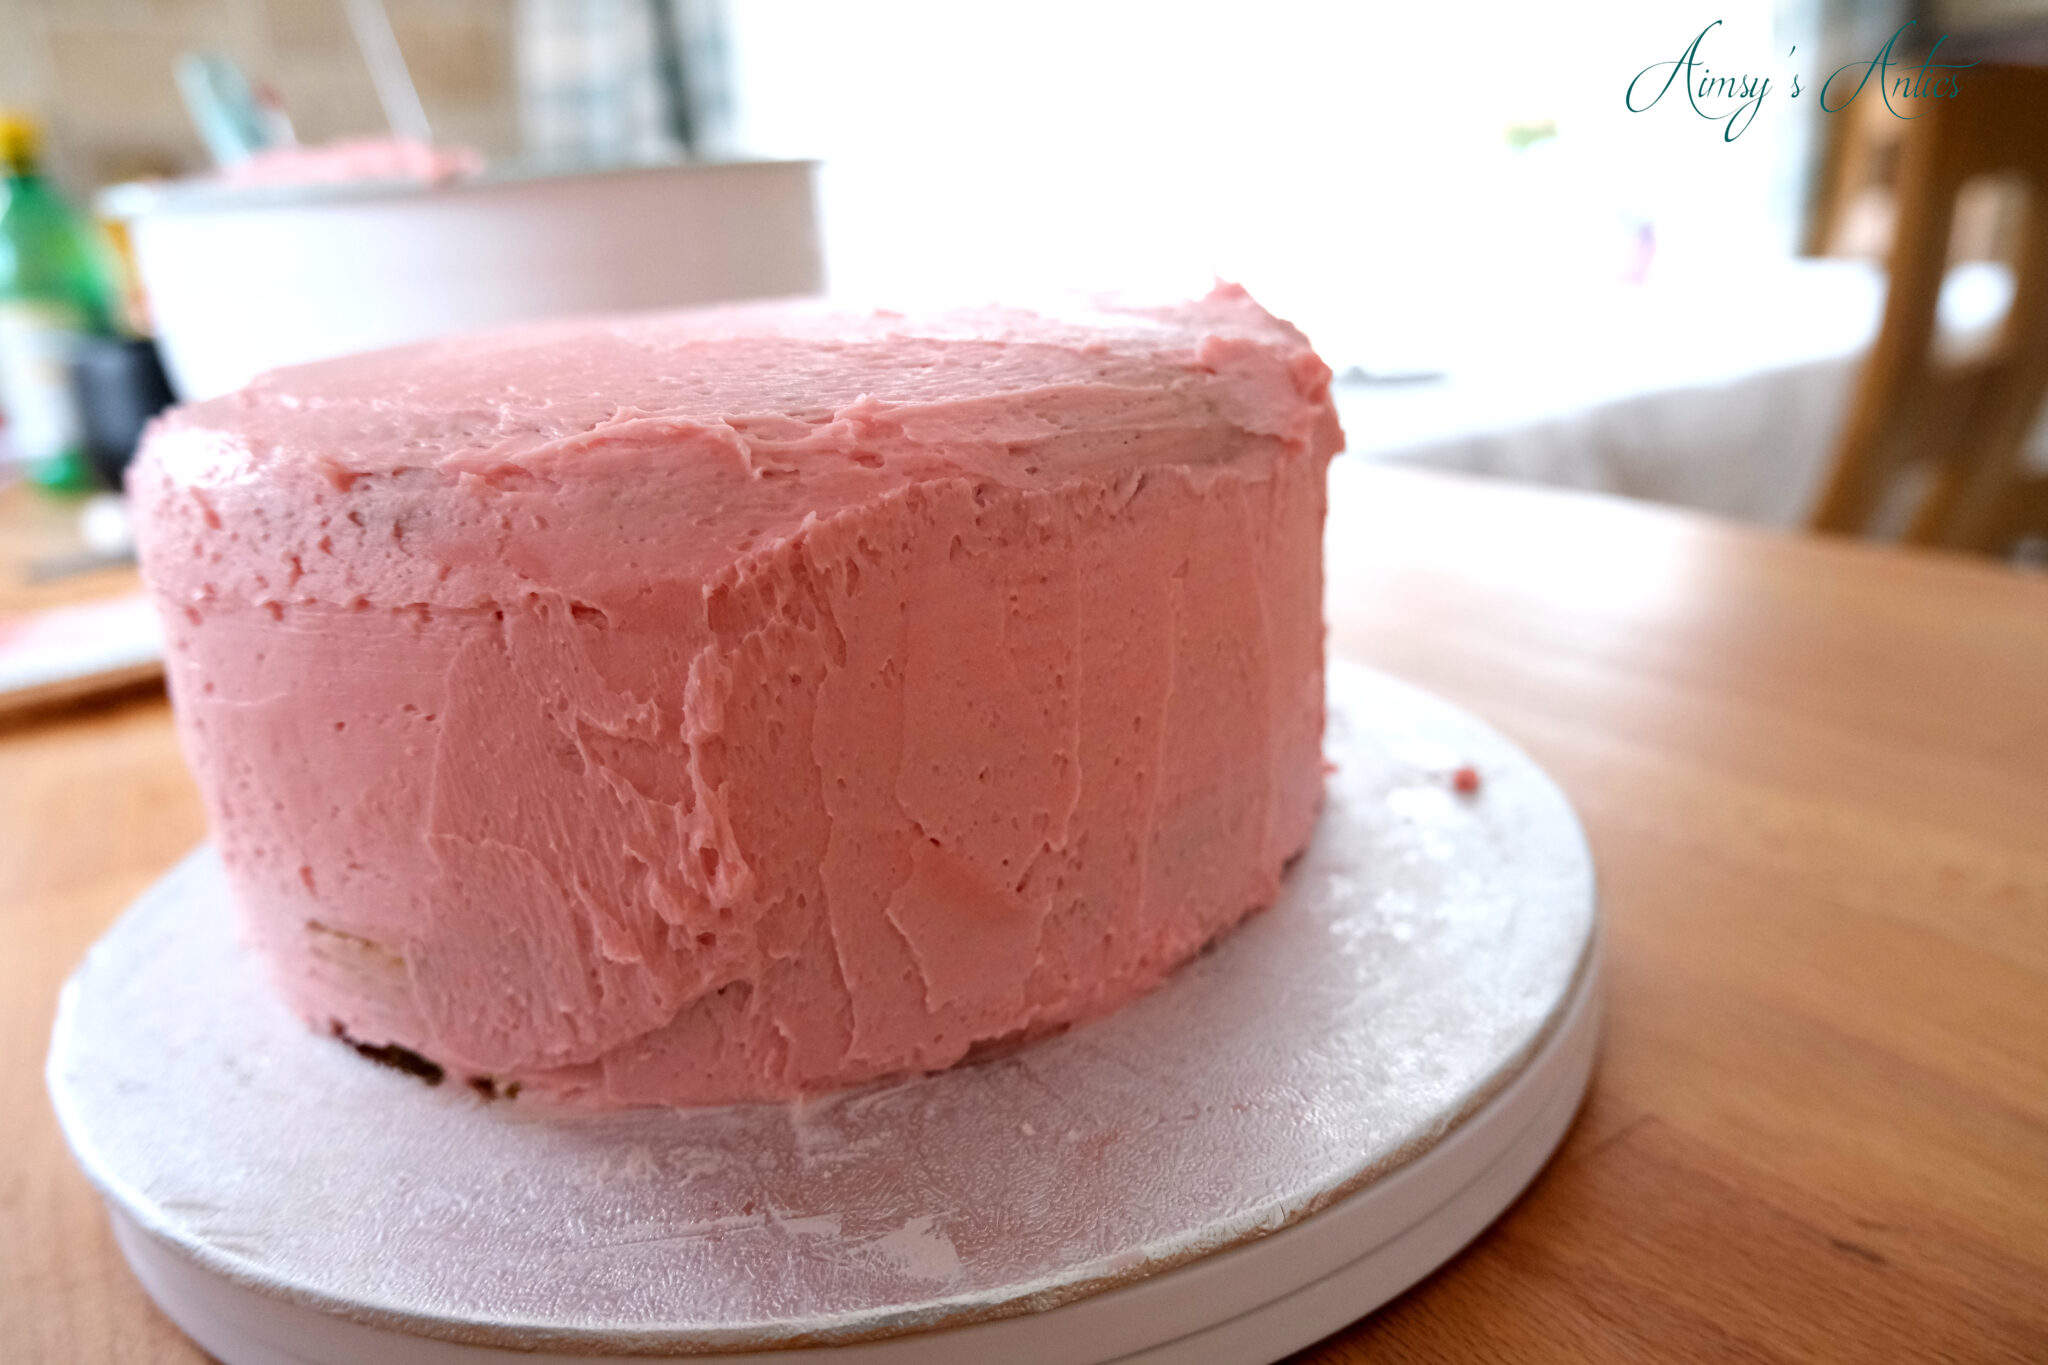
Again, place a layer of the buttercream on and begin smoothing it around with the scraper. Keep adding and smoothing until you are happy with the finish. It is quite a difficult task to get the buttercream perfectly smooth without lots of practice. Don’t worry though, as there are some decorative touches that can be added, and will make the cake look pretty as well as hiding any blemishes.
Decorative touches:
You can use different piping tips to create beautiful designs on the cake. I created small petal flowers as well as some buttercream roses to decorate the pistachio and rose cake.
Small petal flowers
To create the small petal flowers (sort of representing cherry blossom) then you need a small closed star piping tip. Place this in the bottom of the piping bag, and cut the piping bag tip so the nozzle sits snuggly in the hole. Spoon in the swiss meringue buttercream and bring the buttercream to the end so that it is coming out of the nozzle. Simply squeeze the top of the piping bag, with even pressure, for the buttercream to come out. Gently place the tip towards the cake and press a small amount of buttercream until it comes out. Lift the tip away and stop squeezing and you should have a little petal flower.


Buttercream Roses
To make the buttercream roses, you are going to have to improvise a bit of the kit. Usually, for flower piping, you need something called a piping nail. This allows you to hold and turn to create the buttercream flower. However, you can DIY one of these.
Take a small square piece of cardboard, roughly 5cm x 5cm and cover it in tin foil. Make sure the tin foil piece is quite large so that it can cover the square, as well as create a handle underneath. Scrunch the tinfoil under to create the handle part and you then have your own DIY piping nail!


To create the roses you are going to need a petal tip. This is a piping nozzle that has a line in the middle creating the petal shape. They come in a variety of sizes, so choose according to the size of rose you want to make.

Place a small amount of the frosting straight onto the piping nail and place a small piece of greaseproof paper over it. This will allow you to pipe the rose and move it off the nail easily.
Then create a small mound of buttercream in the middle of the piping nail. With the larger part of the tipping point to the bottom, hold the tip vertical to the mound and begin squeezing the piping bag gently, moving the tip around the mound in small motions, releasing the squeeze. This should create small pieces of the buttercream, going around the centrepiece, like the petals of a rose. Keep going until the rose builds. For the final layer of the petals, turn the bag so the larger part of the tip is at the top, curving the buttercream up and around the rose.


Attaching buttercream roses:
When piped, place the buttercream roses in the fridge or cool place to set and harden slightly. This will make it easier to manoeuvre onto the cake.
After the roses have chilled, pipe a little of the frosting onto the designated place. Use a flat knife or spatula to remove the rose from the greaseproof paper and put it onto the piped buttercream. Then the buttercream rose is attached!
Finish off with sprinkling a bit of crushed pistachio for a nice pink and green contrast. You can also add some edible dried rose/flower petals for more colour contrast too. I bought mine from Polly’s Petals on Etsy.
Then the pistachio and rose cake is complete!


Looking for more makes and bakes? Why not check out the recipe section of the blog?
Pistachio and Rose Cake Video:
Here is the video version of this post. You may find following some of the steps easier by video. Don’t forget to give the video a thumbs up if you have enjoyed it and subscribe to my channel to keep up with more creative goodness!
Pistachio and Rose Cake – Pin it!
If you enjoyed the post, why not pin it and save it for later? Don’t forget to follow me over on Pinterest too!


Pistachio and Rose Cake Recipes:

Pistachio and Rose Cake
Ingredients
- 95 grams Ground Pistachio
- 250 grams Plain Flour
- 190 grams Caster Sugar
- 180 ml Vegetable Oil Rapeseed Oil
- 240 ml Milk
- 3 Large Eggs
- 1 1/2 tsp Baking Powder
- 1/2 tsp Salt
- 1/4 tsp Cardamom
- 1/2 tsp Almond Extract/Essence
- 1 tsp Vanilla Extract/Essence
- 2 tbsp Lemon Juice
Instructions
- Preheat the oven to Gas Mark 4 or 350°F. Also grease or line your chosen cake tin.
Make the cake mix
- In a mixing bowl, sift in the flour and add in the ground pistachios. Also add in the baking powder, cardamom and salt to the bowl. Give this a mix together until combined. Set aside.
- In a separate large mixing bowl add in the eggs and begin mixing in the sugar. Next, add in the vanilla extract and almond extract. Beat all together until the mixture appears to have thickend and possible tripled in size. Then, begin adding in the vegetable oil, mixing this into the mixture fully.
- Begin adding in a few spoonfuls of the flour mix into the wet mixture. When this has incorprated add in a small amount of the milk. Keep alternating betwen the four and milk until you have one part of each left.Then, add in the lemon juice followed by the remaining milk and flour. Mix until smooth.
- Place the mixture into the pre-lined baking tins and bake in the oven for approximately 50 -60 minutes. this will depend on the oven type. The top will begin to golden and a skewer should come out clean when inserted to the middle of the cake.
- Remove from the oven when baked and allow to cool. Then the cake is ready for frosting.
Video
Rose Swiss Meringue Buttercream
Ingredients
- 4-5 Large Egg whites
- 220 grams Granulated Sugar
- 340 grams Butter (unsalted) cubed
- 60 ml Rose Water
- 1 tsp Lemon Essence
- 1/4 tsp Salt
- 1/4 tsp Pink food colouring (optional)
Instructions
- Before starting, ensure the mixing bowl used is completlelyclean. Use lemon juice to wipe around the bowl to remve any grease from the bowl.
- Place the mixing bowl on a pan of simmering water (ban-Marie style). Make sure the water does not touch the bottom of the bowl.
- Add in egg whites and sugar and gently whisk (it doesn't have to be vigorous). Heat and mix until the temperature reaches between 68°c -71°C (155°F – 160°F.
- Remove from the heat and begin whisking on a medium-high setting. The meringue should begin forming into stiff peaks and appear thick and glossy. Allow the mixture to reach room temperature.
- Gradually add in the butter a few cubes at a time. Make sure each butter part is fully incorporated before adding the next. Ideally use the paddle attachment of a stand mixer for this.
- Next add in the salt, rose water and lemon essence. Make sure all is fully mixed in.
- [Optional] Add in food colouring to colour the buttercream. Ideally use gel colouring, as this incorporates better; however regular food colouring can still be used.
- Use buttercream to frost the cake. It can also be stored in the fridge, ensuring it is in an airtight container. Return the buttercream to room temperature and mix a little before using.The buttercream can also be frozen, again in an airtight container. Defrost and return to room temperature, re-mixing before use.
Notes
https://www.theflavorbender.com/naked-raspberry-cake-with-pistachio-and-rose-water-swiss-meringue-buttercream/

WOW this seems so tastefull and the decorating you did was amazing. Good job, I will definitely try to make it myself.
https://justakiddd.blogspot.com/
Thank you! Love how it turned out, although there was just a bit too much cake for us to get through! haha
Have fun baking!
Aimsy xoxo
I would never think to put these flavours together, what an interesting recipe! Thanks for sharing x
Definitely an acquired taste, but we found it delicious!
Thanks for commenting 🙂
Aimsy xoxo
This not only sounds fantastic but it looks amazing!
Sarah x
Aww thank you! I am so happy with how it turned out, although would prefer the cake to be a little lighter next time. it was almost too pretty to eat haha!
Thanks for commenting 🙂
Aimsy xoxo
Oooh what a beautiful looking cake! I love the story behind it as well. X
https://www.femaleoriginal.com
It turned out so well, didn’t it?! Such a great story, would love to know what the outcome was!
Thanks for commenting 🙂
Aimsy xoxo
This sounds absolutely delicious! Thanks for sharing
Glad you like it! It was yummy!
Thanks for commenting 🙂
Aimsy xoxo
Wow this looks amazing! What a beautiful cake as a treat for your Mom’s birthday! Thanks for sharing.
Glad you like it! Yes, she loved the cake, as did I making it.
Thanks for commenting 🙂
Aimsy xoxo
Looks so Yummy! Thanks for sharing.
Infinitely Posh
Glad you like it, it was delicious!
Aimsy xoxo
This is such a pretty cake, with a great story attached! I don’t think it would look quite that pretty if I make it, but I bet it will be delicious. Thanks for sharing the recipe.
Aww thank you, I love how it turned out (I was worried i wouldn’t be able to pipe it). I am sure with some practice it would turn out great, and if not then like you say it will be delicious!
Thanks for commenting 🙂
Aimsy xoxo
The roses on top of this cake are beautiful! Saying that, this whole cake looks beautiful! I’d love to give this a try Aimsy x
Lucy | http://www.lucymary.co.uk
Aww, thanks, Lucy! I was worried they were not going to pipe very well with the buttercream, but they turned out nice, didn’t they?
Happy baking!
Aimsy xoxo
Wow! How yummy and gorgeous! Definitely going to try and make this unique flavored cake!
Glad you like it! It certainly is a unique flavouring cake, but delicious none the less!
Have fun baking!
Aimsy xoxo
In LOVE with your pretty decoration of this love cake. My mum is from Pakistan so Persian love cake is a family treat that runs in my blood. Pistachio and roses are the flavors of my motherland combined beautifully in this light and decadent dessert. 🙂
Aww, thank you, Jaya! Oh, I bet she is able to make this so much better than I have. I hope I have done it justice!
It is a great balance of savoury but sweet, isn’t it? Delicious flavours together!
Thanks for commenting 🙂
Aimsy xoxo
Omg yum! One of my fav flavours is pistachio. So perfect. I would fall in love with anyone who baked me this cake hahaha Thanks for sharing xx I’ll pin for later!
http://www.lynnmumbingmejia.com
Me too, pistachio has to be my favourite ice-cream flavour, so this cake just had to be made!
Definitley, you an see why it is called a love cake haha!
Thanks for commenting 🙂
Aimsy xoxo
Oh wow this looks & sounds incredible!! I need to make some pistachio cake ASAP.
Aww thanks, Sophie! I bet your pistachio cake will be super tasty; you have a way with baking!
Thanks for commenting 🙂
Aimsy xoxo
This cake has exciting flavors! I love to try this recipe. Thanks 😉
Oh, it definitely has exciting flavours! Glad you like it and have fun baking!
Aimsy xoxo
This cake looks super yum! My sweet tooth is calling!
xoxo
Lovely
http://www.mynameislovely.com
Thank you, it was delicious!
Thanks for commenting 🙂
Aimsy xoxo
I am a huge fan of pistachio! Love that they’re included in desserts :). The rose cake looks gorgeous! Love that you made everything yourself, and the roses are straightforward. I really need to get into baking someday. Thanks for sharing!
Nancy ✨ mdrnminimalists.com
Oh, I know, it is the best nut, isn’t it?! The best thing about baking is; if it doesn’t go quite to plan, it is usually still edible and delicious haha! Have fun baking!
Aimsy xoxo
Holy moly this looks delicious!!! Not only are you the crafting queens but you’re a star baker too!? This cake looks gorgeous and I am jealous of your piping skills. I will have to attempt this cake though as I am a sucker for good cake. Thanks for sharing this recipe, I’ve never heard of a Persian Love Cake.
Em x
Aww, thanks! A multitude of talents… it’s all creating though isn’t it? I was worried about the roses when I started piping at first, but they behaved this time! Would love to know your thoughts, if you do have a go at making this.
Thanks for commenting 🙂
Aimsy xoxo
This cake look amazing and sounds so delicious. Thank you for sharing recipe.
New Post – https://www.exclusivebeautydiary.com/2021/03/clarins-lip-comfort-oil-04-candy.html
Glad you like it and thank you!
Aimsy xoxo
The cake looks delicious & the buttercream roses are so pretty! You did an amazing job!
I have never had a pistachio & rose cake before & I had no idea the flavors would work well together!
Aww, thank you! I was worried about how they were going to turn out. It is an acquired taste, but if you like them flavours it will be perfect for you!
Thanks for commenting 🙂
Aimsy xoxo
This looks so good!! thanks for sharing!!
Aww thank you! It tasted yummy 🙂
Aimsy xoxo
I love everything that has pistachio in it and this looks absolutely delicious! I love the decoration, you have some amazing piping game! Thank you for sharing x
Pistachio is one of my favourites too! Thank you…I was worried the swiss buttercream wouldn’t pipe well, so was pleasantly surprised!
Glad you liked it 🙂
Aimsy xoxo