
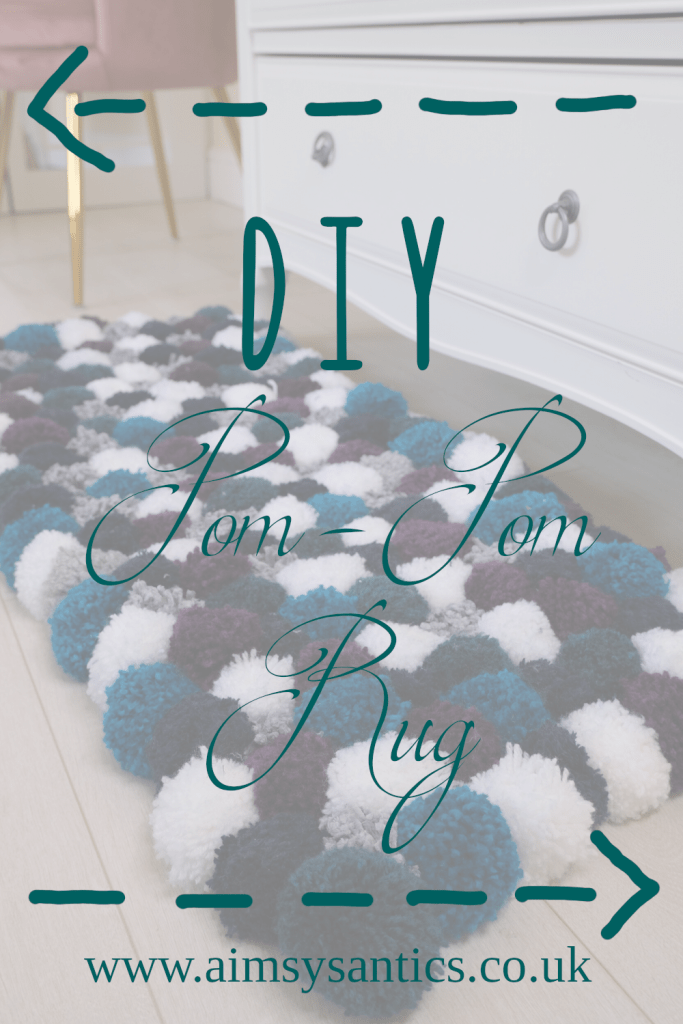
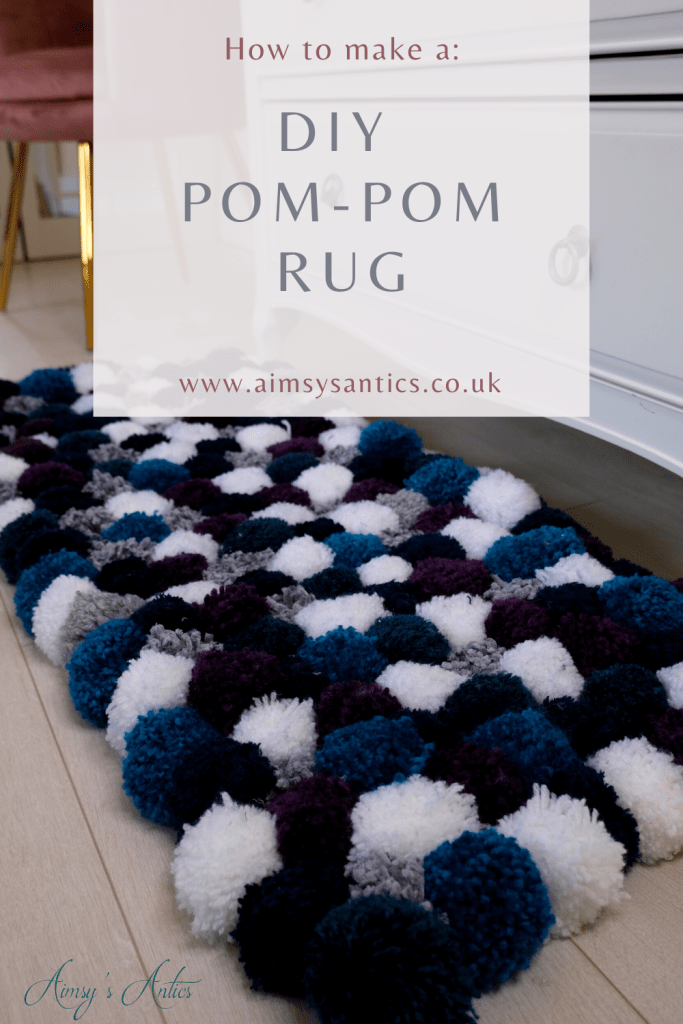
Today I bring you another crafty DIY that is perfect for adding a bit of cosiness to your home decor. See how to make this fabulous DIY pom-pom rug for your home!
I love a good pom-pom, I mean who doesn’t? There is just something about the little fluffy ball of wool that brings a little joy. Now, I have made a few other projects using pom-poms; pom-pom cushion and used pom-poms on this crown-shaped cushion to name a few. They are perfect for adding a bit of an added touch to your decor. Pom-poms are being used more and more in decor pieces, with a pretty price to match. It makes sense to have a go at making your own, doesn’t it?
Having looked on Google, the style of this rug in this tutorial isn’t as popular in the stores. They do have versions made of small pom-poms tightly packed together though, which can set you back £200 – £300! Luckily making your own version won’t cost you this much. It is also a perfect way to express yourself through your decor.
Now, pom-poms come in all shapes and sizes, some denser and others more fluffy. I’ll show you how to make them using a pom-pom maker. Plus there is a fabulous tip on how to get your pom-poms a little more fluffy!
So, if you fancy making your own DIY pom-pom rug, then let’s get crafting!
**Jump to the end of this post for the Video version of this DIY.***

DIY Pom-Pom Rug:
So, you are going to need a lot of pom-poms for this DIY pom-pom rug. I think I have used close to 200 pom-poms in total! This is insane as it just doesn’t look like there is that many. You need to have a lot to be able to pad out the rug.
Ideally, you want thick wool to make your pom-poms, but not the big chunky type. This will give your pom-poms a bit of volume, especially when they are fluffed out. You can use various thickness, but you may find that the thinner the wool, the more straggly the pom-pom.
I used a velvet effect wool for some of my pom-poms, and the shed from this tenfold. So, although the pom-pom is lovely and velvety soft, the shedding is immense. It also doesn’t fluff up as well as standard wool, so something to make a note of when choosing your wool.
I wanted to tie in this DIY pom-pom rug with my bedroom decor, so the colours have been inspired by my wall canvases. Rich blue, purple and teal colours with the added balance of white and grey. I love the contrast between all the colours of this rug, and that it ties in with my other decor.
*Just to warn you, there will be a lot of repetitive movement involved with making your pom-poms, so please be careful. You may find that your hands, wrists and arms begin to ache when making these. Make sure that you rest in between making them. I know, as I am paying the price now with an aching arm*

DIY Pom-Pom Rug – What you need:
To make the pom-pom rug, you are going to need the following items:
- Wool – colour and thickness of choice. You will need approximately 15 balls of wool to make the number of pom-poms needed.
- Non-slip grip mat – I picked mine up from B&M or Home Bargains
- Pom-Pom Maker or cardboard pom-pom maker
- Sharp scissors
- Lint brush

Step 1 – Make Pom – Poms
There are a few ways to make pom-poms, with a pom-pom maker or with a cardboard template pom-pom maker. For this project, I opted to use a pom-pom maker, purely for the durability of it, as so many pom-poms are needed. I also find these you get better pom-poms. If you don’t have a pom-pom maker then check out my guide on how to make them in this pom-pom making post.
To use the pom-pom maker, you want to open up the arms of the maker so that they are matching on either side. Then begin wrapping around your chosen wool on one of the arms. Keep going until it is full of wool. Ideally, you want the bottom of the arm to go from curved to straight with the wool, but it is totally up to you how thick you want the pom-pom. Place this back into the middle of the pom-pom maker and repeat on the opposite arm. I tend to leave the wool attached and bring it over at this part, but you can snip it here and start with a new piece of wool.

Once both sides are complete, you want to cut down the middle of the pom-pom maker to ‘release’ the wool. Then take another piece of wool and place this down the middle of the pom-pom maker. Loop this around and tie a tight knot. I often tie one side and then take the wool around again, double knotting on the opposite side for extra stability. Make sure you leave a long-ish tail as this will attach the pom-poms to the mat.


Pom-Pom tip:
If you want to really fluff out your pom-poms then grab a lint remover or dog/cat brush. Brush this all over your pom-pom and it will remove any loose fibres of the wool. It will also separate out the wool threads giving it a fuller and fluffier look.

Keep making until you have enough pom-poms! Did I mention you need a lot? 😂
Step 2 – Cut down the non-slip mat
Once you have enough pom-poms (or have had enough of making them for now), it is time to cut the non-slip mat to size. I folded mine to give a rough guide of the sizing and cut down. What is good about this type of non-slip mat, is that it is grided so you can follow one length down and get more of an even cut.
The design, size, and length are totally up to you with how you want the rug to look. I fancied a runner type rug, but I have seen circular ones as well as heart-shaped rugs. The possibilities are endless!
Once cut, place down on the work surface you are going to use and move onto the next step.

Step 3 – Add on the pom-poms
Now, it’s the fun part of getting your DIY pom-pom rug to take shape…attaching the pom-poms. You can do this in a pattern form or just add them on as you like without a set pattern (the method I went for). If you do want to do some sort of pattern, it is best to draft this out onto the non-slip mat before adding the pom-poms. Then add the corresponding pom-poms to where is designated on your pattern.

To attach the pom-poms you simply have to take the tail of the pom-pom. There should be two strands from the knots you tied. Thread one strand through one of the gaps in the grid of the mat, and thread the second strand through another. You may find that the gap between where you tie the strands increases and decreases, dependent on the placement of other pom-poms. Just be mindful that increasing the gap between and tying these may alter the shape of your rug, as the non-slip mat will be getting pulled into where the knot is. If that makes sense. This is the reason my rug went a little misshapen at the end.

It is best to double or even triple knot this tail to make sure it is fully secure. Then, trim down the tail once the knot is in place. Make sure it isn’t trimmed too short, as I found some of the pom-poms came loose and the tail was too short to re-tie it on. If this happens to you, use a needle and thread to create a new tail. Attach it with this newly made tail.
Then you have your DIY pom-pom rug!


Let me know what you think of this DIY in the comments below. What colours would you use?
DIY Pom-Pom Rug issues:
Because the pom-poms are made of wool, you may find that the rug sheds /malts through wear. You may also find that loose strands of the pom-pom may come loose. This shouldn’t be a problem and the pom-poms should stay quite full. If you do find that some of the pom-poms are getting past their best, then you can make a new pom-pom, remove the old and replace it with the new.
I have also found that walking over the rug can be slightly uncomfortable and lumpy. This is because the pom-poms have been really fluffed up, and you are feeling the knot where the wool has been bunched tightly together. Now, it is not really an issue as such, as it is not painful (or like walking over a bed of nails) but just wanted to warn you in case you think there is something wrong with the rug.
DIY Pom-Pom Rug Video:
Check out the video version of this post here! There is usually always a video for every blog post I write, so be sure to check out my YouTube Channel. Don’t forget to like and subscribe if you enjoy the content. I would love for you to join the crafty family of Aimsy’s Antics!
DIY Pom-Pom Rug – Pin it!
If you enjoyed this post, why not spread the love and pin it!



I love this idea, it looks so good! I think the colours look amazing. I have seen pompom rugs around before and have heard you can easily make one yourself so I guess I know what I shall be making this week! Thank you for sharing this tutorial, I think your rug looks fab!
Em x
https://www.loveemblog.com
I saw it on Pinterest ages ago and have only just got around to making it. They are easy to make, but just take a long time to do. Perfect if you have free time on your hands though!
Glad you like the rug, you will have to show me how yours turns out if you do have a go at making it!
Thanks for commenting 🙂
Aimsy xoxo
That’s a lot of hard work and it comes out so beautiful, you never leave a chance to impress us. We have to shift in our new home and I’ll try to make this for my room.❤️❤️❤️
Oh, it takes a long time to make, but so worth it for the effect afterwards. Glad you like it!
It will make a great addition to your new home, you will have to show me how yours turns out if you do end up making it!
Thanks for commenting 🙂
Aimsy xoxo
That is so cute! You are always coming up with great ideas that I wouldn’t even think of☺️
I saw this ages ago on Pinterest and just knew I had to make it.
Glad you like!
Thanks for commenting 🙂
Aimsy xoxo
I am in love! I’ve bookmarked this to do over summer when the weather isn’t nice, been looking at buying one of these but would be more fun to do it myself! Thank you!
So glad you like it! Just to be warned it takes forever to make, so great idea with having a go when the weather isn’t as nice. Definitely more fun to make your own!
Thanks for commenting 🙂
Aimsy xoxo
This is so cute! I love your tip about getting the pompoms to look fluffier, you wouldn’t think a lint remover would be able to make them puff out like that 🙂 x
https://www.femaleoriginal.com
Glad you like it, it is so cute, isn’t it? I only found out about it recently, and it definitely does give you fluffier pom-poms. The only downside is all the fine bits of wool it pulls off and having to clear it up!
Thanks for commenting 🙂
Aimsy xoxo
Wow! This is so cool and such a good idea I would love to do something like this!
Amber – The unpredicted Page
Glad you like it! It has turned out so good, hasn’t it?
Happy Crafting and thanks for commenting!
Aimsy xoxo
This looks amazing I’m definitely gonna try and make my own!
Thank you, so happy with how it turned out! You will have to send a pic of how yours turns out if you do give it a go!
Thanks for commenting 🙂
Aimsy xoxo
This is so creative, I love it! I wish I was this talented 🙂
Glad you like it! Oh, it is a really easy project to make…no special skills needed really! I am sure you would be able to make a fab pom-pom rug!
Thanks for commenting 🙂
Aimsy xoxo
I love this idea Aimsy! The colours really blend well together and it’s so cute! x
Lucy | http://www.lucymary.co.uk
I love how the colours blend together! Glad you like it 🙂
Thanks for commenting 🙂
Aimsy xoxo
Wow, this is a craft to take up many evenings! I applaud your patience making so many pompoms; they look amazing, and I appreciate the warning on taking breaks between all the twists.
I love the color pattern to this rug! And being able to easily replace old pompoms with new ones has its pluses.
Thanks for sharing!
It definitely does take up many evenings! It makes it so much more versatile to be able to replace the pom-poms, especially if they are wearing out.
Glad you liked!
Thanks for commenting 🙂
Aimsy xoxo
Your idea sounds very good. The colors looks really good together. Love to see all your posts
Glad you like it. I love how the colours go together!
Thanks for commenting 🙂
Aimsy xoxo
This is so cute and looks fluffy, the colors are cool and well blended. Thanks for sharing
Oh, it is so fluffy! I love how to colours go together, definitely catches your eye!
Thanks for commenting 🙂
Aimsy xoxo
You should absolutely sell these! They’re fab! And the second I looked at it, I wondered what it would feel like to walk on. Gosh, I bet it’s soft on your feet!
Aww, thanks! I would worry about the durability of them for selling and would need an army to make all the pom-poms for me But i definitely need to get some little business going for all my makes…Covid has slightly slowed this down though!
Oh, it is so soft under feet, I love it!
Thanks for commenting 🙂
Aimsy xoxo
That looks so cool. I remember my mum making Pom poms when I was a kid….I wonder if she’s make me a rug
Thanks! It is definitely a make to have a go at if you love making pom-poms!
Thanks for commenting 🙂
Aimsy
This looks incredible! I’m sure this would take forever for me to make because I’m not sure if I could handle the repetitive nature of it for that long but the end product looks so worth it!! It looks so cosy and fluffy. All I’m seeing while I’m looking at this is how cute my dog would look sleeping on it although I’m fairly confident that he’d ruin it…x
Sophie
Oh, it takes forever to do. You definitely need a bit of patience when doing this, but so worth it for the end result!
I bet you dog would love something like this, definitely would look super cute and cosy asleep on it!
Thanks for commenting 🙂
Aimsy xoxo
That was a smart idea to add a non-slip grip mat on the back. Your pom pom rug turned out so so adorable. I love it!
Yeah, grip slip mat gives it something to tie the pom-poms too, as well as offering a bit of grip when it’s on the floor. I think adding another layer of the matting underneath, and glueing it on would make it even better at gripping the floor.
Glad you like it and thanks for commenting!
Aimsy xoxo
I love this idea! Thank you so much for sharing! Maybe I’ll have to give this a try my daughter’s room.
So glad you like the idea and it has inspired you. I bet your daughter would love it!
Thanks for commenting 🙂
Aimsy xoxo
Ooooh! I’ve seen a lot of these pom pom cushions and they look so cute!!! Big plus when you can make it at home for so cheap and can color coordinate however you want. So cool that there is even a pom pom maker! It turned out so nicely. Thanks for sharing this amazing DIY!
Nancy ♥ exquisitely.me
Definitely a big plus to making your own with matching it to your decor! Pom-pom makers are great, definitely make project like this a bit easier to complete! Glad you like 🙂
Thanks for commenting 🙂
Aimsy xoxo
Oh my gosh – I love this! It looks so soft to the feet!
It is so soft on your feet. Definitely will be a winner for the colder months!
Thanks for commenting 🙂
Aimsy xoxo
I remember making rugs when I was at school but never a pom pom rug – this is so cool! Flora was reading this post with me and has informed me that she would like one for Christmas. I’m not clear if she’s expecting me to make it or will be making it herself, haha. Fab post, Aimsy, and your rug is stunning 🙂 Lisa xx
I would love to have a go at a large weaving rug project, but I think that will take a bit more skill than these pom-poms.
Oh, that would be a great project for you to make together unless she decides its one for you to tackle for her
Glad you like it, would love to see how yours turns out if you do give it a go!
Thanks for commenting 🙂
Aimsy xoxo
This is so cute!! I love the colors. It looks so plush and soft.
The colours are lovely, aren’t they? (but I’m biased ) Definitely plush and soft under feet.
Glad you like!
Thanks for commenting!
Aimsy xoxo
How cute! And it looks super cozy. I’d love to step out of bed onto a fluffy pompom rug.
Oh, it is so nice to step out of bed onto! Glad you liked!
Thanks for commenting 🙂
Aimsy xoxo
What a cool rug! I love that pom pom design, very neat.
Thanks! Glad you like it 🙂 I am loving the design!
Thanks for commenting 🙂
Aimsy xoxo
I love that rug! What a great idea. You’re so creative. I am so tempted to try this. 🙂
Glad you like it! Takes a bit of time to make, but so worth it!
Thanks for commenting 🙂
Aimsy xoxo
That rug looks SO COOL! I will definitely have to do this!
Glad you like it! Have fun crafting!
Aimsy xoxo
My kids would absolutely love this rug and I am convinced they would play on it and probably sleep on it, and I’d probably have to make two (one each), to keep them happy. It looks so cute and super cozy, Aimsy! My head is spinning at the thought of making so many pom poms though! Well well done!
Oh, this would be perfect for kids! You’re right though, it takes a lot of effort in making the pom-poms, but definitely worth it once it is made. Maybe the kids could help?
Glad you liked it and thanks for commenting!
Aimsy xoxo
This is so cute!!! I’ve never heard of this before! Thank you for sharing!
Glad you like it! I love how it has turned out, definitely very cosy on the feet.
Thanks for commenting!
Aimsy xoxo
Oh my gosh, this is so cute!! I could definitely use a rug like this is my room! I love how easily customisable it is. All you need is your favourite coloured wool!
Glad you like it! It is so customisable, and if you want to change out one of the colours, just need to make more pom-poms and attach them.
Thanks for commenting 🙂
Aimsy xoxo
I absolutely love the colours of your rug. Stunning. I’m new to pom pom rug making and in the process of doing my first for my great nieces 1st birthday. I would very much like to make a circular rug and wonder if you have any tips of sizing/cutting the mat base please? I have 3 great nieces and 2 great nephews having 1st birthdays this year and have decided they will each get a hand made rug for their nursery. Let’s hope I can bring it off. 🙂
Aww, thank you! The colours go so well together, don’t they?
Good luck with your makes, and be careful as it can really put a strain on your hands making so many pom-poms! I am sure they will be greatly received. For the cutting of the mats, I would work out which size you want and then work out the half of this measurement. Fold the mats in half and mark out your measurements. Then when you cut it, the sides should be equal. You will have to work out the circumference and radius to get them the size that you prefer.
Also with the pom-poms make sure that they are secured on tight. Recently a lot of my pom-poms have started shedding so I am going to have to replace them. You don’t want the little ones chewing on the shedding yarn!
Again good luck with your makes…would love to see how they turn out!
Aimsy xoxo
Do the project sale well?
I am not sure, I haven’t sold one before.
Aimsy xoxo