

Looking to try resin art for the first time? Well, I have you covered in this week’s post with these DIY resin art pieces as I try resin for the first time.
Welcome or welcome back to Aimsy’s Antics. I have an exciting craft to share with you today, and one that I have been wanting to try for a while now. I am going to be trying resin for the first time and creating my DIY resin art with a beach theme.

DIY Resin Art
This DIY resin art is from a craft kit that I featured in 5 craft kits to try. The kit is by Resin8 who sell various types of kits for you to try out, as well all the different items, including resin, mica colour to create your art.
But what is resin? Resin is an organic compound that comes in two separate liquids. The resin and hardener. When you mix these two substances in equal amounts then it creates the resin and allows it to cure. This then becomes plastic which is hard and durable. There are lots of different types of resin, depending on the craft project, so it is important to get the correct one depending on what you are creating.
As this is a surface covering project then we are using a resin called ‘coat it’. This is typically the type of resin you would use for creating flat pieces of art. You will need casting resin for creating designs in moulds, like coasters for example. You also have to take into account what the end product is going to be, so if making coasters, for example, you will want to make sure the resin is heat resistant. This will ensure that you can still use it for the intended purpose and not ruin your project after it is made by the heat of a cup.

Safety Precautions!
Before getting into the project, it is important to note that resin can be quite harmful to your health, especially fumes. Therefore, you need to take safety precautions when using it. I bought a respirator mask, which came with goggles and wore these throughout the project. It is also recommended to wear after the resin has cured and you are sanding, as the dust particles can be harmful if inhaled.
You also want to make sure that you are wearing nitrile gloves, as well as long sleeves so that your skin is covered. As well as this, I like to wear a wipeable apron, so that I can clean down easily.
The surface you are working on, also needs to be protected, as the resin will cure onto it if left. Ideally, you want a surface that is resistant to resin, like silicone, but I used a vinyl table cloth. This did still mark, but at least it wasn’t the wooden table ruined.
Always read the safety precautions that come with your kit or products, and follow the advice provided on the labels. You want to have fun crafting, but also maintain your safety, because, well, that takes the fun out of it, if anything happens, doesn’t it?

Trying DIY Resin Art for the First Time
As I have said, this is the first time I have used resin and created anything with it. I will show you through my process of making the beach-themed art from the craft kit, as well as anything that I found helpful when doing so. Hopefully, this will inspire you to get creating yourself, or at least give you a few pointers for a first successful try at resin.
You will need:
- Resin8 Beachcomber kit:
– wooden blanks
– Resin Part A and Part b Hardener
– Mixing cups – variety of sizes
– Colourants
– Beach embellishments & Sand
-Craft sticks – varying sizes - Heat Gun*
- Protective gloves
- Respirator mask*
- Goggles
- Long sleeve top
- Wipeable Apron*
- Table protection
- Baby wipes

Step 1 – Prepare Area
The first thing to do is make sure that you have everything you need to hand and ready to go. The thing with resin is it can be quite sticky, so make sure that you also have wipes handy too to clean them in between.
Set three plastic cups upside down, to place your wood blank on top. Make sure the protective mat is down and underneath where you are going to be working.
Before pouring out the resin, set it into a small amount of warm water. This will help reduce the number of bubbles in the resin. Also open your colour pots now, as if your hands are full of resin, it is more difficult to do so.

Step 2 – Mix resin
Now that everything is prepared, it is time to begin mixing the resin. I am going in headfirst and making up the larger board first, rather than the two small pieces. The instructions provided show the larger board, and any remaining resin can then be used for the remaining pieces.
Start by selecting a clean and unused plastic measuring cup. These have measurements on the side which help measure out the resin. Begin pouring the resin until you reach the 40 ml mark. This should leave 10ml in the bottle for the remaining of the kit.
Repeat the process in another measuring pot with the hardener, again measuring out 40 ml.

Then in a larger plastic cup place in the resin first, making sure to scrape it all from the sides of the measuring cup. Follow this by adding in the hardener, again scraping the sides so that it is all removed from the measuring pot. Set a timer for 3 minutes and stir the two together.
It is important to stir slowly, as well as lifting the craft stick out from the bottom, to bring the resin up. The mixture will change slightly and look slightly cloudy when the two are combining. When the resin is mixed, you have around 40 minutes to play about with the design.

Step 3 – Add Colour
Separate the resin into three smaller pots, making sure that one is quite full, with the next slightly less and the third with the least in. You also want some of the resin to remain in the larger cup as well.
In the cup with the most resin, add in the dark blue colour. In the next amount down add in the green mica colour and in the least amount small cup add in a tiny bit of white. Mix these until combined with a craft stick.
In the cup with the remaining resin, add in the sand that comes with the kit, adding about 2/3 of the bag. Mix this into the resin, it will turn slightly gloopy, which is the texture you want. Then it is time to begin creating.

Step 4 – Add on Resin
Start by adding on the sand mixture, spreading this out with the craft stick. The resin will level out slightly, so you can push it around a bit. I created one area for the sand, however, you will see later that this didn’t turn out as planned.
Then it is time to begin adding on the green mica mixture, placing this near to the sand and extending upwards. You can swirl this and place it in parts. After this, begin adding on the darker blue, filling in gaps and concentrating towards the back of the round board. The resin will mix slightly and begin spreading out.
Next, we can add on tiny bits of the white to look like sea foam. Drizzle this on with a craft stick to create thinner lines of the white. Then we are going to do some magic and create waves in the resin.


Step 5 – Create Waves
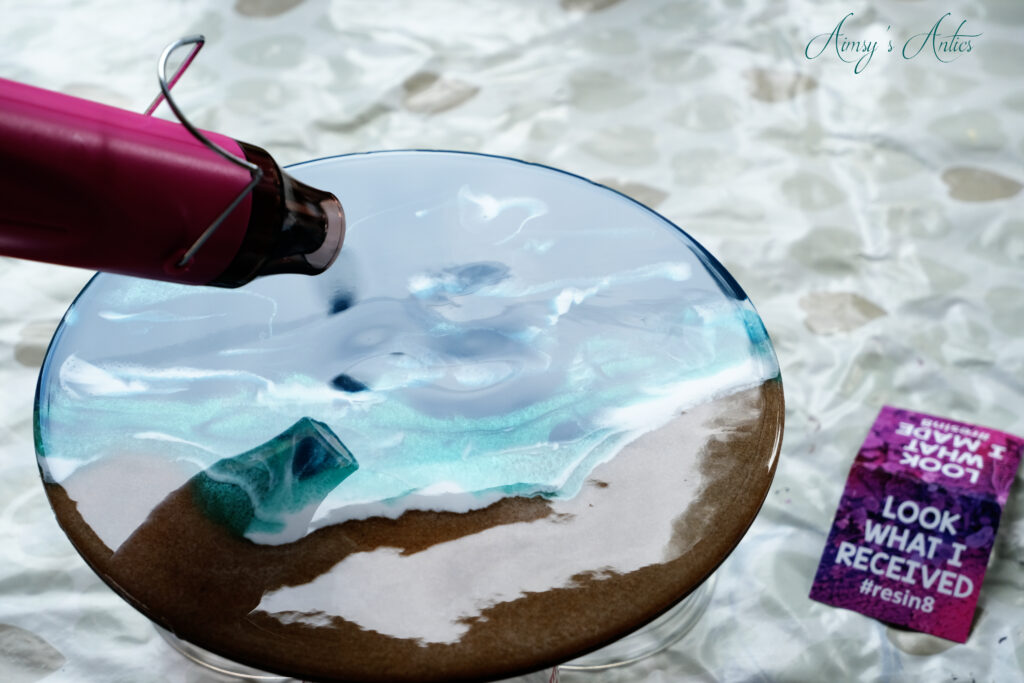
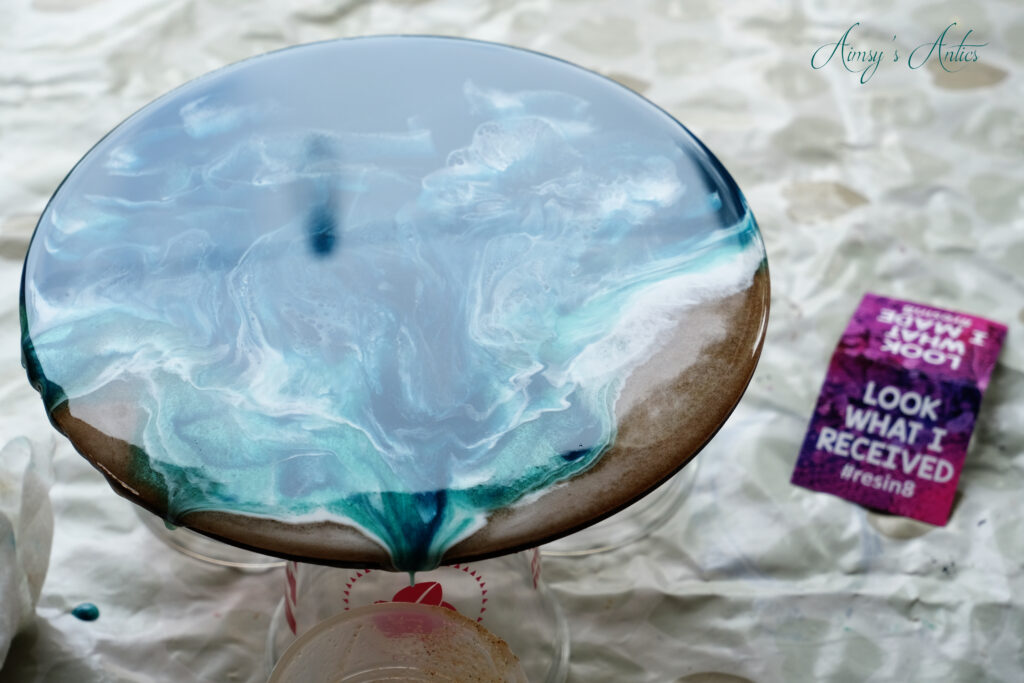
Using a heat gun, gently begin pushing the white resin into the other resin colours and sand. This will spread out, creating a marbling effect and thus creating the waves of the sea. Do this throughout the resin to see what effects you can make. I loved completing this bit, although I think I did get overzealous with this which spread the resin around too much.
You can add more colour to this bit, however, I found that this placed too much resin on, which eventually flooded the piece and I lost some of my beach parts.
Step 6 – Add Embellishments
In the kit, you get tiny shells, so this is the part where you can add them on. Make sure you have completed the resin design/adding on more resin first. Then, place the shells wherever you like on the piece. I tried to add them to the sand part, however, the resin swapped them a little.

Step 7 – Allow to Cure
Fingers crossed you got the resin measurements right and your piece will begin the curing process. Leave the DIY resin art for at least 24 hours to cure. The piece will harden and become one with the wooden board.
You may find that you get dripping of the resin, I know I did, so gently wipe this away from the edge during the process. I didn’t and now have hard lumps underneath the piece, but never mind!
Then the DIY resin art is complete and ready to be displayed wherever you choose!


What do you think of this DIY resin Art? Have you tried resin before? Let me know if you have any tips and tricks with working with resin too. I am sure there will be more resin crafts coming up on the blog, as I have the resin bug now!
DIY Resin Art – Video
Here is the video version of this post. It may be easier to see the project developing via video than through the pictures, but I will let you decide that! Don’t forget to give the video a big thumbs up if you have enjoyed it, and don’t forget to subscribe to my channel too! It would be lovely to see you over there!
DIY Resin Art – Save it!
If you have enjoyed this post, then why not share the love by sharing it or pinning it? You can also check out my Pinterest for more creative inspiration!


Have a creative project in mind, but don’t know how to plan it? I have you covered with a FREE creative project planner when you sign up to my email list. Grab yours now!

This looks like such a stunning effect!
Glad you like it! It s quite mesmerising to look at, isn’t it?
Thanks for commenting 🙂
aimsy xoxo
Okay, I always watch videos of people working with resin on Facebook so I am more than intrigued here! I didn’t know they sold a kit, so I am definitely looking into this now, thank you for sharing – the ones you made look so amazing!
It is a great way to start with just using a kit, that way, if you don’t like it then you haven’t wasted your money on all the supplies. It is quite addicting though, so there is more than likely going to be more resin projects coming up! Something is mesmerising watching the resin pour and swirl, isn’t it?
Thanks for commenting 🙂
Aimsy xoxo
What a beautiful idea, I love how it looks just like the sea! Thanks for sharing how to do this, I’ve never done any resin art but have wanted to; this doesn’t seem so hard I wouldn’t be able to do it myself!
Glad you like it. I love how it looks like the sea, and it was relatively easy to get the look! The trickiest bit is measuring it all out and making sure it will harden. Hope you have fun should you try any resin crafts!
Thanks for commenting 🙂
Aimsy xoxo
I love, love, love these pieces Aimsy! They are unique and so beautiful! I love the inclusion of the little shells and the colour is stunning. I’m glad you purchased a respirator mask to protect yourself. This is my new favourite project of yours!
I am so glad that you like them! Yeah, the shells add some dimension to them, but if you want to use them as a coaster, do get in the way haha! A respirator is a must! Thanks so much for commenting!
Aimsy xoxo
These look fantastic! I can’t believe this was your first time using resin. It definitely makes me want to give it a go. Thanks for sharing the process!
Aww, thank you, so glad you like them! It is much easier than it looks, although I haven’t attempted mould resin yet, so will have to see how that goes! Glad it inspired you too, thanks for commenting!
Aimsy xoxo
I love this blog post, I keep saying I want to try resin art but I’m always put off after watching videos. This post is has motivated me, I can’t wait to see more.
Thank you so much for sharing.
I am so glad you like them and that it has motivated you. If I can do it, then you definitely can!
Thanks so much for commenting 🙂
Aimsy xoxo
Oo, the resin art is so beautifully swirled and pretty, it is worth getting into protective gear to craft with! I love how you can fully control the colors you mix and see how the swirls play and meld into each other as it spreads.
I have never tried anything with resin art, but I would love to have a go at it and maybe make some fun gifts to give this year. Thanks for sharing how it is done!
It has swirled so well, hasn’t it? I am a bit disappointed that you can’t see as much of the sand/beach, but the way it has swirled into the sand is beautiful, isn’t it? It is quite therapeutic to make the swirls too!
I am so glad you like it, and hopefully, it has given you some inspiration. This won’t be the last resin project I try!
Thanks for commenting 🙂
Aimsy xoxo
Wow, Aimsy, these are absolutely stunning – although that mask is a little scary, haha. Do you think a standard disposable blue COVID mask would work as well? I think we have a heat gun somewhere so I think we’re probably all good to go with this activity – although I’m sure it won’t look anywhere near as professional as yours 🙂
Haha, I HAD to take a photo of the mask! I don’t think it will catch on in the fashion world, do you? haha. I think because of the fumes you should use some form of air filtering mask, but I guess a mask is better than no mask!
I am sure yours would look even better than mine! Hope you get to try this, it is quite therapeutic as well as being creative!
Thanks for commenting 🙂
Aimsy xoxo
I can’t believe you are trying this for the first time. It turned out beautiful and neat. You are talented!
xoxo
Lovely
http://www.mynameislovely.com
I would highly recommend the kit, as the instructions were easy to follow and it turns out as it should! I am so glad you like how they turned out!
Thanks so much for commenting 🙂
Aimsy xoxo
This is such a good reminder
https://www.diyshowercurtain.com
This looks amazing sweetie!
Danielle | thereluctantblogger.co.uk
Glad you like them and thanks for commenting 🙂
Aimsy xoxo
That’s really pretty. Thanks for sharing.
Glad you like it. Need to try other resin art now!
Thanks for commenting 🙂
Aimsy xoxo