

I am back with another sewing make for you today and one that is bringing in a bit of vintage. See how to make a beautiful blue floral tea dress using the Etoile dress pattern!
A tea dress, a quintessential wardrobe staple in my house. I love this style of dress and often gravitate towards them when shopping for new dresses. Having sewing skills really does help in making your own wardrobe, so instead of perusing the shops for the perfect tea dress, I thought I would make my own. That is where this beautiful blue floral tea dress comes in.
Now I have previously made a pretty wrap skirt with a ruffle, a cottagecore style cardigan and cropped wide-leg trousers. So, I thought it was about time I venture into making a dress, and showing you how you can make your own. The style of choice was obvious for me…a tea dress style. But, what is a tea dress?

What is a Tea Dress?
A tea dress is an older style dress, which grew in popularity in the mid-19th century. You may also hear the dress called a tea gown. The tea dress is usually made with lightweight fabrics and has unconstructed lines, making it loose-fitting and comfortable. Traditionally the hemline for these types of dresses is just above the ankle or below the knee, however today you will often find the hemline finishing above the knee, like the dress in this post.
A tea dress was often worn for informal entertaining in the afternoon to early evening, around the time you would have afternoon tea. Hence the name for it…a tea dress! Think smart-casual style, so you are not too dressed down or dressed up, that is where the tea dress fits in.

Blue Floral Tea Dress Pattern:
The pattern of choice for making the beautiful blue floral tea dress is the Etoile Pattern by French Poetry. This pattern is just great for making an above the knee tea dress. It comprises a simple structure that has a button-down front, deep V neckline and puffy gathered tie front sleeves. When I saw the pictures of the pattern, I just knew that I had to make the dress for myself. It is simple but super effective and is perfect to wear during the summer months. It also just screams effortless french style to me too!
French poetry is the creators of this dress, which are an independent French pattern company. They have many different styles of sewing patterns, but I found the Etoile dress was my favourite. The pattern comes in a range of sizes from 2 to 16, however, I would base the make on what your measurements are, rather than your presumed dress size. this will make it more tailored to your body.
The pattern comes complete with cutting and sewing instructions, however, the instructions are not that detailed, unfortunately. I found this to be one downside to the pattern, and if you are a beginner without much previous sewing experience, you may find it difficult to put the dress together with the written instructions solely. Luckily, French Poetry have a youtube tutorial on making this dress.
Making a Blue Floral Tea Dress
So now I will show you the process I went through to make this pretty blue floral tea dress. I am not going to lie, I did have some struggles with this, but I still think the dress has turned out beautiful and is certainly wearable on a summers day.
Blue Floral Tea Dress – Fabric
One of my favourite fabrics to sew is viscose, and luckily this material is perfect for this style of dress. I also like a floral print, and this blue floral print viscose from Minerva Fabrics fits the bill perfectly. At only £5.99 a metre too, it is pretty cheap! Like most viscose fabric, this is lightweight and has a beautiful drape. As it is lightweight, it is thin, and slightly see-through when you hold it up to the light. However, I have found that when wearing it isn’t see-through at all.
Again, as it is lightweight it was a little slippery when going through the sewing machine. This isn’t a problem, but you may find that you need to have a tighter hold when sewing.

What You Need to make a Blue Floral Tea Dress:
To make this blue floral tea dress, you will need the following items. Some items on this list are affiliate links, which will be marked with an asterisk (*):
- Blue Floral Viscose Fabric from Minerva
- Etoile Tea Dress Sewing Pattern by French Poetry
- Sewing Machine* – This is what I use
- Iron on Lightweight interacting*
- Sewing Pins*
- Rotary cutter* or Sewing Scissors*
- Matching thread
- Decorative Buttons – I bought mine from a local haberdashery
Step 1 – Preparing and Cutting Pattern Pieces
The good thing about the Etoile pattern is it is a PDF pattern. This means that you download it and print it off at home for yourself. No need to head out to the shop or wait for it to be delivered. You can send this off for printing on larger pieces of paper, however, it is easy enough to print and attach the relevant pages together.
Once the pattern piece is constructed, you need to work out which size you are going to make the dress in. As I said previously, you are always better at taking your body measurements and working from these rather than dress size. Sewing pattern dress sizes vary so much from shop-bought clothing sizes. Not only this, but you can tailor the dress exactly to fit your body. My measurements fluctuated through different sizes, therefore I made this dress in a size 10, then, altered where I needed to. You should always alter the pattern to suit before sewing. I didn’t follow my own advice and did this step after sewing. So, if you have any tips on adjusting patterns, then please do pop them in the comments below!
Then, place the pattern pieces onto the fabric as directed in the instructions. The pattern calls for some items placing on the fold and others not. You should have one back bodice, which is cut on the fold, and two separate front bodice pieces. To go with this there should be two sleeves, two front facings and a facing across the back of the neck. Finally, two long pieces of fabric for the straps.

Step 2 – Sewing Front Bodice
Apply interfacing to the facing pieces as well as along the V neckline of the front bodice pieces. Interfacing adds strength to the pieces and helps the pieces to hold their shape.
As the neckline is a V shape, this can distort easily as it is slightly cut on the bias of the fabric. A small amount of interfacing applied to the wrong side of the material can help it keep its shape. Stay stitching is also a way of keeping the shape, which is basically a line of stitching close to the raw edge of the neckline. I used the two in combination.
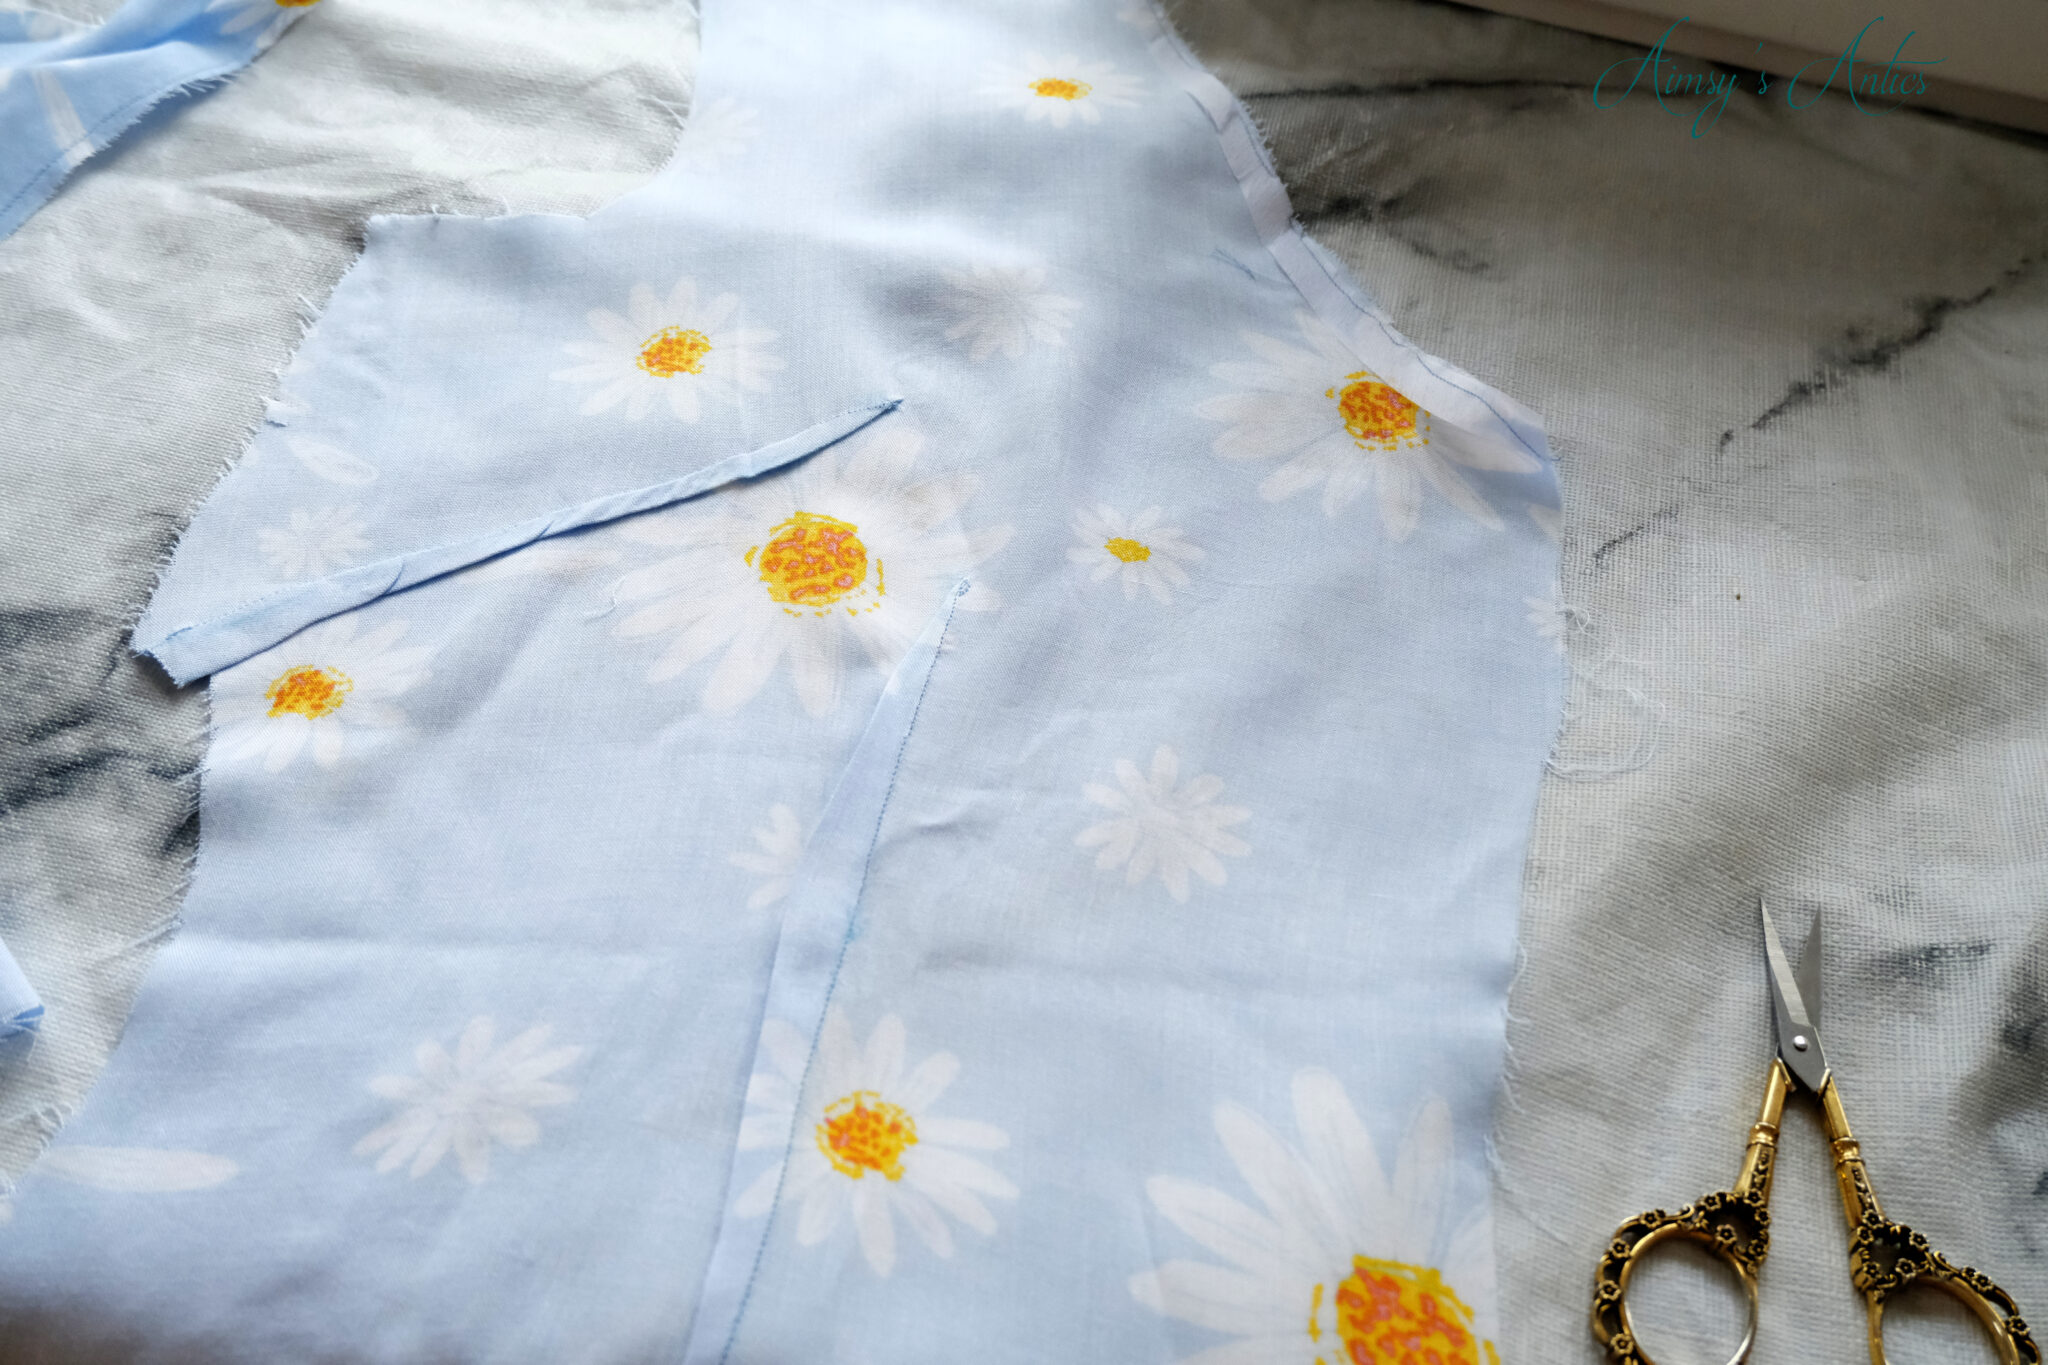
Also, transfer the bust and waist dart markings from the pattern piece onto the wrong side of the material. This helps to add definition to the front of the dress, whilst still keeping the shape simple. I like to use tailor’s chalk to add these markings, as it is easy to brush the markings off when finished.

Use pins to fold the bust and waist darks as directed. For the bust darts sew along the line marked, starting from the inside of the fabric to the outside. Start with a tail to the thread and run the stitch off the machine, again leaving a tail. This can then be double knotted to secure the stitching. You can backstitch, however, this can cause tightness in the darts and affect how they sit.
Waist darts are slightly different, as you start and end in the fabric, rather than running it off to the edge. You still want to leave a tail on either side to double knot at the end. Follow the line marked and take it easy when sewing. This is the first time sewing waist darts for me, so I am hoping that they have been sewn correctly!

Step 3 -Attach Front to Back & Facing
After sewing the darts, the front bodice pieces are ready for attaching to the back bodice piece. Now, this style alters the way that the sleeves are set in, as you sew the shoulder seams and side seams. My DIY Hoodie has raglan style sleeves, which are an easier way of adding in sleeves.
Connect the shoulder seam first using a straight stitch and a seam allowance of 1.5cm. Remember to backstitch the start and end of each seam for added security to the seam. Then begin sewing the side seams. The style of dress has a slight curve to the waist, therefore follow this. You can alter the side seam to allow for better fitting, however, be mindful that this may alter the armhole and how the sleeve fits on the underarm.


Once this is complete it is time to add on the facing. Now the facing is made up of three pieces, two front facings and the piece that sits across the back of the neck. You want to connect the two front pieces to the back piece to make one long facing. Make sure these are right sides together when connecting, and that you have them the correct way around.

Then, starting at the back neckline, attach the back piece of the facing, matching the shoulder seams with the seams of the facing. Follow the neckline round, pinning the remaining front parts of the facing to the front bodice. Again, make sure these are right sides together.

Press the facing after sewing, to set in the stitches, then press the facing to the wrong side of the front bodice. This should fold underneath. Sew a top stitch along the edge of the bodice/facing piece to hold the facing in place, and stop it from flapping open.

Step 4 – Create the Sleeves
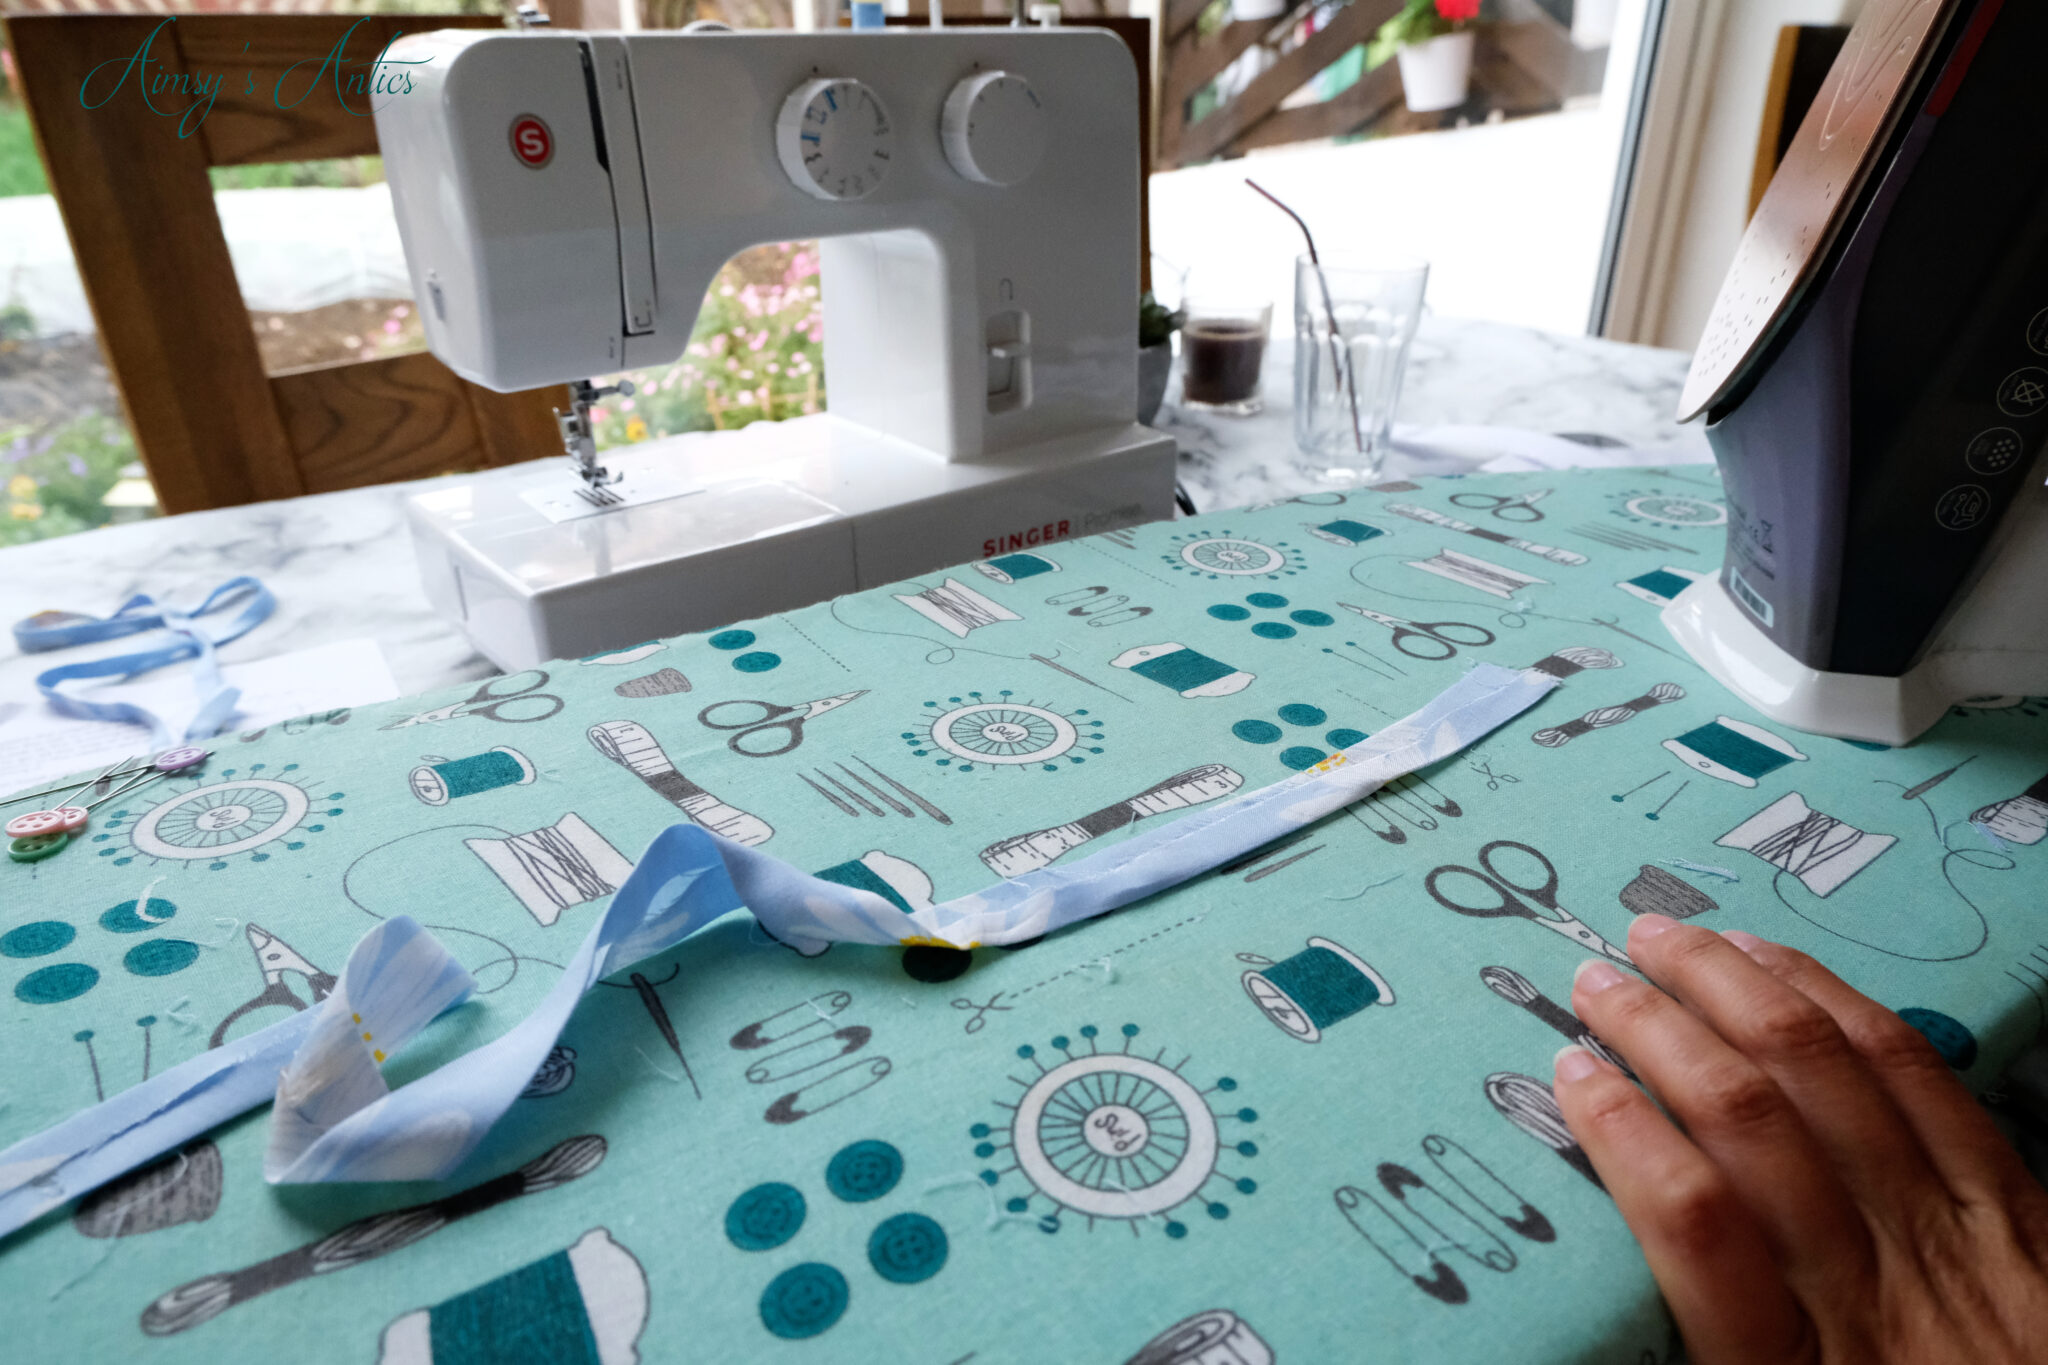
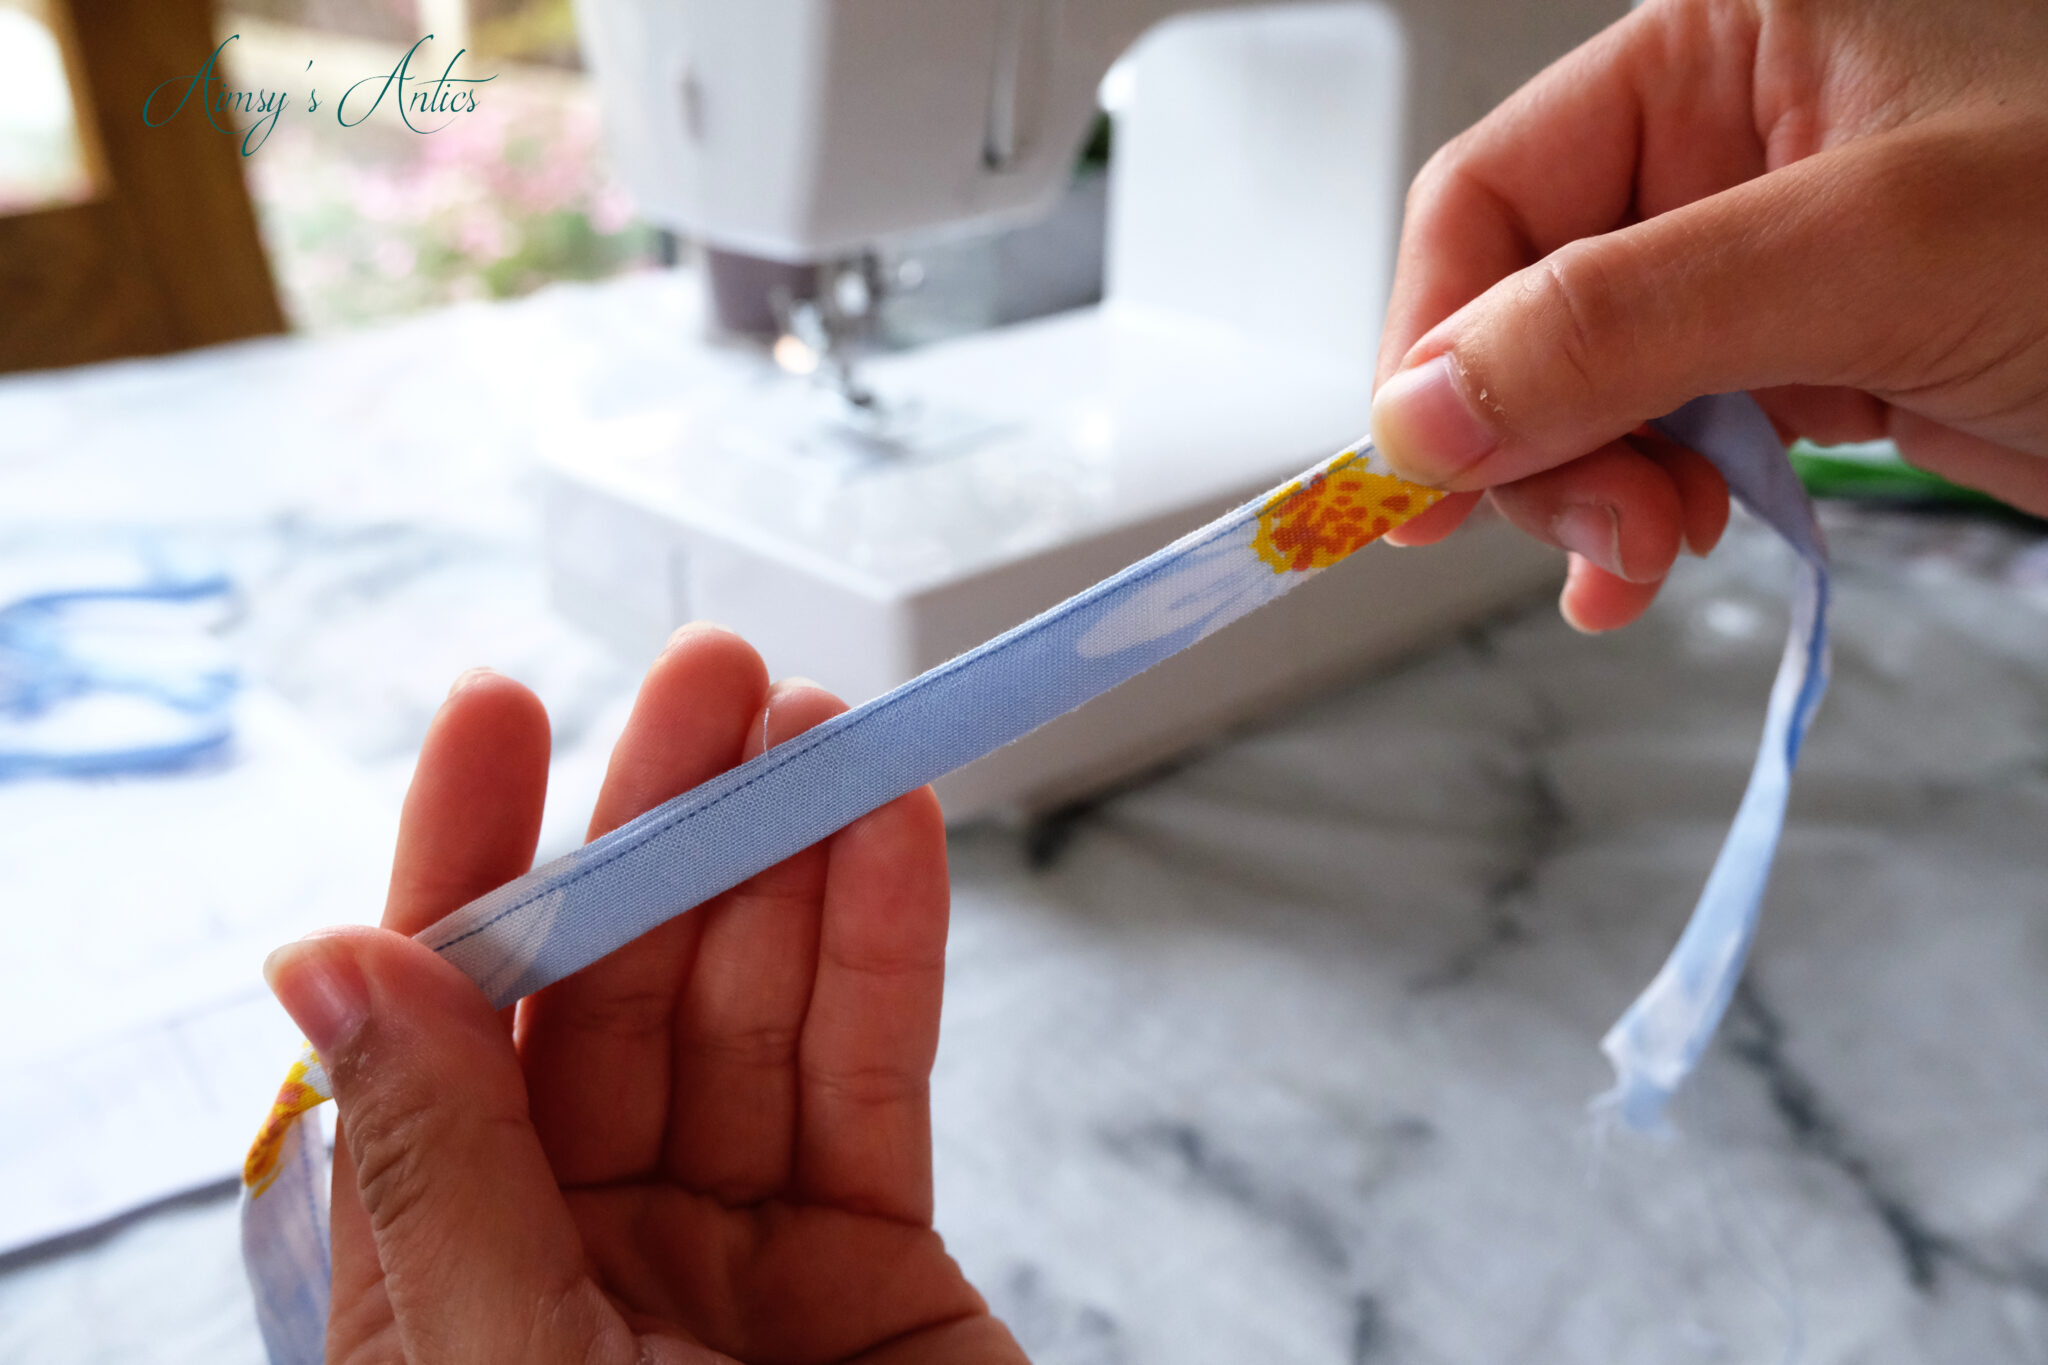
Start by creating the sleeve ties. Use an iron to create a bias binding type strip. To do this, fold one edge of the strap strip towards the centre, wrong sides touching. Repeat with the opposite side. This should be folded by approx a quarter of the strap (if that makes sense). Then, use the iron again to press this in half. The two folded edges will then be encased in the strap. Pin the raw edges together, leaving a gap where indicated on the pattern.
Head to the sewing machine and sew along the edge of the strap, backstitching when you reach the gap being left.
Sleeve Split Tab
The sleeves have a split in them where the ties are. This part needs to be finished so that the raw edges are not showing. To do this, there is a tab to be sewn into place. To do this start at one end of the V split, pinning the tab to the raw edge, then pin to the opposite corner of the raw edge. The fabric should be right sides together. Pull the tab down and continue pinning along. You will find that you are unable to fully pin into the V shape, as this creates folds, that won’t look good on the opening, so pin as far as you can without causing folds. Stitch along to attach this.
Then, fold the remaining tab edge on itself slightly, pressing into place. The with this folded edge, pin into place on the opposite side of the opening to full cover the raw edges, sewing into place. The opening should have a neat edge now. On the inside, stitch the top part of the V together to keep the tab inside.
French poetry has a great tutorial on how to complete this here.

Gathering Sleeves
The next step is creating the sleeves for the dress. The sleeves have a gather at the top and bottom, and therefore we need to sew gathering stitches to help with this. To sew the gathering stitches, set the machine stitch length to the longest possible. On my machine that is turning the dial to stitch length 4. Then, sew two rows of stitching close to the edge of the sleeve where it is indicated. Leave approx 0.5cm gap between the two rows, making sure you have a long tail of thread on both the start and end of the stitch line.


Connect the two side seams of the sleeves, so that the sleeves come into a rounded shape. Then, separate the thread of the gathering stitch tails, using the two top threads to gather. Gently pull the top two threads to gather, evening out the gather.
Then take the straps for the sleeves and pin the strap where there is a gap around the bottom edge of the sleeve. Alter the gathers until the bottom of the sleeve fits into the gap. Sew into place to attach the strap to the sleeve.

Step 5 – Attach the Sleeves
Next, it is time to add the sleeves to the dress. Match up the notches on the armhole of the dress and sleeves. Pull the gathering stitches, like before, so that the sleeves fit into the armhole. The sleeves will be slightly larger than the armhole at the point, which helps to create the gather and puffiness. The armhole and sleeves will be right sides touching. Carefully sew around to attach the two, making sure the gathers are inside the seam.

Finish off the edges with a zig-zag stitch. This will help reduces fraying to the material and keep the sleeves intact for longer. You can also “stitch in the ditch” of the shoulder seam to connect the facing to the seam at this point. This will hold the facing in place at the shoulders. This is basically sewing along the shoulder seam, as closely as possible.
Finish off the edges of the straps by folding in the end and folding on itself again. Stitch along the inside folded edge to keep them in place. This may be bulky on the machine, so hand-winding may help, or hand-sewing into place.
Step 6 – Sew Buttonholes
The blue floral tea dress is really taking shape now, but we need to be able to close the front of the dress. This dress is a buttondown front, which therefore means we need to sew buttonholes. These are not as daunting as you may think.
Mark along the front left facing as indicated on the pattern piece for the front-facing. I marked the central spot of the buttonhole placement and then placing my chosen buttons on, marked the top and bottom of the button. This will determine the size of the buttonhole needed. The dress calls for 9 buttonholes, however, you can play about with the placement and amount you le for the front of the dress.

The sewing machine should come with various presser feet. For buttonholes, there is a dedicated buttonhole foot. This is a long plastic foot with markings along the edges. You can also use this to sew buttons into place if they are the right size. The sewing machine I use also has buttonhole sewing stitches, and I believe most sewing machines come with this option. Change the settings to suit, and begin sewing the buttonholes. You may need to change these settings depending n which part of the buttonhole you are sewing. Some machines complete this automatically, so follow the instructions that come with your machine.
Use a seam ripper to open up the centre of the buttonholes to allow the buttons to pass through. Test out your buttonholes by pushing your chosen buttons through. If the buttonhole is too tight, lengthen the buttonhole slightly and remove the stitching stopping the button from passing through. If the buttonhole is too large, then shorten this by stitching lower in the buttonhole, and removing the excess stitching. I hope that makes sense!

Step 7 – Attach Buttons
After sewing the buttonholes, the tea dress then needs the buttons attaching. My buttons are a cute yellow and white flower design, which I think, look perfect with this fabric. They really give it the summery feel, don’t you think?
Place the opposite front facing over the buttonholes, where the dress will sit when fastened. Use the tailor’s chalk again, and mark where each buttonhole is, as central to the buttonhole as possible. This will indicate where each button needs to be in relation to each individual buttonhole.
Use a hand sewing needle and matching thread to the fabric to attach the buttons. I like to start on the back, bringing the needle through to create a stitch before adding the button to the next stitch. I find this gives more security to the stitching. Repeat until all buttons are added.

Step 8 – Hem and Finish Seams
The final steps are to sew the hem and finish any open seams. Start by using the zig-zag stitch on any exposed seams. This will capture any fraying edges and help reduce the amount the fabric will fray. It is also nice to finish off the seams to give it a professional look. An overlocker or serger can also achieve a professional look too, and make the item more “shop-bought” looking. A zig-zag stitch works just as well if you do not have one of these machines. I don’t own an overlocker yet. Also, trim any loose threads that may be showing/dangling. Remove any gathering stitching that is showing too.
Then it is time to sew the hem. Use an iron to press the raw edge in on itself by 0.5cm-1cm. Pressing will help keep the fabric in place, or at least create a line where to fold. Then fold this again by 0.5cm-1cm pressing again. This gives the folded hem to the dress. Pressing should hold it in place, but place pins if you require.
Then head to the sewing machine and sew along the inside folded edge to secure the hem in place. Be mindful that the stitching will show on the outside, so make sure it is neat. Then the blue floral tea dress is complete and ready to wear!


What do you think of this blue floral tea dress? Do you like this style of dress? Will you be attempting to make your own? Let me know in the comments below!
Blue Floral Tea Dress – Video
Here is the video version of this post, showing the making process of the tea dress. If you enjoy the video, then please do give it a big thumbs up, and don’t forget to subscribe to my channel for more creative goodness. It would be lovely to see you over on YouTube too!
Blue Floral Tea Dress – Share it!
If you have enjoyed this post, why not share the love and hit the sharing buttons, or pin it for later? See more creative over on my Pinterest too!
Have a creative project in mind, but don’t know how to plan it? I have you covered with a FREE creative project planner when you sign up to my email list. Grab yours now!


Aimsy, what a beautiful dress (yet again!) you have here! Tea dresses are my favourite, i love the shape of them and how they look on me so it’s usually my go-to! But yours is extra special, I just love the details so much…I mean, the little bow on the side of your sleeve and shall we even mention those buttons?! I am in love with the buttons so much! x
Aww, thank you so much for your lovely comment (and share on Twitter)! Tea dresses are just so flattering, aren’t they? The sleeves are my favourite bit, but were the most fiddly bit to sew! haha! Oh, those buttons were an impulse buy that paid off. I saw them in the haberdashery and thought they would look great with this fabric, but I couldn’t quite remember the colour so bought them in the yellow you see here, and a dark blue. Keep an eye out for the blue ones in a future project!
I am so glad you liked this post, thanks for commenting 🙂
Aimsy xoxo
This dress is so pretty! I love the style of the dress x
Thank you! I am glad you like it. Tea dresses are just so flattering, aren’t they?
Thanks for commenting 🙂
Aimsy xoxo
The dress came out so well! I love the pattern. I haven’t gotten into sewing yet but I should – it sounds like a lot of work but rewarding at the end.
I am glad you like it! I had a bit of trouble with it and had to do a bit of unpicking, but I am blaming that on trying to watch the Euros at the same time as sewing haha!
Thanks so much for commenting 🙂
Aimsy xoxo
Yay!!!!!! Beautiful dress for summer. Thank you for sharing the DIY and some information on Tea Dress. I learned something from this post.
Aww, thank you. This is a perfect dress for summer. I am hoping we get some warmer/sunny days here in the UK to be able to wear it!
Thanks for commenting and glad you liked it! 🙂
Aimsy xoxo
What a beautiful, flattering dress which looks amazing on you! This print is so cute and I love the ties on the sleeves. You are so talented Aimsy!
Aww thank you! I love how it turned out. I knew I had to buy the fabric as soon as I saw it, perfect for spring/summer, isn’t it?!
The sleeves are my favourite bit too. Glad you like it and thank you for commenting 🙂
Aimsy xoxo
Great post! I’m not really one for making things but my sister is so I’ll have to get her to try this – it’s super cute! Thanks for sharing x
Oh, I hope your sister likes it! It is a great dress to have a go at making, but a little fiddly in places.
Thanks for commenting 🙂
Aimsy xoxo
You know me: totally loving this amazing floral cloth you have picked! The color is just the right kind of blue for my eyes and white and yellow flowers offer eye-grabbing contrast.
The cut of this dress is perfect for both a tea gown or a night gown; I like something loose to sleep in for the summer and am not a big fan of pajamas. A slight alteration to the sleeves would make this comfy to sleep in and a little longer on the skirt would give me the confidence to wear this out on a hot summer day.
Thanks so much for sharing!
Oh, isn’t the fabric just beautiful? It comes in four other colours, but the pale blue one caught my attention the most! Perfect for Spring/Summer, isn’t it?
Ooo, what a great thought of turning it into a nightgown! This would be perfect, as it is loose and lightweight. Yeah, the skirt length is short, I am sure it will be easy enough to lengthen it.
I am so glad that you liked it Jaya! Thank you for commenting! Now onto the next sewing project…
Aimsy xoxo
Wow! What a great idea, and how amazing did it turn out! Thanks for sharing, I’m not the best at DIY even though I love searching up different clothing ones! xo
xoxo Olivia | http://www.oliviaandbeauty.com
I am so happy with how it turned out, although I can see a few mistakes that I made. (I am 100% blaming the Euros for them, as I was trying to watch the football whilst sewing haha). I would highly recommend this sewing pattern, but more so if you have been sewing a while, as some of the instructions are a little vague if you are not 100% sure about what you are doing! I am sure you would be able to make one like this, no problem!
Glad you liked it and thank you for commenting 🙂
Aimsy xoxo
This is so pretty. You have done so well with creating this design. This design is great for the Summer. You are very talented. Thank you for sharing.
Lauren -bournemouthgirl.com
Aww, thank you! It is perfect for summer, isn’t it? All we need now is for the heatwave to return!
Glad you like ti and thank you for commenting 🙂
Aimsy xoxo
I honestly squealed with happiness when I read the title of this post I’ve started to take up sewing and my gran who is a master sewer and made kilts for 20+ years is teaching me and I’ve been dying to have a go at making a dress! This is stunning, live the fabric you’ve chosen. Thank you for sharing, going to bookmark this post!
Thelifeofaglasgowgirl.co.uk
You will not regret taking up sewing. The only problem is you will want to make everything and have a massive fabric bundle haha! Wow, I wouldn’t know where to start making kilts, I bet your gran is super talented.
Hope you get to make the dress and enjoy the process!
Thanks for commenting 🙂
Aimsy xoxo
I can not believe you made this! It came out so good, I am always in awe of people that can sew. And love the textile you chose too.
Allie of
http://www.allienyc.com
Aww, thank you! The fabric is just lovely, isn’t it? Perfect for spring summer days!
Thanks for commenting 🙂
Aimsy xoxo
You are so talented! I love how this dress turned out! It looks cute on you!
xoxo
Lovely
http://www.mynameislovely.com
Aww thank you! There are some minor imperfections with it, but it is so lovely to wear on a sunny day!
Thanks for commenting 🙂
Aimsy xoxo
I love this dress, it’s so cute and would be perfect for summer! I have been looking for a tea dress for so long and I really want ones with the buttons. Unfortunately, all the ones online seem to be for really tiny people, so the buttons pull a bit. Perhaps it’s time to make my own!
I’m glad you like it Em! It is perfect for summer, although I was a bit warm wearing it the other day when the temperatures soared haha!
This is your sign to have a go at making your own! I’m not going to lie, this dress did take a bit of work, and there is still imperfections on it, but at least it is wearable and fits better than the shop-bought ones!
Thanks for commenting 🙂
Aimsy xoxo
I love the process of making this beautiful dress. Very creative and simple as well. Thank you so much for sharing.
Aww I am so glad you liked it. It is quite simple to do, once you get into the flow of it anyway!
Thank you so much for commenting 🙂
Aimsy xoxo
Tea dresses are one of my favourite styles of dress to wear and I own so many of them. I love the print you’ve chosen and the detail on the sleeve is gorgeous too.
Tash – A Girl with a View
There is just something about tea dresses, isn’t there? The print and sleeves are just It is so comfortable to wear too!
thanks for commenting 🙂
Aimsy xoxo
That is such a stunning dress sweetie!
Danielle | thereluctantblogger.co.uk
Aww thank you so much! Glad you liked it 🙂
Aimsy xoxo
This is such a beautiful dress for summer! I like the colour and print, thank you for sharing how you made it! 🙂
Hope you are having a good weekend 🙂 It’s another chilly winter day here, but we still spent a little time at the playground this morning 🙂
Away From Blue Blog
Aww, thank you so much! The fabric is just lovely, isn’t it…it came in lots of colours, but I liked the pale blue better.
Hope you had a great week and the weather picked up for you. We are in a mini heatwave at the moment, so trying to make the most of it!
Have a great week ahead!
Aimsy xoxo
really love how this came out! I am still finding my way to be comfortable in dresses but i am sure my sister would love this! Every project you make always push me to give sewing a change! Really love the detail of the buttons x
Aww, thank you. There is just something about this dress isn’t there? You can always length so that it isn’t as short too.
Glad it is giving you the inspiration to try sewing, you won’t regret it if you do give it a go!
Thanks for commenting 🙂
Aimsy xoxo