

Looking to add a bit of cottagecore to your attire? Well, look no further than today’s sewing project with making your own DIY Cottagecore cardigan. All you need is the perfect fabric and the Tilly and the Buttons ‘Bertha’ cardigan pattern.
This cardigan is such an easy make and gives you practice with sewing knit fabrics too. The best bit is, there isn’t a knitting needle in sight. I really struggle with knitting, I just can’t seem to get the coordination to it. So, this makes it all the better as it uses a ribbed knit fabric to make the DIY cottagecore cardigan.

What is Cottagecore?
Cottagecore has become a big hit in recent years. It combines all the love of vintage, cosy cottage vibes with a bit of chintz. Just picture a little cottage in the woods and you are on the whimsical countryside aesthetic. What makes this cardigan cottagecore? Well, with the knit fabric and the oversize nature, it could be something you pluck straight from your granny’s wardrobe. If it looks like something your grandma would wear, then you are on the road to cottagecore. Team it with a flowy, or pretty patterned dress and you are bang on the money.
This DIY Wrap Skirt fits perfectly in with this theme too!
The ‘Bertha’ cardigan by Tilly and The Buttons is the perfect relaxed fit, complete with batwing style sleeves. You can find the pattern in one of my favourite sewing books, and one I have mentioned a few times on the blog “Make it simple”. This is a great book for getting into sewing your own clothing, and as the book keeps it simple, perfect for the beginner sewer out there.

So if this has piqued your interest and you are looking to sew your own DIY Cottagecore cardigan, then…Let’s get sewing!
There is also a video at the end of the post if you would like to see the steps in video form too. Just click the button below to be taken straight to it!
DIY Cottagecore Cardigan – Fabric
As I have said above, this fabric is perfect for those cottage core vibes. A nude ribbed knit fabric, which is lightweight enough for the warmer months but helps keep the chill off when the temperature drops. This fabric was an absolute bargain from Pound Fabrics and was only £2.00 a metre (shooketh 😲). So, of course, I did what any crazy sewist does and stocked up on it, buying 4 metres in total. Now, the cardigan doesn’t require this much material, and you can make it with approximately 1.4m (1 1/2 yards) of the fabric. Plenty left for other projects then!
The only problem with this material is how to cut it, due to the ribs in it. Although a knit fabric, which doesn’t fray too much, this one does shed a little. So, you will find bits of fluff flying around when you are cutting and sewing.

DIY Cottagecore Cardigan – What you need:
To make the DIY cottagecore cardigan, you will need the following items. Please note some links in this post are affiliate links, which are marked with an asterisk(*).
- Make it Simple Book for the ‘Bertha’ pattern*
- Ribbed knit fabric
- Dressmaking Scissors*
- Sewing Machine* – This is the machine I use
- Ballpoint sewing needle*
- Matching cotton thread
- Walking foot*
Step 1 – Cut out Fabric
The first thing to do is determine which size of the pattern you are going to make. This is an oversize style cardigan with loose sleeves, and I made mine in a pattern size 3. It is still slightly oversize, but I wouldn’t advise sizing down, as the cuffs on the arms are a little tight. This could be my fabric choice and the way I have made the cuffs, but I like the more oversize look of the cardigan.
After measuring and choosing your size, you can trace this out onto sewing trace paper or straight from the pattern. It depends if you want to use the pattern again to make other sizes. I like to trace mine so I don’t ruin the original.
Once the pattern is traced, pin it to your fabric as indicated. The pattern pieces will indicate where to place them by the grain of the fabric. Then cut out the pieces.
After cutting you should have two sleeves, one back bodice, two front bodices, one hem band and two neckband pieces.

Step 2 – Construct Cardigan Bodice
Now that everything is cut out, it is time to begin assembling the cardigan. Place the back bodice right side up and match the corresponding sleeve at the top diagonal part right side down, pinning into place. You want the right sides touching. Then head to the sewing machine and use a stretch stitch (if your machine has it) or a zig-zag stitch like me to sew all the seams together. Because the fabric is knit and has stretch to it, then we need to use the zig-zag stitch to accommodate for the stretch. A straight stitch is likely to snap when the fabric is stretched. Also, a walking foot is useful to aid in feeding the fabric through without it stretching out too much.
Sew the sleeve to the top shoulder seam of the back bodice.

Next, place the two front bodice pieces onto the opposite side of the sleeve, right sides together. It will start to resemble a cardigan with the sleeve seam open if that makes sense. The cardigan may look like a slightly odd shape at this point, but that is because the sleeves are sewn raglan style rather than set in. This is a really easy way to attach sleeves, and gives it a relaxed look.

After attaching the front bodice pieces, it is time to sew the sleeve seams and side seams. Fold the sleeves right sides together and pin. Follow this seam onto the front bodice, attaching it to the back bodice. This will create the side seams leading up into the sleeves. Again, sew with a zig-zag stitch and the DIY Cottagecore cardigan is beginning to take shape.

Step 3 – Add Hem Band
The next bit is to finish the bottom edge of the cardigan This cardigan has a nice size hem band, and if you are careful, you may be able to pattern match the ribbing of the knit so that the directional lines flow. I was so happy to match these!
Fold the hem band in half lengthways so the two raw edges meet, and it is wrong sides touching. Use an iron to press this in half, making sure to use the correct temperature for your fabric. Then pin it to the raw hem of the cardigan, lining up any notches and pattern (if you can). Make sure the cardigan and hem band are pinned right sides together.

Then, attach with a zig-zag stitch. Gently pull this through the machine, you don’t want the hem band stretching out of place. The walking foot should help feed this through easier. Trim the seam allowance once attached and press the seam towards the hem band.

Step 4 – Attach Neckband
The next step is to attach the neckband to the cardigan. This is in two pieces, and they, therefore, have to be connected. Where there are triangle ends of the neckband pieces, place these together rights sides touching. Follow the diagonal lines to attach them. You should then have one long neckband piece.

Also, fold the neckband pieces right sides together and connect the two open ends so that they close on each side. These will form the bottom of the neckband. Turn right side out and push out the bottom corners to the neckband.
Fold the neckband lengthways, wrong sides together, and pressing this to help keep the shape with an iron. Pin the neckband to the raw neck edge of the cardigan, right sides touching and lining up the notches. The middle seam of the neckband should sit in the middle of the back bodice piece. Head to the sewing machine and attach the two.

Step 5 – Attach the Cuffs
The final thing to do is attach the cuffs to the arms. I find the cuffs a little snug and have to wiggle my hands into them. I don’t think this is the design of the cardigan, but rather the stretch in the material I have used. Take note of where the stretch is in the fabric when cutting out the cuffs as this does impact the cuffs. It is still wearable, and helps keep the cardigan on my arms!
Create the cuffs by folding them in half lengthways. After this, fold the cuffs up onto themselves, so that this seam stays inside, however it is now widthways. There should be 4 layers when this is folded. This is the same method as creating the cuffs on the DIY Joggers and DIY Hoodie I made from the Tilly and the Buttons, “Stretch!” book.
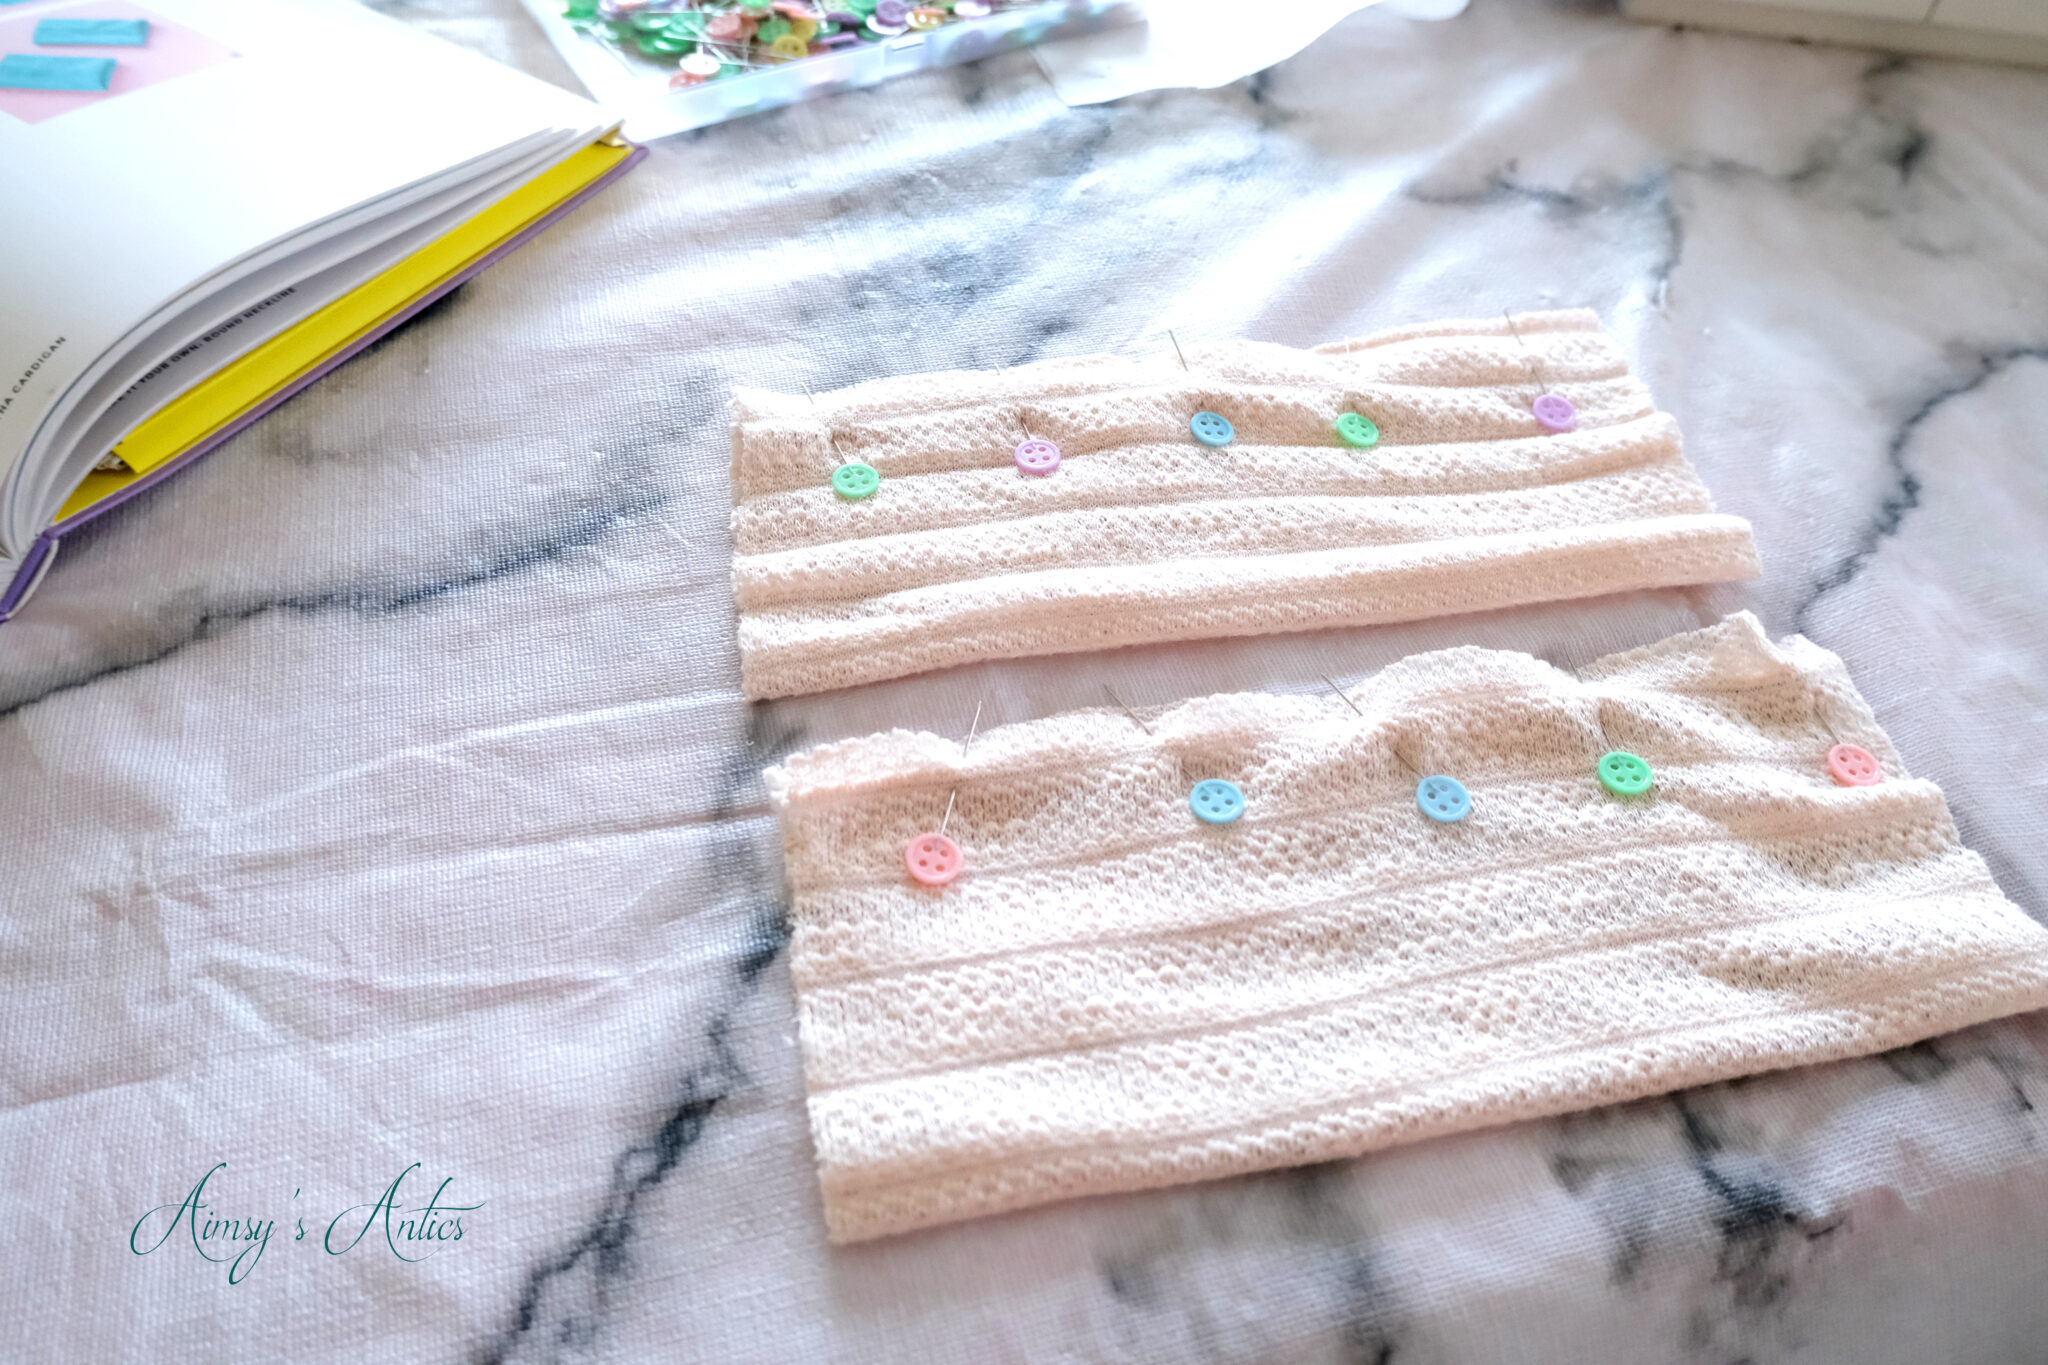
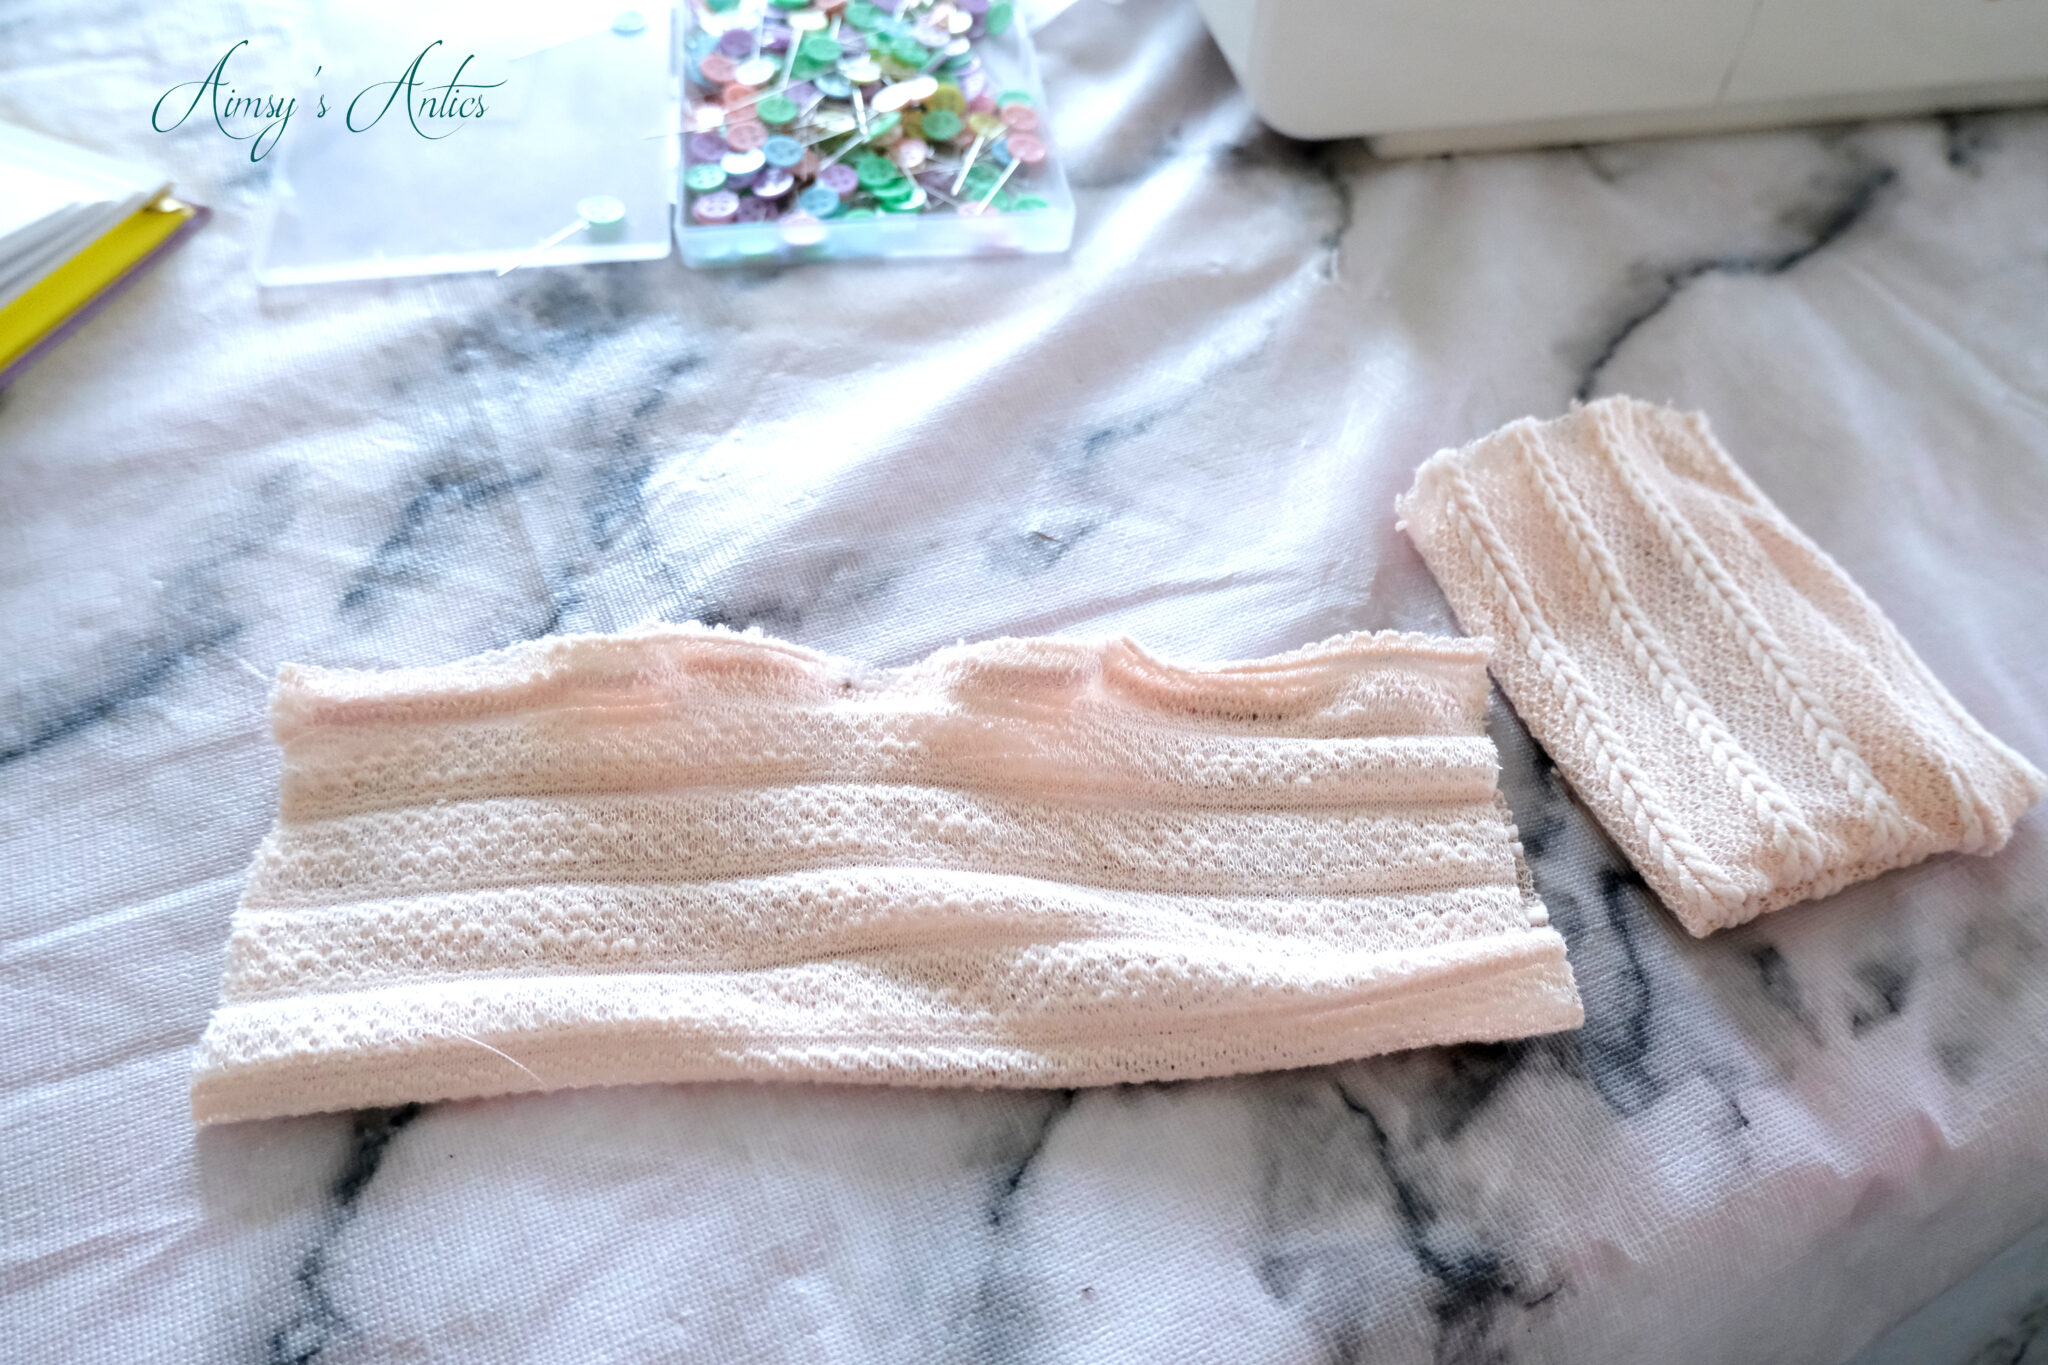
Then, place the cuffs onto the raw arm ends, right sides touching, pinning in place. This is a little fiddly to do, so take it slow when sewing. Sew where you have pinned, making sure that you are not sewing the armhole shut, and only attaching the cuff.
Once the cuff is in place, the DIY Cottagecore cardigan is complete and ready to wear!


What do you think of this cardigan? Is it a style you would wear? Also, what do you think of the cottagecore trend? Do you love it or loathe it? Let me know in the comments below!
DIY CottageCore Cardigan – Video
Here is the video version of this post. Hopefully, this helps to see the cardigan come together in more ‘real-time’. If you enjoy the video, don’t forget to give it a thumbs up! Why not subscribe to my channel too, to keep up with all my creative antics over on YouTube!
Share it!
If you have enjoyed this post, then why not share the love by hitting the sharing buttons. You can also share the love by pinning it for later. Here is my Pinterest if you would like to see where my creative inspiration comes from!
You can also grab a free craft project planner when you sign up to my email list too!


I love both your dress and the cardigan! Vintage and the cute cottage life both appeal to me, so this combines two of my favorite looks into one. The nude knit cloth you chose it perfect for this too; I love a good ribbed fabric, especially in my sweaters and cardigans.
Thanks for sharing a lovely design!
Thank you, Jaya. I wish I could say that the dress is handmade, but it’s not haha! The fabric for the cardigan is just perfect to go with so many different outfits, isn’t it? Its the right balance of warmth for the summer months too!
Thanks for commenting 🙂
Aimsy xoxo
Aimsy, not only this is the style of cardigan I love and wear constantly, the colour is also to die for! You make everything looks and sound so easy to put together, it’s really pushing me to try! Thank you for sharing this xx
Oh, the colour is perfect to go with all matter of outfits, isn’t it? Glad you like it. This make really was so easy to put together, I thought it was going to be a lot trickier than it was. Hope you get the chance to begin making something for yourself!
Thanks for commenting 🙂
Aimsy xoxo
This is so pretty! And it looks great with that dress.
Aww, thank you. Perfect combination, aren’t they?
Thanks for commenting 🙂
Aimsy xoxo
This is a great DIY plus the outcome is so gorgeous, I love the fabric, it fits you so well
Aww, glad you like it and thank you! The colour is great, isn’t it? Can wear it with all sorts of outfits now!
Thanks for commenting 🙂
Aimsy xoxo
This turned out so freaking cute! xx
Aww thank you! Gald you like it 🙂
Aimsy xoxo
This is an adorable cardigan! I wouldn’t know where to begin with making my own!
Corinne x
Thanks Corrine! I thought it was going to be more difficult than it actually was, and luckily no knitting involved! ahah
Thanks for commenting 🙂
Aimsy xoxo
That’s a beautiful cardigan 🙂
Beauty and Fashion/Rampdiary/Glamansion
Thank you, glad you like it!
Aimsy xoxo
This cardigan looks so cosy! You are so talented!
Glad you like it. It is weird because it is so light, but keeps you lovely and warm!
Thanks for commenting 🙂
Aimsy xoxo
That looks amazing sweetie!
Danielle | thereluctantblogger.co.uk
Aww thank you! Glad you like it 🙂
Aimsy xoxo
Aw, love this Aimsy! The color is so on point with my entire wardrobe. This looks super comfy and perfect for cute spring/summer dresses. Great job as always xx
Lynn | https://www.lynnmumbingmejia.com
Thanks, Lynn, glad you liked it! I could so see you wearing something like this, definitely a good wardrobe staple!
Thanks for commenting 🙂
Aimsy xoxo
What a clever idea to use a knitted fabric so it’s just sewing and not knitting! this cardigan looks lovely on you! 🙂
Hope you’re having a nice weekend 🙂
Oh, there is no way I could knit something like this haha! I didn’t realise you could buy it like this, so was a winner when I saw it!
Thank you and thanks for commenting 🙂
Hope you had a lovely week and a week ahead!
Aimsy xoxo
I love ribbed clothing and cardigans. This looks like such a cute cardigan, perfect for the cooler summer evenings! I’ve been looking for a cardigan, but I haven’t quite found the right one so maybe I’ll have a go at making it. I didn’t even know you could buy fabric like that! Em x
I didn’t realise that you could get this type of fabric to sew with until I saw it. I can’t believe how cheap it was too!
It is perfect for the summer evenings as it is just the right thickness to keep the chill off. I would love to see yours if you do have a go at making one, I bet it will turn out fab!
Thanks for commenting 🙂
Aimsy xoxo