

I’ve got another clothing DIY for you in today’s post. Today, I will show you how I made it, and how you can make cropped wide-leg trousers. A really easy clothing project using a Tilly and the Buttons sewing pattern.
I have featured a few clothing sewing projects recently on the blog, and today I am sharing with you another. These cropped wide-leg trousers are a really easy sewing project. Like these DIY Jogging Bottoms, DIY Pyjamas and DIY Hoodie, I am using another Tilly and the Buttons’ sewing pattern to make these trousers.
The trouser pattern is the ‘Safiya’ Trousers from the Tilly and the Buttons Make it Simple book* (affiliate link). It is a simple pattern, that you can adapt to include pockets, and even into a loose-fitting jumpsuit. In this project, I am making the cropped trousers with pockets. Because, who doesn’t love pockets, right?

I will walk through the steps of putting these cropped wide-leg trousers together, so if you are making this pattern, hopefully, it will help. Or, it will give you a bit of inspiration and ideas of how to sew these types of trousers together.
Don’t forget to check out the video version of this post as well at the end of the post!
DIY Cropped Wide-Leg Trousers
To make these fabulous cropped wide-leg trousers I am using a black and white pattern viscose fabric. This is from Minerva Fabrics and was £5.99 per metre. I love the pattern on this fabric, as it makes these trousers a great transition piece in the wardrobe. Perfect for the ever-changing weather here in the UK! It’s also perfect because it is lightweight, and has a great drape, making the trousers more swishy.
To complete the trousers I also have 5cm wide elastic for the waistband. This means that the trousers are a simple make, without the need for any closures or zips to sew in. So, if you are just getting into sewing your own clothes, then these trousers are a great piece to make.

Adapting the Pattern
To make the cropped wide-leg trousers, I had to make a few adjustments to the pattern. I am only 5″3, which means I shortened the length of them to make them cropped for my height. In all honesty, I could have left them and they would sit above the ankle. However, I like the look of the cropped length.
I also adjusted the crotch seam, shortening it by approx 3cm on each front and back pieces of the pattern.
To make both of the adjustments, I traced the pattern onto sewing tracing paper. Then, followed the guidelines of where to shorten and lengthen. I am making the trousers in the pattern size 4 also. As I said before, there are other alterations to add to the pattern, and I am adding the pockets too.
Step 1 – Cutting out the Fabric
Once the pattern pieces are ready, it is time to place this on the fabric and cut them out. You want to make sure that all of the markings from the pattern have been traced onto the pattern pieces. That way the grainline is correct to help the fabric drape properly. To find the grainline, this is usually parallel to the selvedge edges of the material.
None of the fabric needs to be cut on the fold, but the fabric is still folded to get the two pieces for each of the leg pieces. There are also four pieces for the pockets.

I like to use a rotary cutter to cut through the fabric, but sharp sewing scissors do the job just as well. After cutting out, it is important to remember to snip in the notches from the pattern too. This is especially important for the pocket pieces to help them line up correctly when sewing.

Step 2 – Begin Sewing the pockets
The first thing to do is zig-zag the raw edges of the fabric. This acts like an overlocking stitch to trap the raw edge to stop any fraying of the material. Then it is time to place a pocket piece over each front leg trouser piece. This should line up with the notches on the leg side seams and sit around 7cm down from the top edge.

Then down this edge, stitch a seam approximately 1cm to attach the two pieces together. Repeat the process with the two back leg and pocket pieces. When this is complete, an understitch is sewn to secure the pocket seam allowance. This helps to hide the pockets on the inside of the trousers when wearing. To sew the understitch, the seam is finger pressed, with the seam allowance pressing away from the leg pieces. Then a line of stitching is sewn close to the seam on the seam allowance side to secure the seam allowance down.

Step 3 – Joining the legs of the Trousers
After sewing the pocket pieces, it is time to join the legs together. Place matching front and back leg pieces together, right sides touching. Keep the pockets folded outwards rather than inside the leg pieces, and match the edges of each together. Head to the sewing machine and stitch down from the top edge of the trousers until 2cms below the start of the pocket. Backstitch to aid in strengthening the seam, as we are going to leave a gap. Then, begin sewing from the top corner of the outer edge of the pocket, following the curve of the pocket piece. Pivot when you reach where the trouser and pocket pieces meet, carrying on the seam down the edge of the trousers.
The pocket piece close to the inside seam is not sewn at this part and will form the opening of the pockets on the trousers.

Next, it is time to press the pockets inside the trousers by folding the trouser legs wrong sides together (the outer seam remains open at this point). This helps the pockets lay flat inside the trousers. Head back to the sewing machine and with the pocket piece pressed against the front leg part, sew a stay stitch across the top of the pocket bag. This attaches the pocket to the trousers. Don’t worry as this stitching will be eventually hidden in the waistband.
Finally, sew the inner leg seam on both trouser pieces to connect the legs. Remember not to sew the inside crotch seam at this point. Check the video at the end of the post for this (I forgot to take a picture of this part…oops!)
Step 4 – Connecting the Trousers Together
Turn one of the trouser pieces right side out, keeping one the wrong way out. Place the right side leg inside the wrong side leg and match up the seams and notches along the crotch seam. Pin in place and jump on the sewing machine, sewing the crotch seam together. The trousers cropped wide-leg trousers should now be forming.
To finish the seam, this can be zig-zag stitched and pressed to one side.

Step 5 – Create the Waistband
The waistband on the trousers is elasticated at the back, with the front laying flat. To create the channel for the elastic, fold and press the top raw edge down to the wrong side around 1.5cm. Then, fold this down again, keeping the top folded edge inside this, approx 3.5cm. Again pressing this into place.
The front part of the waistband will not contain elastic, so this needs to be marked out with pins. Measure equal amounts from the front crotch seam towards the side seams. This measurement will depend on the size of the trouser that you are making, and the length of the elastic. Place pins in both these points. We will not be sewing this part just yet.

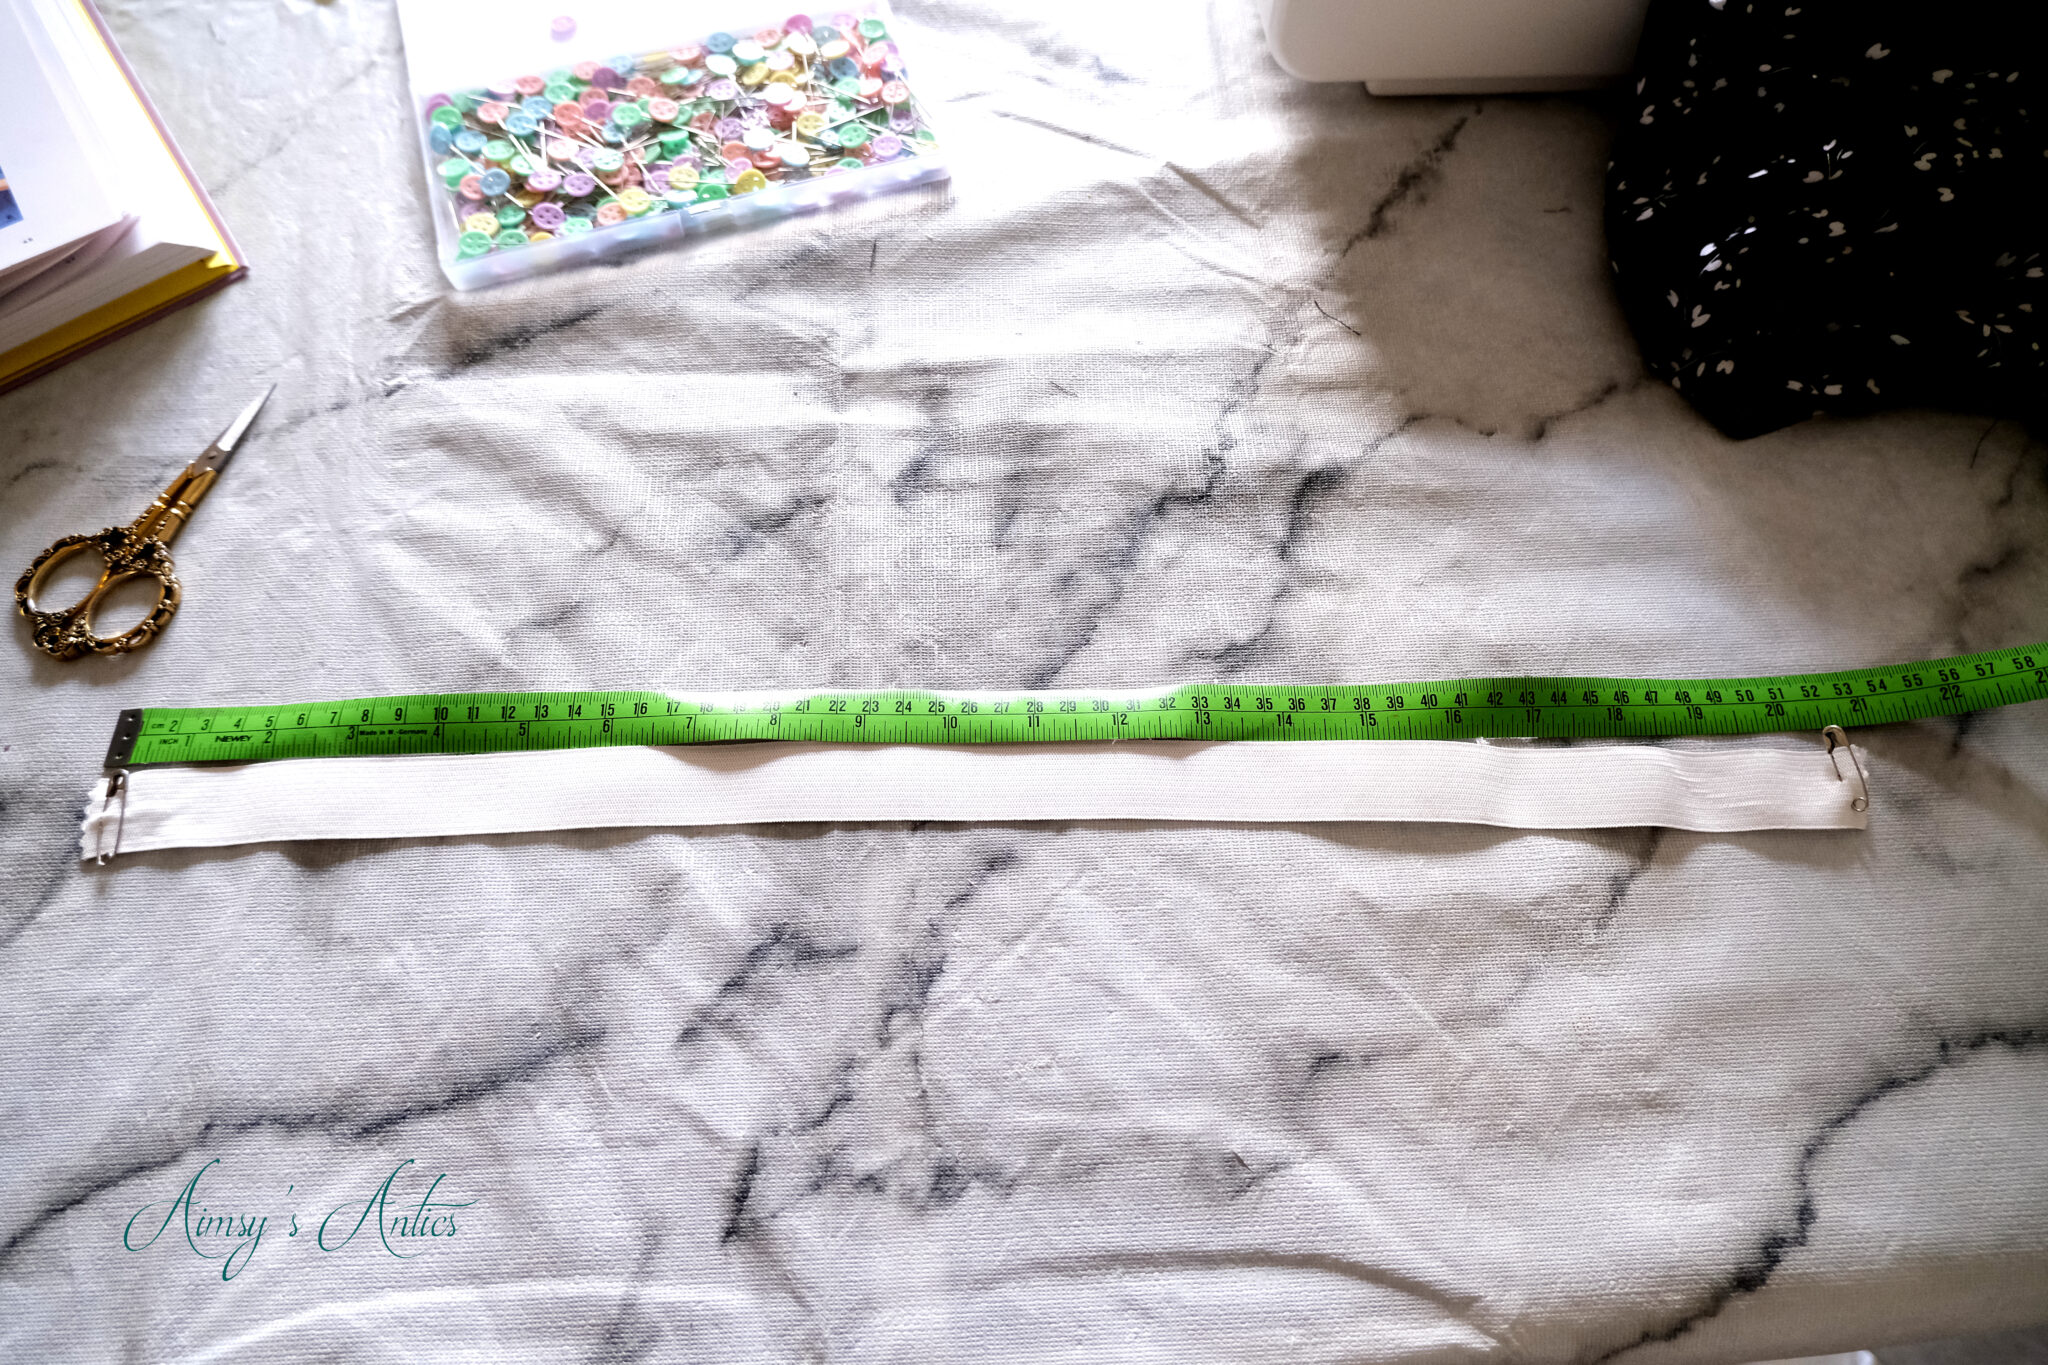
Topstitch the back of the waistband, following from the pins in place, remembering not to sew the front part of the waistband and backstitching these two marker points. Then, place safety pins in the two ends of the elastic, and use these to thread the elastic through the channel. Make sure the elastic does not twist during this. Secure each end of the elastic to the designated part, not the trouser front. Sew these in place, remembering to backstitch to secure the stitching.
Next, finish off the waistband by topstitching the front flat part. Make sure this is neatly sewn as it will be slightly showing. The waistband is now complete.


Step 6 – Hem the Trousers
The final thing to do with the trousers is to hem the bottom of them. To do this, fold and press the raw edge up towards the inside by 1cm. Then re-fold this so that the raw edge is inside, by a further 1.5cm, pressing and pinning into place.
Head to the sewing machine and sew along near to the top folded edge of the hem to secure it in place. This will show on the outside of the trousers slightly, so make sure that it is neat stitching.

Finish with a final press of the whole garment and you have your very own handmade cropped wide-leg trousers!


Let me know what you think of these cropped wide-leg trousers in the comments below. Would you wear this style?
Cropped Wide-Leg Trousers | Video
Here is the video version of the process of making these cropped wide-leg trousers. If you enjoy the video, then don’t forget to give it a big thumbs up over there. If you want to keep up with more of my creative antics over on YouTube, then don’t forget to subscribe to my channel! It would be lovely to see you over there!
Cropped Wide-Leg Trousers | Share it!
If you have enjoyed this post, then don’t forget to share the love by hitting the various sharing buttons. Don’t forget to pin it and save it for later over on Pinterest too!
Also, get a FREE craft project planner when you sign up for email notifications for the blog! A great way to plan out your ideas to create a successful crafty project. I also won’t spam you with a tonne of emails, just a little notification of the newest posts going up on the blog, with the occasional extra with any big news.


I like these trousers so much. It is perfect for summer time. You are so talented.
http://www.exclusivebeautydiary.com
Glad you like them. Definitely perfect for summer.
Thanks for commenting 🙂
Aimsy xoxo
These look adorable on you! Thanks so much for the instructions.
Aww, thank you…love how they turned out! Hope the instructions are helpful!
Thanks for commenting 🙂
Aimsy xoxo
I love these wide leg trousers and they look amazing on you! Your fabric choice is one I would have chosen too! Thanks for sharing.
Aww, thank you, I’m glad you like them! The fabric is just so pretty, isn’t it?
Thanks for commenting 🙂
Aimsy xoxo
Wow you’re so clever! I love the pattern of these, I have a dress with a similar pattern. They look loveoy.
Corinne x
Aww, thank you! Oh, the fabric is just lovely, isn’t it? I have some left, so I am hoping I can squeeze a dress out of it!
Thanks for commenting 🙂
Aimsy xoxo
I love all the clothes you make!
Katie | katieemmabeauty.com
Aww thank you! I have a few more planned so stay tuned!
Thanks for commenting too 🙂
Aimsy xoxo
These are such fun pants on you! You did a great job making them, they look lovely and I really like that fabric!
Hope you had a great weekend! It was a busy one here! 🙂
Aww, thank you, glad you like them! The fabric is lovely, isn’t it? It’s nice and light for the warmer weather too!
Thanks for commenting 🙂
Hope you have a great weekend too. We finally have some sun here in the UK haha!
Aimsy xoxo
Love the wide leg trousers and big plus when you make it yourself! So much cheaper to make it at home most of the time too. Love that there are patterns for you to follow instead of having to guess. You look gorgeous with the trousers! Thanks for sharing this amazing experience 🙂
Nancy ✨ mdrnminimalists.com
Oh, wide-leg trousers are just so comfortable, but look stylish at the same time, don’t they?! I think you appreciate the clothing more when you have made them yourself, and a bonus that is tailor-made to fit your body.
Glad you like them!
Thanks for commenting 🙂
Aimsy xoxo
The print is cute, and the trousers look great on you! Well done!
xoxo
Lovely
http://www.mynameislovely.com
Aww thank you! I love the print, it is a perfect one for any season, isn’t it?
Thanks for commenting 🙂
Aimsy xoxo
Oh this is the perfect project for summer (if we ever see summer in the UK this year!). So cool and relatively easy to whip up too. I think Flora would like some of these, especially if she could choose her own pattern. Yours look great, Aimsy, thank you for the step by step!
I am keeping my fingers crossed this sun is going to stay around a bit! Yeah, these are really easy to whip up, and even quicker if you are not adding in the pockets. It will be a great skill for Flora to learn as well!
Hopefully, the step by step is easy enough to follow!
Thank you for commenting 🙂
Aimsy xoxo
These are so cute! x
Aww, thank you! Love how they turned out 🙂
Aimsy xoxo
This is so amazing! We have dress making way back in high school but I haven’t practice it since then… Well except for few stitching of loss buttons, garters, and wholes. But this is so great! I like the output pants it looks comfy.
Glad you like them! It is a really handy skill to have, and you can make so much from it!
Thanks for commenting 🙂
Aimsy xoxo
OMG, Aimsy!! These look so lovely and comfy. I would definitely love wearing these at like the park on a picnic! I’m slowly getting into sewing again so I’m excited to try some projects! Thanks for sharing xx
Lynn | https://www.lynnmumbingmejia.com
Oh, they are so comfy! Yes, they would be perfect for a walk or picnic. There are so many talented sewists out there, and so many great independent sewing patterns at the moment. Have fun getting back into sewing!
Aimsy xoxo
These came out great! I always admire people that can sew, I can so not do this lol. I am not very crafty I stick to computers but I am good at cooking and baking.
Allie of
http://www.allienyc.com
I am so happy with how they turned out. Oh, it gets easier once you get into it! I bet you make lovely meals and bakes!
Thanks for commenting 🙂
Aimsy xoxo
This is such a beautiful trouser…you are so talented dear 🙂
Beauty and Fashion/Rampdiary/Glamansion
Aww thank you! Glad you like them 🙂
Aimsy xoxo
You are really talented and the trousers look great. Perfect for the Spring and Summer weather. Thank you for sharing how to make them.
Lauren
Thank you! They turned out so good, didn’t they? Definitely great for in-between seasons.
Glad you liked them!
Aimsy xoxo
Alright, these are not only beautiful, but also what I have been wanting to get for summer!! I might have to try to make them myself…even if I have never ever attempted anything like this!
Aww, thank you! Sometimes what you want just aren’t in the stores, are they, so it’s great to be able to make your own. That’s the reason I got into sewing anyway because I couldn’t find what I wanted. Glad you liked them, I am sure you will be able to make them really easily. Not adding the pockets make them much easier to sew too!
Thanks for commenting 🙂
Aimsy xoxo
These are great!
I’d love to see them in linen.
http://a-woman-of-a-certain-age.com/2016/05/the-luxury-of-linen/
Aww, glad you like them. They would be great in Linen…maybe my next project!
Thanks for commenting 🙂
Aimsy xoxo