

I have another sewing project to share with you today. Today, I will show you how to make pyjamas using the Tilly and the Button’s ‘Juno’ pyjamas.
As I now truly have the sewing bug, I have another project to share with you today. This one is another easy clothing sewing project where I show you how to make your own pyjamas using the ‘Juno’ sewing pattern by Tilly and the buttons. This pattern is really adaptable and even has a shorts version for the bottoms. I have upcycled a dress to make PJ shorts before, using existing shorts to do so. So, if you don’t have this sewing pattern, be sure to check that post out, if you are looking to make pyjama shorts (or any shorts). However, I will show you the make using the Juno pattern today.

How to Make Pyjamas
As I have said, I am using the Tilly and the Button’s ‘Juno’ pyjama pattern for today’s make. This can be found in the third book by Tilly…“Make it Simple”* (*affiliate link), which is another fabulous book to get you sewing. The idea behind it is to make the sewing projects simple and completed quickly. I love these patterns for their simplicity, and getting a wearable make at the end, so I would highly recommend investing in Tilly’s books. Not sponsored in any way, I just love the patterns.
I have previously made more leisurewear with Tilly’s books for ‘Stella’ Joggers and ‘Stella Hoodie’ if you are looking for more clothing sewing inspiration.
To make the full set of Juno pyjamas, you also need to use the ‘Tabitha’ T-shirt pattern in the same book. I have made some alterations to the pattern and made the basic t-shirt design, rather than the long sleeves with cuffs version. I have also not added the cuffs to the pyjama bottoms, which I can explain later in the post. This means that my pyjamas are an ankle grazer style. Perfect for the transition of Spring into Summer for nightwear. As I have said above too, I also have made the shorts version of the bottoms which will be perfect for those warmer nights in summer.

So without further ado, let’s see how to make pyjamas!
How to Make Pyjamas – Fabric Choice
As pyjamas are comfy pieces of clothing, we need to use fabric that is of that description. Hello, knit / stretch! Now, don’t be afraid of using knit (jersey) material, as although it does have stretch to it, it is relatively easy to sew. Not as easy as cotton, admittedly, but definitely not as scary as it sounds.
For these pyjamas, I have used the following fabric:
Peach colour cactus print jersey for the bottoms and shorts, which has a lovely stretch to it. I bought this from Pound Fabrics, however, this one is currently sold out, and isn’t on the website anymore. However, I have been able to find it on another site. Stock is limited but you may still be able to get this fabulous material from Slipstitch. I’ve also seen the mint green version over on eBay too!
For the t-shirt, I headed to one of my favourite online fabric stores Flamingo Fabrics. This is a lovely pistachio green jersey t-shirt fabric that compliments the cacti print beautifully. Unfortunately, I cannot find the one I used on the website, so have linked it to a light mint green jersey instead.
The final material for the pyjamas is the ribbing of the cuffs. I bought mine on Amazon* (*affiliate link), and let’s just say that the quality of this is not the best. The ribbing is scratchy and just low quality. Also, the width isn’t wide enough for the actual pattern piece, so had to be adjusted. Therefore I have left the cuffs out of this project, but have still linked the ribbing if you do want to check it out. You can see the video version for more information on making the cuffs, or check out the ‘Stella’ Joggers for adding in the cuffs to these pyjamas.

Making the Pyjamas Bottoms & Shorts
So first up, we are going to make the pyjama bottoms and shorts. I like to trace my patterns onto sewing tracing paper. That way I can keep the original and make them in other sizes if needed. For the pyjama bottoms, I am making them in a size 4, which means they are not too tight on the legs. We are looking for comfort with them after all!
For the shorts, the pattern piece needs to be altered. So, trace the pattern of the bottoms but shorter. When it comes to the inside leg part, the length of the shorts will be determined here. I followed the instructions in the book and kept them the same length, which is 9cm down from the inside leg/crotch point. This allows includes the seam allowance of the hem of the shorts also. Once you have the 9cm measured down, you then draw a line from this to the outside edge to give the length line of the shorts. Alternatively, you could use an old pair of your shorts folded in half and trace this, adding an extra cm or two for seam allowance. Repeating the same for the back of the shorts. More information on this can be found in my thrift flip of turning a dress into pyjama shorts post.
Once all the pattern pieces are ready, it is time to pin and cut them out of the chosen material. In this case, it is the cactus print fabric. I also traced the neckband pattern piece of the ‘Tabitha’ t-shirt in this material too, so that I could have a contrasting neckband for the t-shirt. It also makes the pyjamas into a set too!

Sewing the bottoms together
Once everything is cut out, it is time to begin sewing them together. You should have two pieces for each leg piece, so two fronts and two backs. Match these up to each corresponding leg, placing the front piece down onto the back pieces with right sides together. Pin along the outer leg and inner leg, ignoring the turn up for the crotch.
Head to the sewing machine and using a zig-zag stitch or stretch stitch if your machine has it, sew the two seams together. Remembering to backstitch the start and end of each seam. Repeat this process if you are making the shorts too.

Then, you should have two leg pieces taking shape. Turn one of these right-sides out, leaving the other inside out. Place the right-side-out pieces inside the inside out pieces, so that the right sides of the fabric are meeting. Line up the side seams, and notches indicated across the crotch seam. It will look like a large curve. Sew on the sewing machine, doing the second row of stitching close to the middle of the crotch area for extra strength on the seam.


Then the pyjama bottoms are really taking shape. Repeat the process above if making the short version. If you are making both, I would advise batch sewing the same parts as it makes it much easier and quicker. Also after sewing each seam, press with an iron to set in the stitches. It is amazing how pressing as you go gives the garment a more professional look.
Sewing the Waistband
Firstly, we need the measurement of the elastic. Use a tape measure to measure your waist, and then bring the tape measure down slightly lower than the natural waist. Take that measurement and deduct 10% of the measurement. This allows for the stretch in the elastic. Then add on an extra 15mm for seam allowance when connecting the elastic.
Connect the two raw edges of the elastic so that it is circular. Then fold it in half where this seam is, placing a pin to make the centre of the elastic. Fold again in half, and place pins in the two-quarters parts that will now be there (if that makes sense.) This gives you the four pints to line the elastic up with the pyjama bottoms.

Place the elastic onto the waist area of the pyjama bottoms and/or shorts. Place the connected part of the elastic on the back seam of the bottoms, with the front pin meeting the front seam. Then the two-quarter pins should line up with the two side seams on either side. Add more pins, securing the elastic to the pyjama bottoms. You may need to stretch the elastic slightly to get everything in place. Then sew along the edge with a zig-zag stitch to connect the elastic to the fabric.

Next, fold over the material so that the elastic is encased. Make sure the elastic is pushed up flush with the fold in the fabric, but not curling over. Then sew another seam along the raw edge of the fabric (along the previous stitch line). I also added in a label so I know it is a ‘me-made outfit (not that i would forget) along this part too. Then the waistband for the pyjama bottoms is finished.

Sewing Cuffs or Hem
The final part is to either add the cuffs, as in the book or just straight hem them. I decided to hem the pyjama bottoms as well as the shorts. I think I folded the bottom edges 1 cm, then run a zig-zag stitch along this edge. Press with an iron to set the stitches and sharpen the folded edge. Then the pyjama bottoms and/or shorts are complete!


Making the Pyjama Top
For the top, I am using the ‘Tabitha’ T-shirt pattern from the book, keeping the sleeves at the shortest. Then the pyjamas are more appropriate for the spring/summer season as they should be cool enough as a t-shirt.
Again, I traced the pattern out, this time in a size 3. The size 3 makes it a bit more fitting, but with room to move about comfortably.
For the t-shirt, I used the plain pistachio green jersey, with the contrasting neckband in the cactus print fabric.
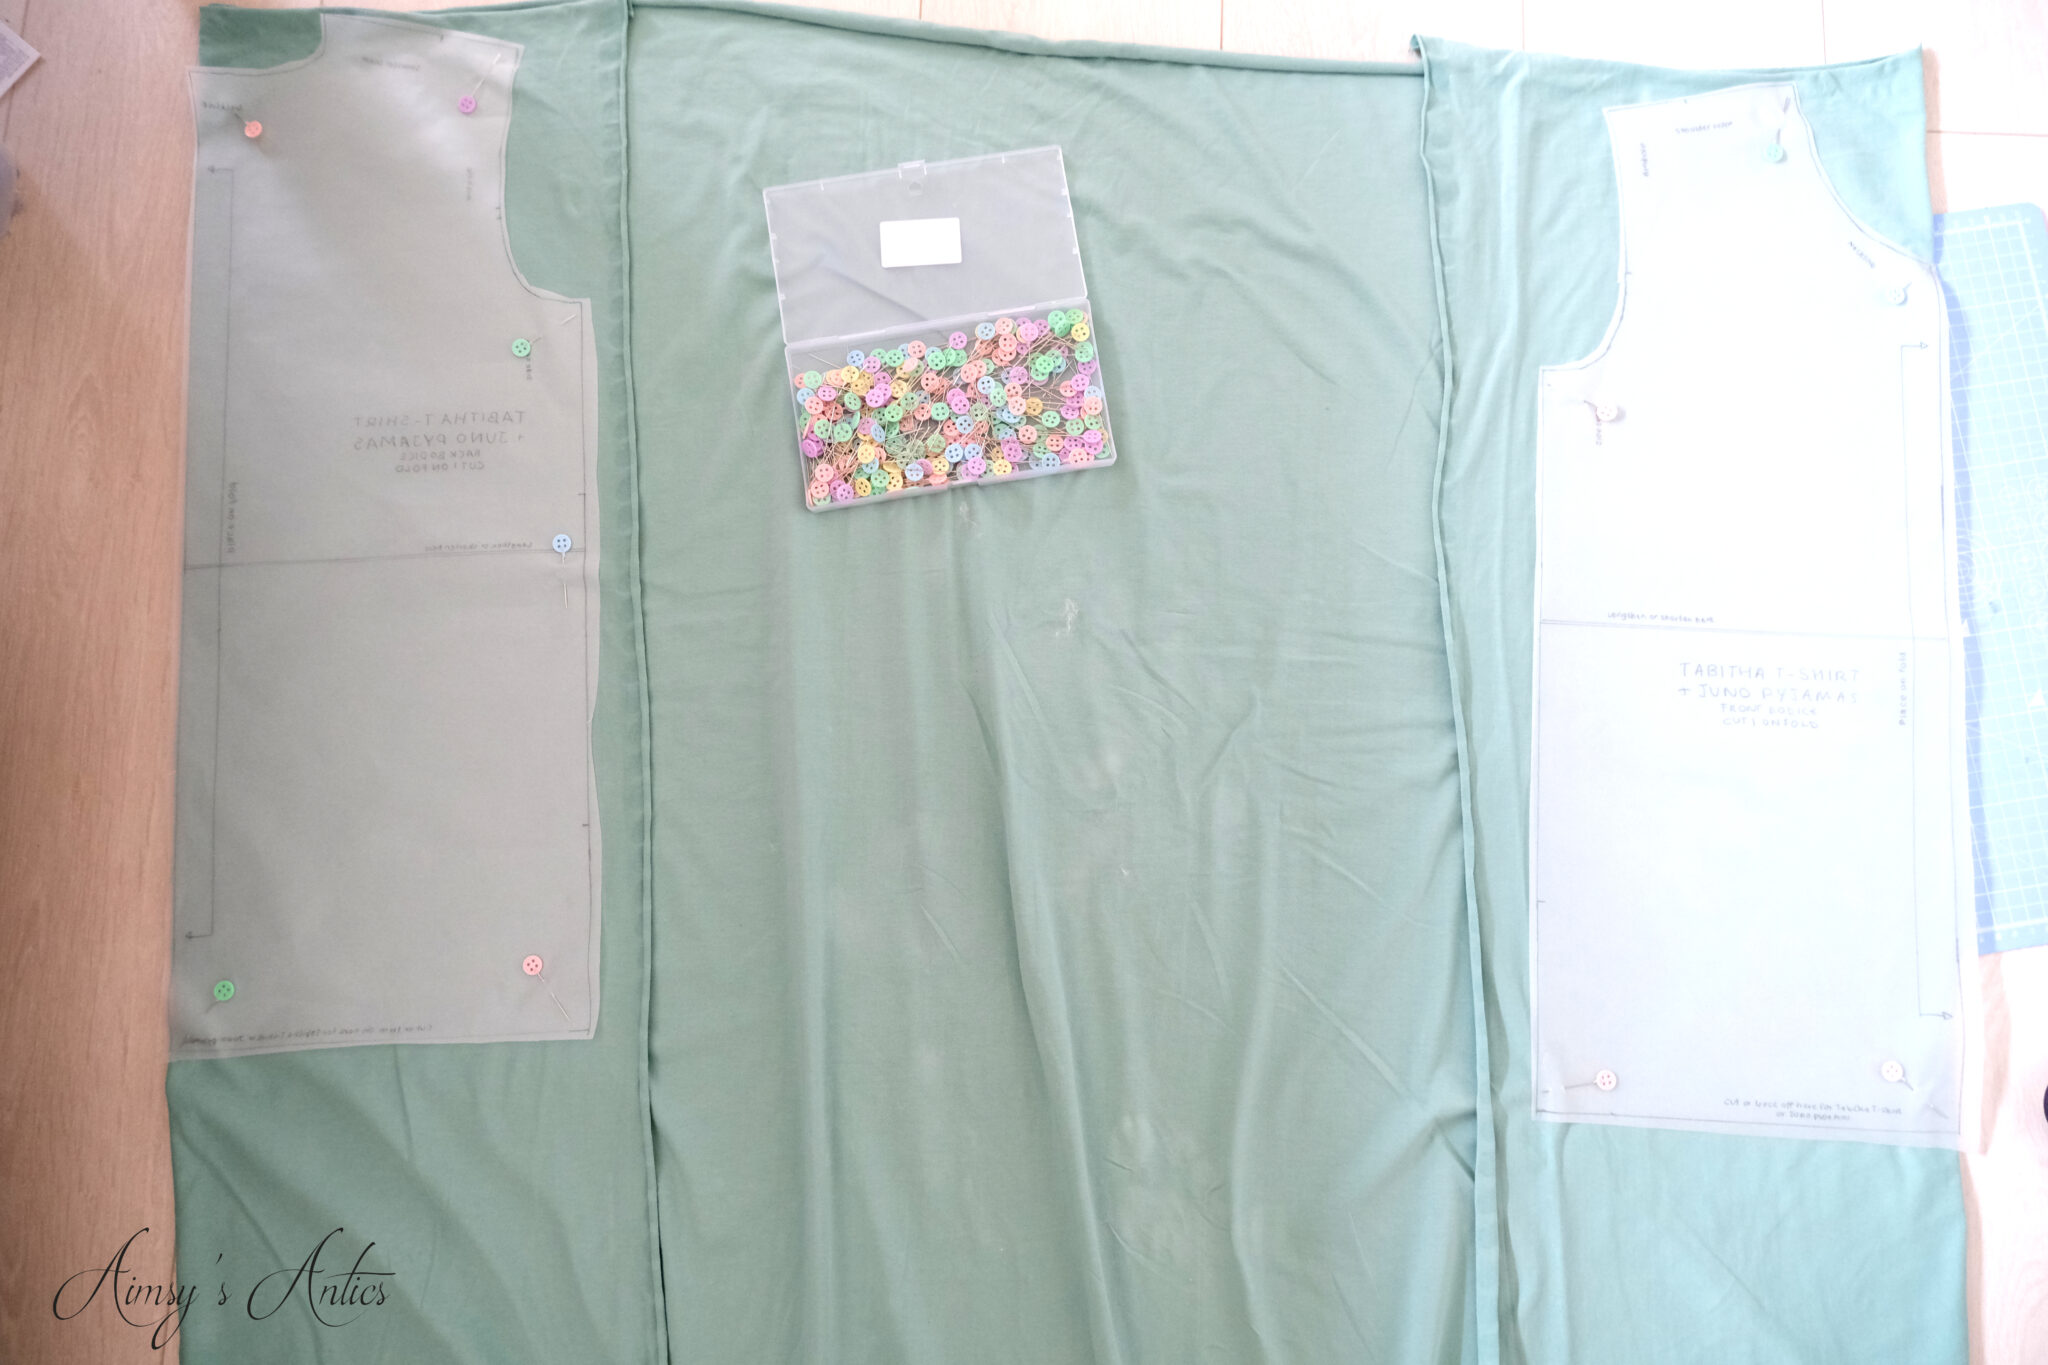
Cutting out the t-shirt is a little bit different, as you need to place both front and back bodices onto the fold. The book recommends folding the material so that the two selvedge edges are in the middle. The pattern pieces can then be pinned onto the two folds.

Before any sewing can commence, place a slim strip of iron-on knit interfacing along the shoulder on the back bodice. This will help stabilise the should seams, stopping them from stretching out when sewing. Then place the front bodice on top of the back bodice, right sides together, lining up the shoulder seams. Place in pins to keep in place, then sew the seams on the sewing machine. Remember to backstitch at the start and end of each seam. Press the shoulder seams to set the seam.

Sew the Neckband
This next part is probably the trickiest out of the whole project.
Take the neckband piece and place the two raw ends together, right sides together. Then, connect with a small seam, backstitching the start and end. Use the iron to then press this seam open as it will reduce the bulk in the neckband. Whilst the iron is still out, fold the neckband in half lengthways, wrong sides together. Press into place so the fold holds its shape.


Like with the waistband elastic, fold the neckband in half from the sewn seam. Place a pin in this, as this will be the centre front mark. The seam of the neckband will also line up with the centre back part of the bodice. Mark the front centre and back centre of the t-shirt bodice. Fold the t-shirt in half so the to shoulder seams come together in the middle. Then see where the material folds on either side, placing a pin in the centre point.
Match up the corresponding points of the neckband and t-shirt bodice, and ease the neckband into place all around the neck opening of the bodice. This should be pinned so the raw edges are meeting, with the neckband piece being on the right side of the bodice.
Then head to the sewing machine and sew it all into place. Be careful not to stretch the neckband too much, as this will cause it to misshape. Press with an iron. If it looks like the neckband has stretched, go over it with an iron, it may just need pressing into place.
Finish off the neckband with a topstitch. This will help the neckband sit flat, as well as add a bit of decoration to the t-shirt.


Add in sleeves & Sew Side Seams
Like the DIY hoodie, the sleeves are added in raglan style. This means they are sewn in flat and is an easy way to add in sleeves. Match the notches of the sleeves with the notches along the armhole part of the bodice. The sleeves have a slight curve, so the fabric has to be manipulated a bit to get them to sit right.
Sew along these until both sleeves are attached to the bodice. Press the seams to set the sleeves in.

Once the sleeves are in, side seams can be sewn. Pin the side seams up the sides, as well the underneath part of the sleeves. You can add in your own label as well on one side of the side seams before sewing if you like. Then, sew the two seams together. The pyjama t-shirt is more or less complete!

Sew Hem
The final thing to do is sew the hem along the bottom of the t-shirt and the sleeves. Fold the edge of the t-shirt up to the underside of the t-shirt about 3 cms. This is going to be a deeper hem. Then sew along the raw edge on the inside to secure it. The stitching will show on the front side of the t-shirt so make sure it is neatly sewn! The hem of the sleeves is a 1 cm hem.
Press with an iron to neaten the hems, and set in the stitches.
The t-shirt part of the pyjamas is then complete. I added a heat transfer vinyl decal to my t-shirt to fully finish it. I will show you how to create and add this in another post.
That is how to make pyjamas using the ‘Juno’ pyjama pattern by Tilly and the Buttons!


What do you think of this sewing project? Have you made these pyjamas before, or your own style of pyjamas? Let me know in the comments below!
If you want to know how to make an eye/sleep mask, then try out this Breakfast at Tiffany’s sleep mask.
How to Make Pyjamas – Video
Check out the video version of this post here. The video may offer a different view of how to sew thse pyjamas together, as well as detail making the cuffs for the pyjamas. Don’tforget to like the video if you have enjoyed it, as well as subscribing to my YouTube channel!
Pin it!
If you enjoyed this post, why not share the love and pin it for later? Check out my Pinterest for more creative inspiration too!


These are the cutest pjs ever, you’re so talented! I would love to get my hands on a sewing machine so I can do things like this x
Aww thanks! I knew when I saw the material that I had to buy them and thought they would be perfect for pyjamas!
Learning to sew opens up so much, I would highly recommend…tailored clothing to suit your body and style…winner!
Thanks for commenting 🙂
Aimsy xoxo
Oooh you did such an amazing job! You really inspire me to sew more!
Love, Amie ❤
The Curvaceous Vegan
Thanks Amie! Glad you like them, simple but effective and ever so comfy! Glad it has inspired you to sew more…its amazing what you can create from a piece of fabric, isn’t it?!
Thanks for commenting 🙂
Aimsy xoxo
These pyjamas are so cute Aimsy! I love the style and pattern and they look great on you! Well done!
Glad you like them! I am so happy with how they turned out and glad I made them ankle grazers instead of the cuff.
The fabric is just the best, isn’t it?!
Thanks for commenting 🙂
Aimsy xoxo
All the DIY projects you make are going straight on my list! As soon as I have more space i really want to get into sewing, even if jersey sounds a bit scary to try at the beginning! The whole set looks amazing, thank you for sharing x
Glad you like them and they inspire you to have a go. You will not look back once your start sewing…the possibilities of what you can make are endless! I love how they turned out, and my fear of jersey has gone. this material was really easy to sew!
Thanks for commenting 🙂
Aimsy xoxo
I’m not going to lie, I clicked on this post thinking the PJs you were wearing were from New Look or Topshop or something and they were going to be your inspo. But OMG amazing that you made these yourself!
Katie | katieemmabeauty.com
Ah glad they look shop-bought, that is a big compliment for home sewing!! I can imagine New Look or Topshop selling this type of print though…hopefully, I can get my hands on some more!
Thank you so much for commenting and glad you liked it!
Aimsy xoxo
WOW – this is so impressive! I love the style and pattern of fabric you chose – the end result looks amazing! Thank you for sharing how to do this with such helpful step by step instructions!
Thank you, glad you like them! The fabric is just amazing, isn’t it? They had it in a mint colour but that was sold out…keeping my eye out to see if it comes back into stock! Hope it inspired you to get sewing!
thanks for commenting 🙂
Aimsy xoxo
Wow looks so cute, never thought of making my own pyjama though..
Glad you like them and thank you! They were so easy to make, would definitely recommend having a go!
Thanks for commenting 🙂
Aimsy xoxo
This looks like such a fun thing to make and I love the fabric you’ve chosen. Growing up, my mum used to make me cute pyjamas. I’d love to give it a go myself.
Glad you like them. I love the fabric, it is just so cute! Aww, I bet she made some fab pyjamas!
Happy sewing would love to see your creations if you do!
Aimsy xoxo
These are so cute! I love the pattern and would love to have a go. Fab post!
Tash – A Girl with a View
Thank you, and glad you like them! The cacti are just cute, aren’t they?
Happy sewing if you do have a go!
Thanks for commenting 🙂
Aimsy xoxo
These came out so well! I love the pattern that you used for your pyjamas!
Molly xx
https://volumesofbeauty.com
Glad you like them, the cactus print is fab, isn’t it?!
Thanks for commenting 🙂
Aimsy xoxo
Brilliant work! The pj’s look great. Cute prints and color!
xoxo
Lovely
http://www.mynameislovely.com
Thank you, glad you like them! Love the print…need to find a similar one with other items on like avocado or something now haha!
Thanks for commenting 🙂
Aimsy xoxo
Thats a great idea to creating pajama. Love it so much!
Love,
Diana, | Guide to wear Minimalist Jewellery
Glad you like it. It is so rewarding making your own clothing. You definitely appreciate them more!
Thanks for commenting 🙂
Aimsy xoxo
If I say I can’t believe these are home made I hope you know I mean that as a compliment, Aimsy! Wow, they look so professional. I don’t think I could manage the elastic and the cuffs but they are gorgeous. The shorts and top will be just perfect for summer (assuming we do get one this year). Lovely, thank you for sharing your gorgeous new lounge/sleep wear! x
I take it wholeheartedly as a compliment, so thank you! If it looks shop-bought (in a good way), then it is definitely a compliment haha!
Glad you like them, the elastic is fairly easy to put in. Much easier than I was expecting it to be anyway.
I can’t wait to be able to wear the shorts when it’s warm enough…may have to make some form of matching tank top for summer!
Thanks for your lovely comment 🙂
Aimsy xoxo
These turned out so fabulous! I honestly would’ve thought they were shop bought! xx
Glad you like them! They turned out so much better than I expected them too.
Thanks for commenting 🙂
Aimsy xoxo
Oh amazing tips thank you! And I adore the PJ´s cause I loooooove cactuses 🙂
have a great day,
Tiziana
http://www.tizianaolbrich.de
Hope you found it useful, and glad you like the PJs! Cactus print is just fab, isn’t it?
Thanks for commenting 🙂
Aimsy xoxo
Aw! I love the print you chose!! They are so cute! Thanks for sharing love xx
Lynn | https://www.lynnmumbingmejia.com
The cactus print is amazing, isn’t it? They are so comfortable to wear too!
Glad you like and thanks for commenting 🙂
Aimsy xoxo
How cute! Love me some good PJ sets
Glad you like them. Love how they turned out!
Thanks for commenting 🙂
Aimsy xoxo
These are so cute!! I have pjs like this myself, but it’s amazing to see I could make it myself. Flamingo Fabrics have so many cute fabrics so I think I’m going to have to make a pair of these myself. You’re so talented!
Em x
Glad you like them Em! Oh, Flamingo fabrics are amazing for cute prints…also try Pound fabrics and Minerva as they have great supplies too.
Have fun making your own, you will love wearing them!
Thanks for commenting 🙂
Aimsy xoxo
They look so cute!
Danielle | thereluctantblogger.co.uk
Glad you like them…turned out so cute!
Aimsy xoxo
This is so cute! I would love to make my own pyjamas one day. You are so talented! x
Julia x
Last Post: Five Ways To Celebrate Spring
Glad you like them! They are so easy to make once you get started, hope you get to make your own!
Thanks for commenting 🙂
Aimsy xoxo
These pajamas are so cute & I love the cacti print! You did an amazing job!!!
Aww, thank you! I know the cactus print is just fabulous, isn’t it? On the lookout for more unique prints like this now!
Thanks for commenting 🙂
Aimsy xoxo