

I am back with another crafting session and one that is perfect for those quiet rainy days. Today I am going to show you the process of creating mosaic art with a lemon mosaic design craft kit.
You may remember I showcased five craft kits from Etsy that you have to try out. Well, today’s post is doing just that using the mosaic craft kit, creating mosaic art to display. Using a craft kit with a specified design is a great way to try out this art form. The kit comes with everything you need to create a wonderful masterpiece, cutting down the cost. The best bit, if you find the craft isn’t for you, then you haven’t wasted your money on all of the tools and items needed.

What is Mosaic Art?
Mosaic art is the process of piecing various pieces of tile or glass together to create a design. These designs can be as intricate or as simple as you like. The tiles or glass can also be of all different shapes and sizes to create some truly creative designs.
In essence, the pieces are stuck to a backing, with grout then being used to finish off the piece neatly and concealing the open edges of the tiles.

Creating Mosaic Art
To create the beautiful lemon mosaic design I am using the craft kit by Montet Designs. This kit came in at £28.75 including delivery. It comes complete with more than enough tiles to create the design, including both vitreous iridescent tiles and sea glass. It also has the backing board, glue, grout and spreader to complete the mosaic.
In addition to the craft kit, I also purchased a set of tile cutters* to trim down the small tiles. These cutters or nippers are great and cut the tiles like they were butter. I would highly recommend this set.
*This is an affiliate link.

So now that we have the craft kit and additional items, let’s get creating mosaic art!
Step 1 – Transfer the Design
The first thing to do is transfer the lemon design onto the backing board. There are a few ways to do this. The craft kit states to cut the design out and then draw around the outline of this. I decided to complete it a different way, and one that I used when creating this Christmas Advent Sign. The process transfers the design using lead from a pencil.
Turn the paper design over so that the back is facing upwards. Then use a pencil and shade all around the outline of the lemon, making sure it is a decent layer of the pencil. Turn the design over and position the paper onto the board where you want the lemon design to be. Then, ideally using a pen (but you can use a pencil) begin to apply pressure and draw along the printed outline. This should then transfer the pencil on the back onto the board leaving the design. I had to trace over the design just to darken it a bit more.


Step 2 – Create the Lemon Design
The first step is to create the lemon part of the design, which is where the yellow tiles come in. Start by cutting the squares down into different shapes. The craft kit advises cutting the 2cm tiles into three parts, ensuring that the pieces are not too small. If the tiles are too small, there is a risk that they will not adhere properly to the baseboard. I would also advise cutting these as you go, as I now have lots of left-over pieces of the cut tiles.

Then, grab the PVA glue and place some onto the baseboard where the lemon of the design is. Start by placing cut pieces of the mosaic tiles around the edge of the lemon design. Follow this by filling in the middle of the lemon. You want the glue layer to be thick, but not overly thick. This way it ensures the glue gets up into the tile ridges of the back of the tile, adhering and securing them in place. Whilst the glue dries the tiles can move, so be careful when placing other pieces down.


Next, it is time to complete the lemon following the same process but with the green sea glass. These come in already cut down shapes, however, you can use the nippers to trim them more. These do not have the ridges like the tiles but do secure down well enough. My top tip for this is to place on the glass first in the design you want, then begin adding the glue and adhering as you go.

Step 3 – Complete the Mosaic Design
Once the lemon part is complete it is time to complete the remainder of the mosaic art. This part calls for the white iridescent tile pieces. Again trim these down, cutting each tile into three pieces at the most. I created various shapes or squares, rectangles and triangles.
Place more PVA glue down onto the baseboard and starting from one corner, begin adhering the mosaic pieces to the baseboard. You may have to play around with the shapes and sizes of the mosaic pieces to fit them together around the lemon part. You also want to make sure that there is a slight gap left between each mosaic piece. This means you can then have the grout fill these in, giving them the classic mosaic look. Keep going until the whole of the mosaic is complete.

Let the glue dry before moving onto the next stage. I left mine to dry for approx. 24 hours. You don’t want to begin grouting if the glue is still drying as the mosaic pieces can become unstuck and fall off.

Step 4 – Add on Grout
Now it is time to add on the grout. The glue is completely dry and all of the mosaic pieces adhered to the wood. If you find that any pieces have fallen off, repeat adding on the glue and allow it to dry. Fingers crossed any loose pieces should now be fully stuck.
Then you want to mix the grout. The kit advises using approx. half of the bag of grout and gradually add in water a teaspoon at a time. Continue mixing the grout, adding water as you go to create a paste. The consistency should appear like toothpaste, not too dry and not too wet.

Use the glue spreader to place on the grout, pushing this into the gaps between the tiles. Keep working until all of the gaps are filled and grout is covering the mosaic design. Ideally, try to scrape most of the grout from the tiles, but don’t worry if you can’t do this. Leave to begin to harden for around 30 minutes.
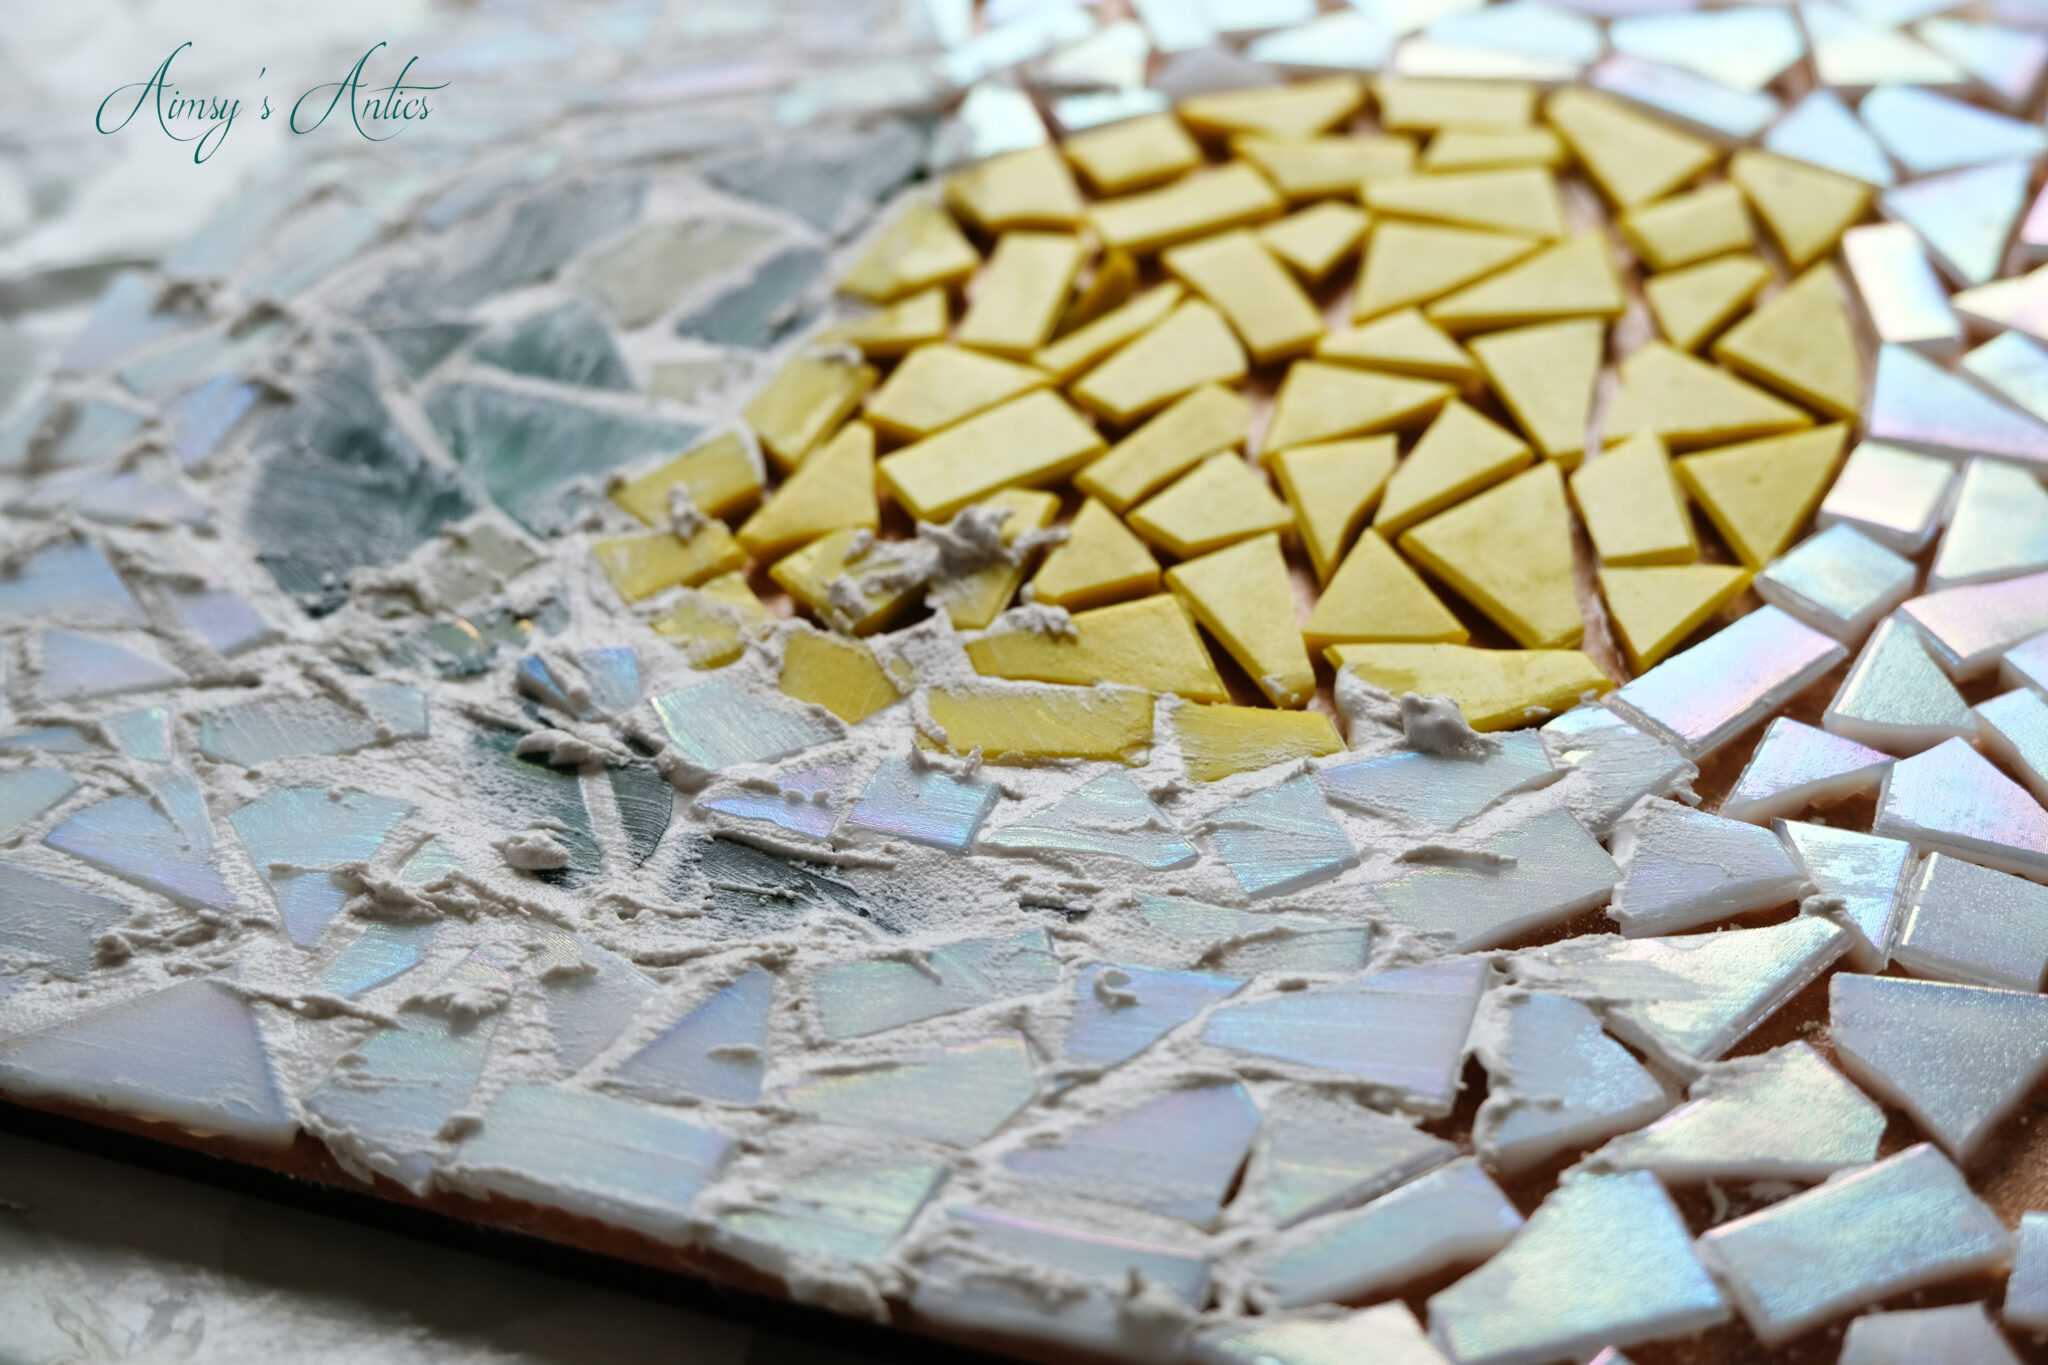
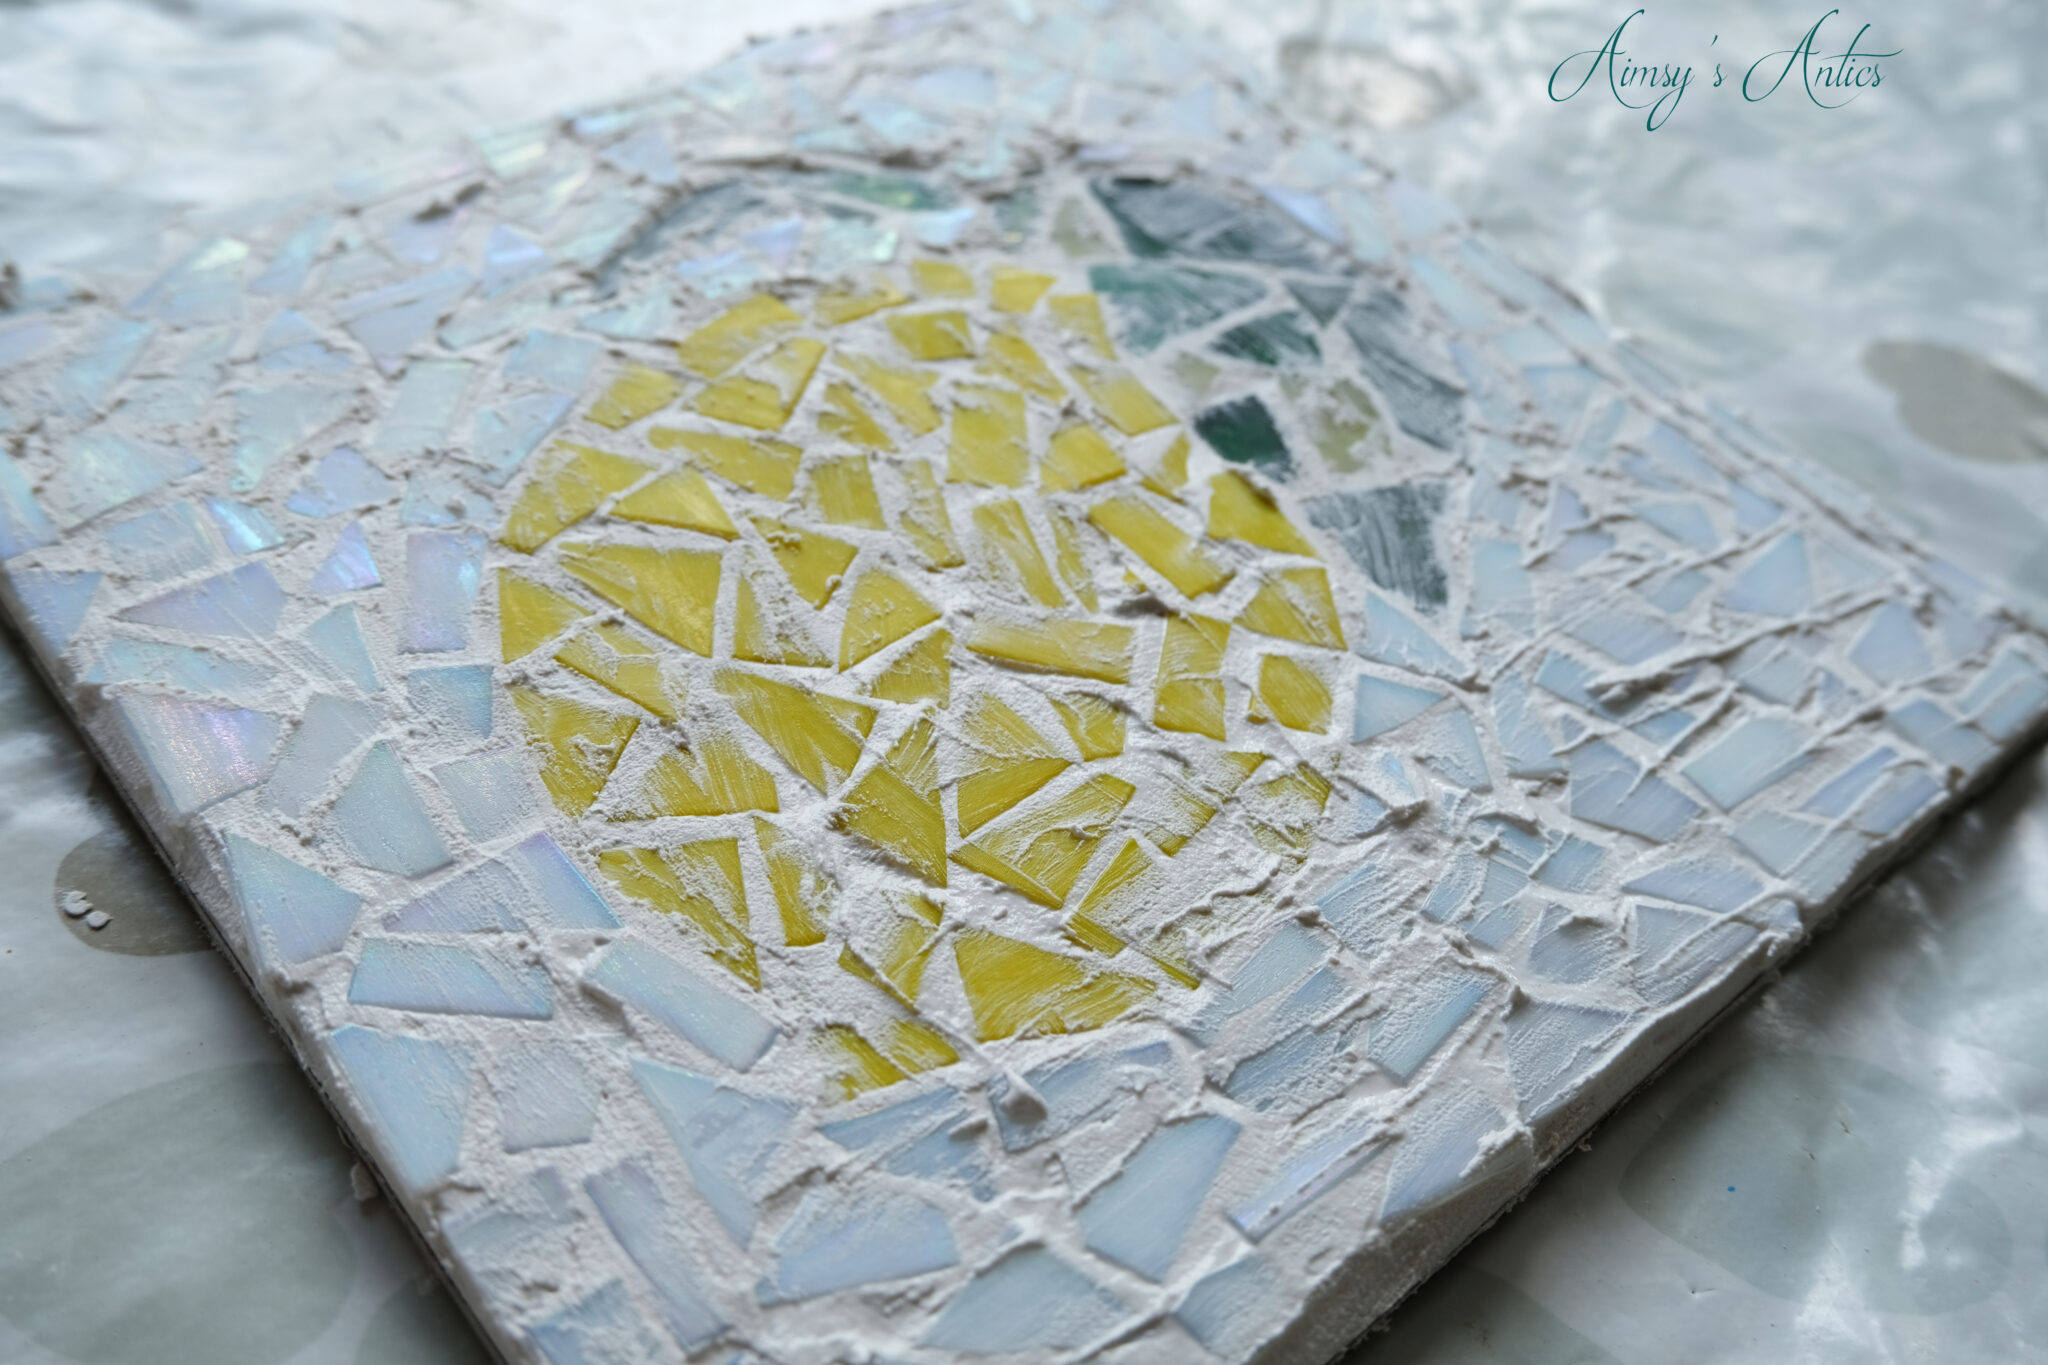
After 30 minutes use a damp cloth (I used an old piece of a tablecloth) and begin wiping away the excess grout on the tiles. Keep going into the grout is removed from the times. Allow the grout to dry and harden. Once dry, run back over the mosaic design with a dry cloth and buff the tiles. Some of the grout left a powdery residue on the tiles, so I just used a baby wipe to remove this. The tiles shined up a treat.


Then the lemon mosaic art is complete and that is the process of creating mosaic art.


What do you think of this craft kit and the creating of mosaic art? Is this a craft that you would like to try? Let me know in the comments below!
Creating Mosaic Art – Video
Here is the video version of this post of creating this wonderful piece of mosaic art. Don’t forget to like the video if you have enjoyed it, and why not subscribe to my channel to keep up with all of my creative and crafty antics on YouTube.
Share it!
If you have enjoyed this post, then why not share the love by sharing it or pinning it? You can also check out my Pinterest for more creative inspiration!
Have a creative project in mind, but don’t know how to plan it? I have you covered with a FREE creative project planner when you sign up to my email list. Grab yours now!


Fab write up!! I’m really pleased you enjoyed my kit
Thank you so much for the wonderful kit. I absolutely loved making it and how it turned out. Think I might be addicted to mosaic creating now!
Thanks for commenting too 🙂
Aimsy xoxo
This is so beautiful. A great DIY craft that you can display or even give as a gift. Thank you for sharing how you made this.
Lauren – bournemouthgirl
Aww thank you, it turned out so much better than I thought it would (with my lack of mosaic creating skills). Yeah, it would make a great gift, even if given as the kit for them to create.
Thanks for commenting 🙂
Aimsy xoxo
Oh wow!!!!!! I love this lemon mosaic design! It is soooooo cool!!!!!!!! Thank you for sharing.
Glad you like it! It is so shimmery in the light!
Thanks for commenting 🙂
Aimsy xoxo
WOW!! You are so talented and this mosaic is absolutely beautiful! I will need to check out Montet Designs!
Sarah | http://www.aspoonfulofvanilla.co.uk
Oh, she has some beautiful kits…there is a watermelon one that I have my eye on! This is my first-time mosaic creating, so using a kit was a great way to test it out…and get addicted to it! Would highly recommend Montet Designs!
Aimsy xoxo
This looks like fun! 🙂
Oh, so much fun to create. You have to be patient though, as it takes a few days with all the drying of the glue/grout needed!
Thanks for commenting 🙂
Aimsy xoxo
Love this! I haven’t actually tried out mosaic art before but this looks like such a cool idea and I’d love to try it someday! Will definitely have to look into it, haha. Thanks for sharing x
I am so glad you like it! Once you start, you want to keep making mosaic creations! It is so therapeutic to cut the tiles and stick them on, as well as wiping over the grout. I would highly recommend it, although you do have to be patient with all the drying times!
Thanks for commenting 🙂
Aimsy xoxo
I made quite a bit of mosaic art during my foundation year in college so this was such a fun piece to read! I love the piece that you created 🙂
https://www.femaleoriginal.com
Oh, there is something so therapeutic making mosaic isn’t there? I bet you had great fun doing it in college.
Glad you like the post and thank you for commenting!
Aimsy xoxo
Mosaic art reminds me so much of primary school as I remember helping to make a big mosaic for outside our primary school and I loved it! x
Lucy | http://www.lucymary.co.uk
Oh, it is such a great craft for any age, isn’t it?! So much fun to create!
Thanks for commenting 🙂
Aimsy xoxo
this is stunning! I was actually waiting to see the results of the kits after reading the post and it came out amazing! Pinning this for later so I can show my parents to make one together x
Glad you like it! I was looking forward to this one, as I saw how good it could look and hopefully I have done it justice. Would highly recommend this craft kit…would be perfect as a gift!
Thanks for commenting 🙂
Aimsy xoxo
That is ever so lovely!
Danielle | thereluctantblogger.co.uk
Thank you! I am glad you like it 🙂
Aimsy xoxo
Oh this is beautiful! I really like the pattern and the lemon stands right out, its gorgeous. I would love to do this but with a strawberry instead of a lemon. Thank you for sharing.
Aww, thank you. The light just captures it all beautifully giving off different shades of the opal. Ooo a strawberry one would be so good!
Thanks for commenting 🙂
Aimsy xoxo
I think mosaics are gorgeous and I love that this kit is easy to make and looks great. I think the outcome looks really good and there are lots of design possibilities with this! Thank you for sharing 🙂 Em x
The only problem with mosaic is that once you start, you want to mosaic everything haha! I love the creativeness of it too, the possibilities are endless with a blank canvas!
Thanks for commenting and glad you like it!
Aimsy xoxo